

I stood in my sunny living room, squinting at a quick fix that now looked like a neon sign of failure. I had just finished laying a stunning dark walnut floor, but one tiny gap near the transition kept staring at me. I did what any eager DIYer would do: I grabbed a tub of medium walnut filler and went to town. Big mistake. Huge. Instead of disappearing, that gap turned into a chalky, flat streak that did not catch the light the way the rest of the floor did. It looked like I had stuck a piece of chewing gum in the crack and tried to paint over it. It was my first real lesson in the harsh reality of pre-finished boards and how they play by a completely different set of rules compared to raw wood. Today, I am going to show you how to avoid that blotch of shame and keep your floors looking like they were installed by a pro.
Why Store-Bought Putty and Factory Finishes Do Not Mix
The problem is that pre-finished hardwood is not just wood—it is a precision-engineered product with a high-tech armor. When you are working through your expert flooring installation tips, it is easy to forget that the surface you are touching was finished in a vacuum-sealed factory, not in your dusty garage. These floors often feature an aluminum oxide finish, which is incredibly durable but also notoriously difficult to bond with. If you try to use standard filler, it often fails to adhere or, worse, creates a hazy halo around the repair that you can never quite wipe away. This is high on the list of flooring installation mistakes to avoid if you want your home to look like a showroom rather than a construction site. Most off-the-shelf fillers are water-based and designed to be sanded down and stained over, which is impossible to do on a floor that is already sealed and finished.
Is a visible gap actually better than a bad patch job?
It sounds counterintuitive, does it not? Our instinct is to close every hole. But here is the kicker: wood moves. According to the National Wood Flooring Association (NWFA), wood is hygroscopic, meaning it constantly gains and loses moisture based on its environment. Standard wood filler is rigid. When your floor expands in the summer, it squeezes that filler out like toothpaste. When it shrinks in the winter, the filler cracks and falls out. You are left with a mess that is harder to clean than the original gap was to ignore. I learned the hard way that knowing how to match wood grain is not just about color; it is about understanding the physics of the planks and the way light reflects off the factory coating. Before you reach for that plastic tub, you need a strategy that accounts for the finish and the movement. Have you ever tried to improve a small floor flaw only to make it the only thing you see when you walk into the room? Let me know in the comments—I need to know I am not the only one who has obsessed over a half-inch of putty! If you are dealing with deeper issues, you might even need to learn how to hide a scratch before you tackle the gaps.
Ditch the Water-Based Putty and Grab the Wax
The first rule of thumb with factory-sealed boards is to stop thinking about filler and start thinking about melt-ins. Standard putty is the toothpaste of the flooring world; it is messy, shrinks, and looks flat. Instead, you want professional-grade wax sticks or burn-in sticks. These are basically high-performance crayons that are formulated to mimic the sheen of an aluminum oxide finish. To get this right, you do not just rub it in. You need to warm the wax slightly—not so much that it drips, but enough to make it pliable. When I worked on my sister’s dark walnut floor, I made the mistake of trying to force cold wax into a hairline gap. It just sat on top like a scab. Once I realized I needed a heat gun (or even a hair dryer in a pinch) to soften the wax, it flowed into the grain and gripped the sides of the plank, effectively becoming part of the floor. 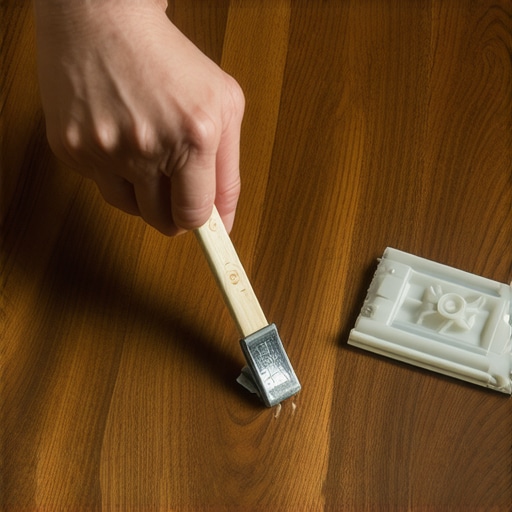
Level the Repair Without Scratching the Finish
Once the wax is in the gap, you will have a hump of material. Your instinct will be to grab a metal putty knife—do not. A metal blade will leave silver streaks on your finish that are harder to remove than the gap was to fill. Use a plastic spreader or even a discarded credit card to scrape the excess away while the wax is still slightly warm. If you find the color is not quite right, you can actually layer different shades of wax to mimic the natural variation. This is where your skills in how to mix custom wood stains come in handy, even though you are working with solids rather than liquids. Wiping the area with a lint-free cloth after leveling will help match the surrounding sheen.
The Secret to Blending Large Gaps with Slivers
Sometimes a gap is too wide for wax. If you can fit a penny in it, you have a structural eyesore that requires a wood-to-wood fix. This usually happens when you miss the block and hammer hack for tight joints during the initial step-by-step flooring installation. In these cases, take a scrap piece of the same flooring and use a sharp chisel to shave off a thin sliver or spline. You apply a tiny amount of wood glue to the sides of the sliver—never the bottom—and tap it into the gap. Because you are using the actual wood from the same batch, the color and grain match perfectly. Once the glue dries, you carefully trim the excess with a flush-cut saw, being mindful not to nick the factory finish. This Dutchman repair is a staple in high-end carpentry because it accounts for the natural expansion mentioned in your glue down benefit for solid wood floors research.
Finish Your Edges to Hide Installation Flaws
Do not forget that the eye is often drawn to gaps at the perimeter. If your gaps are near the walls, you can solve the problem by choosing the right trim. Using the hot glue hack for holding baseboard miters ensures that your corners stay tight, which prevents the floor from looking like it is pulling away from the wall. If you are finishing a room and the floor meets a different surface, always opt for a low profile transition rather than a bulky T-molding, which can hide subfloor unevenness that causes gaps in the first place.Once you move past the basics of filling gaps, you realize that the real secret to a high-end finish isn’t in how you hide mistakes, but in how you handle the physics of the room. A common trap I see people fall into is treating baseboards like a rigid border. Everyone tells you to nail them as tight as possible against the drywall, but in my experience, forcing a straight board against a wavy wall is a recipe for a ‘wavy’ floor appearance. Instead, you need to master the back-cutting secret for baseboard miters. This allows the front edge of your trim to meet perfectly while leaving space behind the joint for the inevitable house settling. When you choose baseboard styles that elevate your interior design, you’re not just picking a look; you’re picking a profile that either hides or highlights your wall’s imperfections. Have you ever fallen into this trap and ended up with miters that popped open after a month? Let me know in the comments!
Can your shower actually breathe while staying waterproof?
This is where we get into the heavy-duty expertise. Most DIYers think waterproofing a shower means sealing every single square inch until it’s air-tight. But here is the contrarian truth: if you don’t understand the ‘vapor trap,’ you’re building a mold incubator. According to the Tile Council of North America (TCNA) Handbook, specifically detail EJ171, movement joints are not optional—they are mandatory. If you grout your inside corners instead of following the soft joint rule for shower wall corners, that grout will crack, water will seep behind it, and it won’t be able to evaporate. This leads to the dreaded scenario where your shower niche is growing mold behind the tile because the moisture has nowhere to go. 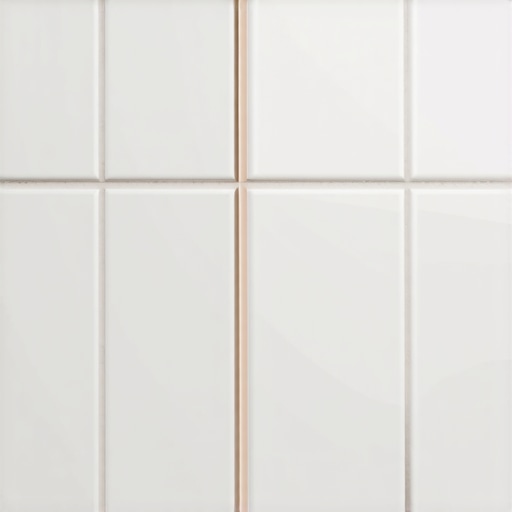
The Popping Pan and Other Installation Warnings
Another ‘oops’ factor involves the subfloor prep for wet areas. I’ve seen beautiful shower renovation ideas ruined because the installer skipped the dry fit test for shower drain alignment. If your pan isn’t perfectly bedded in mortar, you’ll end up wondering why your shower pan is making a popping sound every time you step in it. That sound is the sound of your waterproofing membrane stretching and eventually failing. To prevent this, always perform the flood test secret for guaranteed leak proof showers before a single tile is laid. It’s a 24-hour waiting game that separates the pros from the amateurs. Whether you’re figuring out how to choose the perfect baseboards or waterproofing a custom spa, remember that the most important work is often the stuff you can no longer see once the project is finished.While we are talking about long-term success, I have to be honest about carpet installation. Most DIYers start with a simple knee kicker and think they are finished. I did it too, until I had a client call me back two years later because their expensive plush had developed waves like the Atlantic Ocean. That is why your carpet is coming loose in the hallway—it simply was not tensioned properly. I personally never touch a project without my Crain power stretcher because it allows me to dial in the tension without bruising my kneecaps. According to the Carpet and Rug Institute (CRI) 105 Standard for Residential Carpet Installation, power stretching is not just a luxury; it is a technical requirement for a valid manufacturer warranty. If you are diving into carpet install secrets, this is the one piece of equipment that separates the hobbyist from the pro. Combine that with the double cut method for invisible carpet seams and you will never have to worry about a ‘speed bump’ appearing in the center of your living room.
How do I maintain my shower and floor seals over time?
The secret to longevity is consistency rather than heavy chemicals. People ask me all the time what ‘magic’ cleaner I use for my own home. The truth is far simpler: I use warm water and a tiny hint of pH-neutral cleaner. If you have modern matte finishes, you must follow the microfiber mist rule for cleaning matte floors. Heavy detergents leave a microscopic film that actually attracts dirt, making your ‘clean’ floor look dingy within days. For showers, maintenance is all about inspecting your ‘soft joints.’ Once a year, you should physically check your silicone corners. If the material feels brittle or is pulling away from the tile, do not wait for a leak to appear. Take a look at shower repairs: when to fix vs replace to decide if you just need a quick bead of fresh silicone or a more substantial refresh. 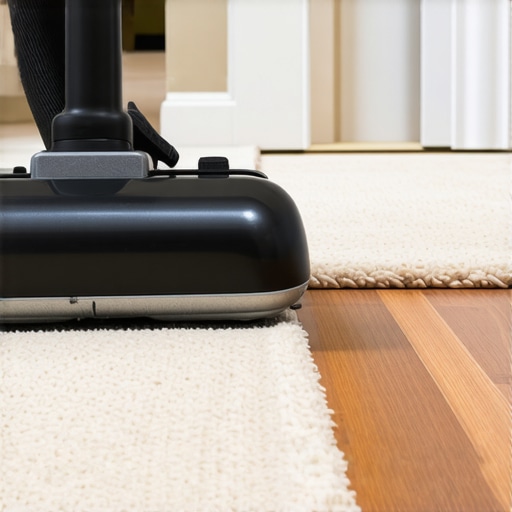
The Shift Toward Modular and Bio-Based Flooring
Looking ahead to 2026, the industry is moving rapidly toward ‘click-and-forget’ systems that utilize bio-based underlayments instead of petroleum-heavy foams. I predict that within a few years, the traditional method of gluing down entire floors will feel as dated as shag carpet. We are moving toward modularity—systems that allow a homeowner to pull up a single damaged plank or tile without destroying the entire subfloor. This trend is already visible in the best carpet types for high traffic areas, which are increasingly favoring high-end carpet tiles over broadloom. If you are prepping for your next renovation, I challenge you to try the ‘back-buttering’ technique on your next tile backsplash or floor. It feels like extra work in the moment, but the bond strength is night and day compared to just troweling the wall. It is the difference between a floor that lasts ten years and one that stays solid for forty. Finally, always reference the painter caulk vs silicone guide when finishing your trim to ensure your aesthetics match your structural integrity.
Mistakes That Taught Me More Than Success Ever Did
Looking back at years of projects, the biggest ‘lightbulb moment’ for me wasn’t about a specific tool, but about respect for the materials. I used to think I could force wood or tile to do what I wanted. Now, I realize I’m just a guide for how they behave in their environment. Here are a few hard-won truths:
- The 95% Rule: Most DIYers fail in the last 5% of the job. Whether it is rushing the caulk or skipping the painter caulk vs silicone guide, those final details are what define the ‘pro’ look.
- Movement is Life: A floor that cannot move is a floor that will fail. I stopped fighting expansion gaps and started embracing them by learning how to choose the perfect baseboards that cover the gap while letting the floor breathe.
- Prep is the Real MVP: If your subfloor isn’t flat, no amount of wax or putty will save the finish. I learned to spend twice as much time on the subfloor as I do on the actual planks.
#IMAGE_PLACEHOLDER_E#
Tools That Saved My Back and My Reputation
If you are serious about getting a high-end finish, you cannot rely on the basic kit from a big-box store. I’ve curated a few essentials that I never go without:
- Crain Power Stretcher: Essential for carpet install secrets; without it, you are just waiting for wrinkles to appear in your hallway.
- Professional Wax Burn-in Kit: Forget the tube putty. These kits allow you to match the factory sheen of pre-finished boards perfectly, making repairs virtually invisible.
- Laser Levels: I use the laser level hack for straight tile rows to ensure that even a massive open-concept space stays perfectly aligned from the first tile to the last.
Go Turn Your Vision into a Reality
The journey from a bare subfloor to a stunning, finished room is one of the most rewarding things you can do for your home. It is okay to feel a bit intimidated by the technical specs of a flooring installation, but remember that every pro started with a single plank and a few mistakes. Take your time, trust your measurements, and don’t be afraid to redo a small section if it doesn’t feel right. Your future self will thank you every time you walk across those smooth, solid floors. Have you ever encountered a gap or a floor ‘popping’ sound that drove you crazy? Let me know in the comments below!