

I will never forget the first time I proudly walked across the dream floor I had just spent three days installing. It looked like a million bucks—wide planks, rich grain, and perfectly tight seams. But then my dog, a forty-pound mutt with slightly long nails, trotted across the room. It did not sound like wood. It sounded like a high-school percussion ensemble practicing in a tile-lined locker room. That hollow boom-boom-boom was not just annoying; it felt cheap. If you have ever felt that sinking realization that your expensive new floor sounds more like a plastic drum than a solid forest, I know exactly where you are standing. Usually, that drum-like resonance happens because there is a literal pocket of air between your flooring and the subfloor, turning your floor into a giant acoustic chamber. I made the classic mistake of thinking the weight of the wood would be enough to hold it down, but I was wrong. We are going to fix that today. I will show you how to identify if the issue is your underlayment, your subfloor prep, or even the material itself. Have you ever finished a project only to realize the sound was all wrong? Let me know in the comments if you have faced this specific frustration.
Your Subfloor is Quietly Screaming for More Support
When it comes to planning your layout, most people focus on the visual, but the acoustic foundation is where the battle is won or lost. If your subfloor has even a 1/8-inch dip, your hardwood cannot sit flush. This creates a trampoline effect. Every time you step, the wood flexes into that gap and pushes air out, creating that sharp, hollow report. According to the National Wood Flooring Association (NWFA), a subfloor that is not flat within 3/16-inch over a 10-foot radius is the leading cause of acoustic complaints in residential homes. This is one of the most frequent flooring installation mistakes to avoid if you want a floor that feels as solid as it looks. Early in my career, I ignored a slight slope near a doorway, thinking I could just nail it down tighter. Within a month, the ‘drum’ sound in that one spot was enough to drive the homeowners crazy. Fixing it meant pulling up the boards and using a self-leveling compound, a lesson I learned the hard way.
Is Professional Sound Dampening Actually Just a Scam?
Many folks ask me if they really need those expensive rolls of rubber or cork, or if it is just a way for the big-box stores to pad their pockets. The truth is, the right underlayment is the only thing standing between you and a floor that sounds like a stage. If you have noticed that your floor sounds hollow when you walk, it is likely because the underlayment is too thin or the wrong density for the wood’s weight. A dense underlayment absorbs the impact energy of your footfall rather than reflecting it back into the room. It is not just about ‘cushion’—it is about mass. Using a high-density fiber or rubber pad changes the frequency of the sound from a high-pitched ‘clack’ to a low, muted ‘thud’ that mimics solid joist-nailed hardwood. Do not let a few dollars on a roll of padding ruin a multi-thousand-dollar investment.
Stop the Bounce with a Level Foundation
The first real step in killing that hollow sound is to eliminate the air pockets. Think of your subfloor like the chassis of a car; if it is warped, the whole ride feels off. Before you even think about the planks, take a long straightedge and sweep it across the room. Any gap where you can slide a stack of three quarters under the straightedge is a problem. You need to use a high-quality patch or leveler. Be careful, though; I have seen many DIYers fall for the self-leveler mistake that creates new high spots by over-pouring and not working the material toward the edges. Use the feather edge tactic for smoothing subfloor seams to create a transition so smooth you cannot feel it with your eyes closed. When your subfloor is truly flat, the wood has nowhere to flex, and that drum sound dies right there.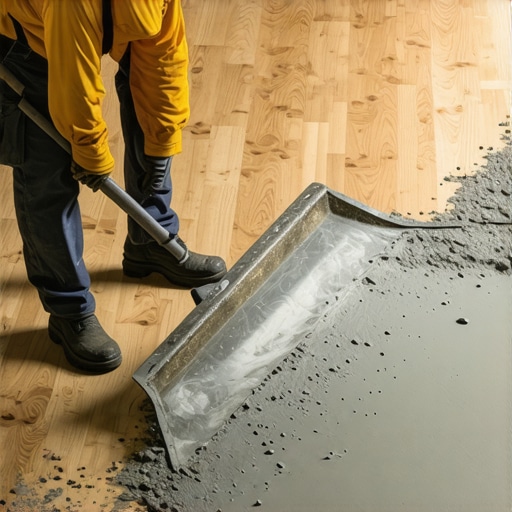
Glue Your Planks to Silence the Drum Effect
If you want the ultimate solid feel underfoot, you have to move past floating floors. While clicking planks together is fast, it leaves a microscopic layer of air that resonates with every step. I remember a project in a high-rise condo where we installed wide-plank white oak over a concrete slab. The client was terrified of the clicky sound common in those buildings. We opted for the glue-down benefit for solid wood floors, which essentially turns the floor and the house into one single acoustic unit. By using the urethane glue secret for hardwood on concrete, we created a moisture barrier and a permanent bond that absorbed all the impact noise. If you are wondering why your rigid core floor sounds hollow when you walk, it is almost always because the floor is floating rather than bonded.
Seal the Joints and Mind Your Gaps
Even with a great subfloor, loose joints can cause a high-pitched clicking sound. This is where your technique matters. I always use the block and hammer hack for tight tongue and groove joints to ensure every plank is fully seated. If there is even a hair-width gap between the tongue and the groove, the boards will rub together and squeak or pop. Once the main field is tight, you must address the perimeter. You might be tempted to jam the wood tight against the drywall to avoid sound leaks, but that is a recipe for buckling. You need to follow the penny gap rule for hardwood expansion space. This allows the floor to breathe without putting tension on the joints which often leads to that annoying hollow resonance.
Protect Your Perimeter and Hide the Evidence
How you finish the edges determines how the sound is trapped or reflected. If you leave huge gaps under your trim, sound can bounce around the wall cavities. When you are learning how to choose the perfect baseboards for your homes style, look for profiles that are thick enough to cover your expansion gap while allowing for a tight fit against the floor. I once worked on a high-end remodel where we used heavy, solid-core baseboards specifically to dampen edge noise. Their mass helped pin the perimeter underlayment, further reducing that hollow echo in the corners of the room. These small details, from the density of the trim to the tightness of the joints, are what separate a cheap-sounding DIY job from a professional floor.Let’s dig deeper into the nuances that even some seasoned pros overlook. Most homeowners assume that if they want a soft, luxurious feel under their feet, they should just buy the thickest carpet pad available. In my experience, this is a recipe for a failed installation. The Carpet and Rug Institute (CRI) actually warns that a pad that is too thick—specifically over 7/16 of an inch for many residential carpets—can cause the carpet to pull off the tack strips and lead to premature backing breakdown. If you have ever wondered why your carpet pad is too thick for the tack strip, it is because the excess height prevents the pins from properly gripping the weave. It might feel like walking on a cloud for a week, but you will be hunting for carpet install secrets achieving flawless results every time once those wrinkles and ripples appear. Have you ever fallen into the ‘thicker is better’ trap? Let me know in the comments. 
Why Your Concrete Subfloor Needs a Science Experiment First
The ‘Oops’ factor in modern flooring often comes down to what you cannot see beneath the surface. Many installers think that because a concrete slab looks dry and gray, it is ready for luxury vinyl or hardwood. I have seen beautiful, expensive wide-plank installs ruined because the installer skipped a basic moisture test. Why your concrete subfloor needs a calcium chloride test isn’t just a technicality for commercial jobs; it is about vapor pressure. Moisture trapped in the slab will eventually push its way up, causing glue failures or mold growth. Even a perfectly level floor can fail if you do not respect the chemistry of the concrete.
Will Your Baseboard Joints Survive the First Winter?
Even if your floor is acoustically perfect, your trim can give away a subpar job. Most beginners use simple butt joints for long runs of trim, but wood is a living material that moves with the seasons. When the humidity drops in January, those butt joints will open like a hungry mouth. I always insist on the scarf joint rule for long baseboard runs, where you overlap two 45-degree angles. This hides the inevitable expansion and contraction much better than a flat seam. It is these tiny, invisible decisions—the ones that take five extra minutes—that determine if your home looks like a high-end custom build or a rushed renovation. When you are looking at how to choose the perfect baseboards for your homes style, remember that the installation method and moisture management are just as important as the profile you pick.
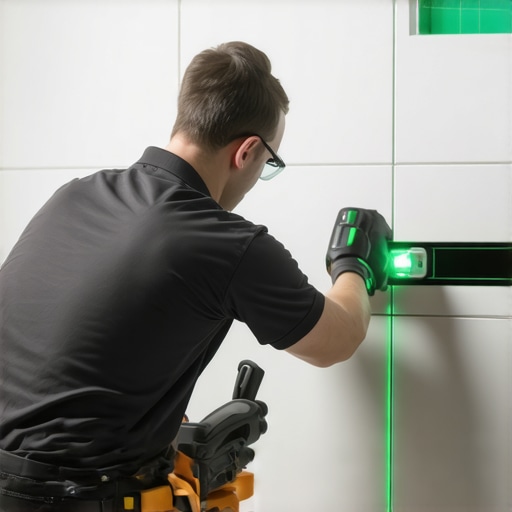
Precision is the difference between a floor that looks okay and one that looks like art. I never set a single tile without firing up my green-beam laser. Using the laser level hack for straight tile rows allows you to see the deviation across thirty feet that a simple bubble level would miss. This is especially critical when you are aiming for the zero grout look for large format porcelain walls, where a 1/32-inch mistake at the bottom becomes a two-inch disaster at the ceiling. When the line is visible on the wall, you stop guessing and start executing with confidence.
When we move to the soft stuff, most people think a knee kicker is enough for carpet. It isn’t. You need the power-stretcher move to fix loose carpet bubbles before they even start. If you do not use a pole stretcher to anchor the carpet into the tack strips with several hundred pounds of force, the backing will eventually relax. This tension is what keeps the carpet from rippling five years down the road. I have seen too many homeowners skip this step, only to realize their ‘DIY savings’ are being spent on a professional re-stretch later.
How do I keep my bathroom and floors in top shape over time?
Maintaining a professional finish requires more than just a vacuum. For showers, you need to understand shower repairs when to fix vs replace for longevity. If you see a hairline crack in the grout, it is a signal that moisture is moving. For hardwood, the biggest enemy is actually ‘cleaning’—or rather, the way people over-wet their floors. I always advocate for the microfiber mist rule for cleaning matte floors. You want just enough moisture to lift the dirt, not enough to penetrate the seams. If a disaster does happen, knowing how to hide a scratch in dark walnut flooring can save you from a full sand-and-finish job. According to the Tile Council of North America (TCNA) Handbook, maintaining a consistent environment—specifically keeping relative humidity between 30% and 50%—is non-negotiable for preventing grout cracking and wood movement.
The future of this industry is heading toward ‘smart’ integration. I predict we will soon see moisture sensors built directly into underlayments that sync with your phone to alert you of a pipe leak or subfloor dampness before you ever see a puddle. This will turn flooring from a passive surface into a protective system for the home. For now, focus on the fundamentals. I challenge you to go into your hallway and check your carpet tension; if you can lift the carpet more than an inch with your thumb and forefinger, it is time to rent a power stretcher and do it right.
The Quiet Mistakes That Taught Me the Most
I once thought I could save time by skipping the moisture test on a concrete slab that looked perfectly dry. That mistake taught me that patience is the most valuable tool in any project; moisture is a silent floor-killer. Now, I never start a project without checking vapor pressure. Sound dampening isn’t just about the padding; it’s about the physics of contact. If there is air trapped underneath, there is noise. Getting that subfloor perfectly flat is 90% of the battle for a quiet home. I’ve also realized that the way you finish a room—like choosing baseboard styles that elevate your interior design—directly impacts how solid the floor feels at the perimeter. Furthermore, understanding the butt joint vs scarf joint debate for baseboards is vital for anyone who wants their home to stay looking tight through the changing humidity of the seasons.
#IMAGE_PLACEHOLDER_E#
Tools That Never Leave My Side During a Job
A high-quality moisture meter is non-negotiable; I trust Wagner or Tramex for accuracy because you cannot guess moisture content in wood or concrete. My Green-Beam Laser is another staple; it makes centering large rooms a breeze and is significantly easier to see than red beams in daylight. Also, never underestimate a professional Power Stretcher—renting one for a day ensures your carpet won’t ripple in three years. When you are learning how to choose the right carpet for a cozy living space, remember that the high-density pad you choose is just as important as the tool you use to install it.
Taking the First Step Toward Your Professional-Grade Floor
Creating a space that feels solid and silent is one of the most rewarding parts of home improvement. When you put in the effort to prep your subfloor and choose the right materials, you aren’t just laying planks; you’re building a foundation for your daily life. A successful flooring installation is within your reach if you stay focused on the details and respect the physical limits of your materials. You have the knowledge now to turn that hollow-sounding room into a quiet, solid sanctuary that lasts for decades.
Have you ever encountered a stubborn hollow sound that just would not go away? Let me know in the comments how you handled it!