

I remember standing in my kitchen at 6:00 AM, waiting for the coffee to brew, when the morning light hit the wall at just the right angle to reveal a terrifying sight. There was a dark, jagged shadow running right along the bottom of my subway tiles. My beautiful backsplash wasn’t just ‘settling’; it was literally peeling away from the drywall like a bad sticker. It felt like my kitchen was rejecting its own skin. I panicked, thinking the whole wall was rotting from the inside out. But after years of DIY mishaps and eventually learning the right way to handle tile planning and finishing, I realized this is a surprisingly common headache that has very specific, fixable causes. Today, we are going to stop that slow-motion tile escape and get your kitchen looking solid again. [image_placeholder_1]
The Morning I Realized My Grout Fix Was a Total Fail
I’ll be the first to admit that when I first saw that gap, I did the exact thing you shouldn’t do. I grabbed a tub of pre-mixed grout and just shoved it into the crack. I thought I was a genius. Two weeks later? That new grout had crumbled onto the countertop like salt. My mistake was fundamental: I didn’t understand that houses breathe. They expand, they contract, and they shift. If you’ve ever noticed baseboard miters opening at the top, you’ve seen this house-movement in action. Backsplashes pull away because the wall and the cabinets are moving at different rates, or because the original installer skipped a crucial bond-strengthening step. We need to look at whether it’s a moisture issue, a structural shift, or just a case of using the wrong adhesive for the job.
Is my kitchen actually falling apart or is this just cosmetic?
It’s the question that keeps us up at night, right? You see a gap and suddenly you’re picturing a full-scale renovation bill. Most of the time, a backsplash pulling away is a symptom of ‘environmental stress’ rather than a structural collapse. According to the Tile Council of North America (TCNA), movement joints are actually a requirement in tile installations because all buildings experience some level of movement. If your installer didn’t leave a flexible joint where the tile meets the counter, the tile has no choice but to pop off when things shift. It’s a nuisance, but rarely a sign that your house is sinking.
Why Your Wall is Rejecting Your Beautiful Tile
One of the biggest culprits is ‘drywall sag’ or simple cabinet settling. Heavy granite or quartz countertops can put a lot of pressure on the lower cabinets, causing them to move just a fraction of an inch downward over the first few years. If the backsplash was glued too tightly without a proper expansion gap, that downward pull drags the tile with it. I’ve found that using the proper trowel notch for better adhesion is great, but even the best glue can’t fight gravity and house settling. Another common issue is moisture getting behind the tiles from the sink area, which softens the drywall and kills the bond. Have you noticed the gap getting wider specifically near your faucet or stove? Let me know in the comments if you’re seeing it in one spot or across the whole wall, because the fix depends on where the ‘break’ is happening. Before you reach for the caulk gun, we need to make sure the surface is actually prepped to hold a new bead, much like using the masking tape trick for clean silicone joints to ensure a professional finish.
Strip the wall back to basics
Before you can even think about re-securing those tiles, you have to get rid of the evidence of the previous failure. When I tried to fix that gap in my own kitchen, I made the rookie mistake of thinking I could just layer new silicone over the old, moldy stuff. It was a disaster—the new layer never actually stuck to the wall, it just hovered there like a ghost of DIYs past. You need to get in there with a sharp utility knife or a specialized grout saw to remove every last bit of old, cracked material. If the tile is physically loose and you can wiggle it with your thumb, it is better to pop it off entirely. Much like when you are learning how to fix a loose floor tile without a full demolition, the secret is all in the prep work. Once the tile is out, scrape the dried adhesive off the drywall and the back of the tile until both surfaces are flat. If you leave even a tiny hump of old thinset, your tile will sit proud of the others, and you will be fighting the thinset comb secret for preventing tile lippage for the rest of the afternoon.
Clean the tile like your deposit depends on it
I once tried to glue a tile back using just a dab of construction adhesive without cleaning the dust off first. It fell off and cracked my favorite ceramic bowl three days later. Use denatured alcohol or a heavy-duty degreaser on the wall and the back of the tile. Kitchens are grease magnets, and even a microscopic film of bacon fat will prevent your adhesive from ever truly ‘biting’ into the surface. 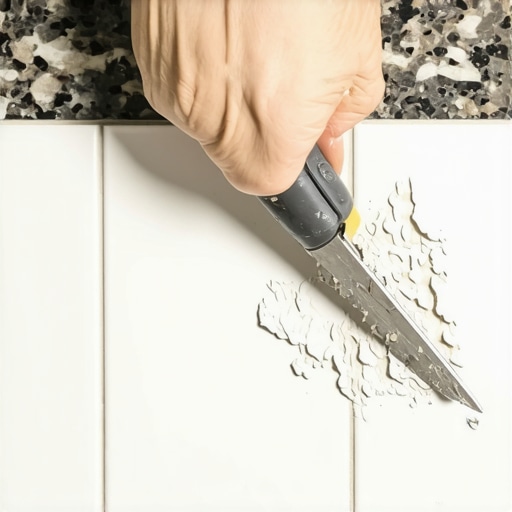
Stop using grout where the wall meets the counter
This is the hill I will die on: grout has no business being in the 90-degree angle where your backsplash meets your countertop. Grout is rigid; houses are not. If you use grout there, it will crack—it is not a matter of ‘if,’ but ‘when.’ This is the same reason why your shower grout is crumbling just months after install if the installer ignored movement joints. You need 100% silicone caulk that matches your grout color. Think of it like a shock absorber for your walls. When the cabinets settle or the house breathes in the humidity, the silicone stretches while grout just snaps.
Master the art of the flexible bead
When you are ready to seal that gap, do not just ‘wing it’ and hope for the best. I spent years making messy, thick lines of silicone until I learned to use the bead and smooth strategy for shower corners which applies perfectly to the kitchen too. Run a consistent, thin bead along the joint, then use a finger dipped in a mix of water and a tiny drop of dish soap to smooth it out. This prevents the silicone from sticking to your skin and creates a crisp, concave shape that sheds water and hides the gap perfectly. If you are worried about making a mess on your new granite, the blue tape trick for cleaning up silicone beads is a total lifesaver for getting those pro-level straight lines without the stress.It’s easy to think that once you’ve mastered the backsplash, you’re the master of the house. But here is where I see the most ‘advanced’ DIYers stumble: they treat their baseboards like static furniture. Most people believe that a tight miter joint is the ultimate sign of craftsmanship. In reality, a joint that is too tight without any ‘give’ is a ticking time bomb. I’ve learned the hard way that wood is a living material. If you aren’t using the back bevel move for tight baseboard miters, you are basically inviting those joints to explode or gap when the furnace kicks on in winter. 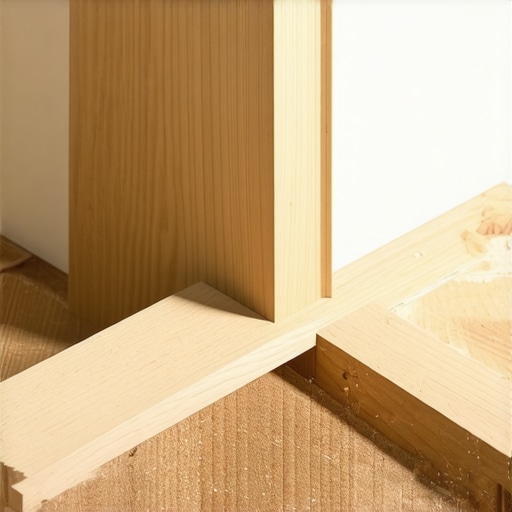
Stop chasing the ‘perfect’ miter joint
In my early days, I used to glue and pin my corners so tightly that there wasn’t a hair’s width of space. Then winter came. The drop in humidity caused the wood to shrink, and because the joints were locked tight, the wood actually split near the nails. This is why your baseboard miters are opening at the top even if they looked perfect in July. Professional installers often prefer the inside corner cope for perfect baseboard installs because a coped joint allows for that tiny bit of expansion and contraction without showing a massive gap.
The trap of pinning your floor to the wall
This is the ‘Oops’ factor that ruins expensive flooring. When you are finishing up step-by-step flooring installation, you might be tempted to push the baseboard down hard against the floor to hide any gaps. Don’t do it. If you nail through the expansion gap and into the flooring itself, you’ve essentially ‘locked’ the floor. This leads to that annoying sound why your vinyl plank floor is clicking when you walk. The floor needs to float; your baseboards should just hover a fraction of a millimeter above it.
Why do my perfectly mitered corners still open up every January?
Even if your technique is flawless, you cannot fight the laws of moisture. The National Wood Flooring Association (NWFA) emphasizes that wood flooring and trim must reach ‘equilibrium moisture content’ before installation. If you skip the acclimation test for avoiding hardwood floor gaps, your baseboards will move significantly regardless of how much glue you use. Have you ever fallen into this trap where a summer project looked great only to fail six months later? Let me know in the comments. We’ve all been there, and usually, the fix is as simple as understanding the ‘breath’ of your home.
The gear that actually saves your back and your budget
If you are tired of things pulling away or clicking, it is time to stop relying on a bubble level and a prayer. I used to think a laser level was for big construction sites, but after using the laser level move for perfectly horizontal shower tiles, I realized my ‘good enough’ eye was actually costing me hours in re-work. Specifically, I recommend the 360-degree green beam lasers. Why? Because red beams disappear in bright rooms, and a 360-degree line ensures your baseboards on one side of the room perfectly meet the ones on the other, even if your floor has a dip. For flooring, stop using dull utility blades. Following the stay sharp blade rule for cutting luxury vinyl isn’t just about speed; it prevents the micro-shattering of the wear layer that leads to peaked seams six months later. When it comes to carpet, the Carpet and Rug Institute (CRI) notes in their 104/105 standards that improper stretching is the leading cause of premature replacement. If you’re doing it yourself, you need a power stretcher, or you will eventually be looking at how to fix a carpet ripple without a power stretcher when the humidity hits. 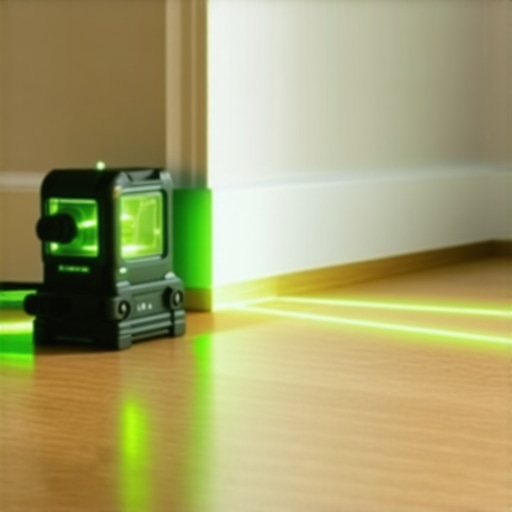
How do I keep these results looking fresh for a decade?
Maintenance isn’t a deep clean once a year; it’s about a quick ‘visual audit’ every season. Check your silicone joints in the shower and at the backsplash every six months. If you see a tiny tear, don’t wait. Use the blue tape trick for cleaning up silicone beads to replace that section before water gets behind the tile and rots the substrate. For your floors, longevity comes down to protecting the finish. We’ve found that we prefer felt pads over rubber for luxury vinyl because rubber can actually chemically react with the floor and cause permanent staining. It’s a five-dollar fix that saves a five-thousand-dollar floor.
What to expect from the 2025 flooring wave
Looking ahead, we are seeing a massive shift toward ‘active’ home materials. We are moving toward top trends in installation for 2025 that focus on waterproof wood composites and digital templating. Soon, you’ll be able to scan your room with your phone to get perfect inside corner cope measurements without ever touching a tape measure. But no matter how high-tech we get, the fundamentals of step-by-step flooring installation remain the same: prep is 90% of the job. I challenge you to pick one room this weekend—just one—and check the silicone joints and the baseboard miters. If they’re gapping, use the flexible caulk method we discussed earlier and see how much better the whole room feels.
Hard Truths About How Your Kitchen Actually Ages
After years of chasing gaps and resealing joints, I have realized that a house is more like a living organism than a static box. My biggest lightbulb moment was accepting that movement is mandatory. If you try to build a rigid kitchen, the house will win every single time by cracking your grout or popping your tiles. I’ve also learned that the best way to handle shower repairs and backsplash fixes is to stop looking for a permanent ‘glue’ and start looking for a permanent ‘flex.’ Another hard-earned lesson? Your eyes will play tricks on you in different lighting. Always check your silicone beads and miter joints during the ‘golden hour’ when the sun is low; it will reveal every tiny shadow and uneven edge that you missed under the overhead LEDs. Finally, never underestimate the power of a clean substrate. You can buy the most expensive adhesive in the world, but it will fail if it’s trying to bond to a microscopic layer of kitchen grease.
The Gear I Won’t Step on a Job Site Without
To get professional results, you need to move beyond the basic hammer and nails. First, a 360-degree green beam laser is non-negotiable for ensuring your baseboard styles align perfectly across a room. Second, I always keep a dedicated moisture meter in my bag. Knowing if your subfloor or drywall is too damp before you start can save you from the nightmare of flooring installation mistakes that only show up months later. Third, I highly recommend a high-quality ‘caulk finishing tool’ kit. While a soapy finger works, these small rubber profiles help you create the exact same bead size throughout the entire kitchen, giving it that high-end, custom look.
Master the Craft One Joint at a Time
Taking on these repairs can feel overwhelming, but you have the tools and the knowledge now to stop the ‘slow-motion escape’ of your kitchen tiles and baseboards. Don’t be afraid to pull off a loose piece and start over; the satisfaction of a job done right far outweighs the temporary fix of a quick patch. Whether you are tackling a small backsplash gap or a full-scale flooring installation, remember that patience and proper prep work are your best friends. You are not just fixing a house; you are building a home that is resilient enough to breathe and shift without falling apart. What is the most frustrating gap you’ve discovered in your kitchen or bathroom lately? Let me know in the comments below!