

I remember the morning I noticed the first hairline fracture. I was three months post-renovation, sipping coffee, and admiring my handiwork when I saw a jagged, ugly line snaking right through the corner of my brand-new shower. My heart absolutely sank. I had spent weeks studying every shower renovation guide I could find, yet here I was, looking at a failure. It felt like my house was telling me I wasn’t as handy as I thought. If you are staring at a similar mess, let me tell you right now: you aren’t a failure, and your house isn’t falling down. You likely just made the same rookie mistake I did by treating a corner like a flat wall. Today, we are going to dive into the physics of why this happens and the one specific material swap that will keep your corners looking pristine for a decade.
Your House is Moving More Than You Think
The fundamental reason those corners fail is that your walls are essentially alive. They expand and contract with the changing seasons, shifting humidity, and the simple settling of the foundation. When you fill a corner—a place where two different planes meet—with rigid grout, you are essentially asking a piece of stone to bend. It won’t. I used to think that if I just packed the grout tighter, it would hold. I was wrong. The Tile Council of North America (TCNA) actually mandates that any change of plane requires a flexible movement joint because the stress of structural movement has to be absorbed somewhere. If you don’t provide a flexible path, the grout simply shatters. This is especially true if you are already dealing with shower repairs where the subfloor might be slightly compromised. Have you ever tried to ‘patch’ a corner crack only to have it reappear a month later? I’d love to hear your story in the comments.
Can you just smear more grout into the existing cracks?
It is the most common question I get from neighbors, and the answer is a hard no. Trust me, I’ve tried the ‘quick fix’ of rubbing a little extra paste into the gap. It looks great for a week, then it crumbles like a dry cookie. To get a result that lasts, you have to embrace the silicone-only rule for shower corner joints. Standard grout has zero ‘elongation’—it cannot stretch. High-quality 100% silicone, however, can stretch up to 25% or more of its original width. Understanding this difference is what separates a DIY job that looks tired in six months from a professional-grade installation that stands the test of time. Making the switch to a flexible sealant isn’t just a suggestion; it’s the only way to stop the cycle of cracking for good.
Strip the Old Grout Without Damaging Your Tiles
Before you even touch a tube of sealant, you have to get rid of every single crumb of that old, brittle grout. Think of it like surgery; you can’t put a new heart in without removing the old one. I use a carbide-tipped grout saw, but you have to be gentle. One slip and you are looking at how to replace a single broken tile without total demo. The goal isn’t to dig a trench to China; you just need a clean, 1/8-inch deep channel for the silicone to bite into. If you skip this and try to layer silicone over grout, it is like putting a band-aid on a mud puddle—it will never stick. Once the grout is gone, vacuum the joint thoroughly. I actually use a shop vac with a narrow nozzle to suck out the dust from behind the tiles. Any dust left behind is a bond-breaker.
Clean the Joint Like Your Life Depends on It
This is the step most DIYers blow. Even if the joint looks clean, it is likely coated in soap scum or hard water deposits. I take a lint-free rag soaked in denatured alcohol and run it through the corner. It evaporates quickly and leaves the surface bone-dry. In my early days, I once tried to shortcut this by just wiping with a damp towel. Big mistake. Two months later, the silicone peeled away like a sunburn because of the invisible residue. If you are working on a new install, remember the backer board rule for tile wall stability; ensure the substrate is rigid before you start sealing, otherwise, even silicone will struggle against excessive movement.
Use Tape to Get Professional Lines Every Time
If you want that crisp, factory-finish look, stop trying to ‘freehand’ the bead. I apply blue painter’s tape exactly 1/8th of an inch away from the corner on both walls. This creates a controlled ‘landing zone’ for the sealant. When I was renovating my guest bath, I thought I was a pro and skipped the tape. I ended up with silicone smeared three inches wide, and because it dries fast, it looked like a mess. With the tape in place, you can be a bit messy with the application because the excess is going to come off with the tape anyway. This is as essential as following a step-by-step flooring installation from planning to perfect finish; precision in the prep defines the quality of the end result.
Apply the Bead with a Smooth, Continuous Motion
Cut your silicone nozzle at a 45-degree angle, making the hole roughly the size of the gap you are filling. When you squeeze the trigger, keep the gun moving at a steady pace. You want a consistent bead, not a series of blobs. After the bead is down, mist it lightly with a spray bottle of water mixed with a drop of dish soap. Then, run your gloved finger down the line in one smooth motion. The soapy water prevents the silicone from sticking to your skin and the tiles, keeping the mess contained. While you are thinking about moisture protection, don’t forget the overlap trick for waterproofing shower corners during the initial build phase, which provides that secondary layer of defense behind the tile. Pull the tape immediately while the silicone is still wet, pulling it away from the corner to leave a perfect, sharp edge.While the corners are the most visible failure points, I’ve learned that the real danger often lurks where you aren’t looking. Most homeowners think that if the floor and the first few feet of wall are sealed, they are safe. However, in my experience, the biggest myth is that waterproofing only matters in the ‘splash zone.’ I’ve seen more rot behind drywall six feet up than I have at the curb because of heavy steam penetration. This is why your shower waterproofing needs to go higher than you think—ideally all the way to the ceiling if you enjoy long, hot showers. Many DIYers assume that standard moisture-resistant drywall is enough, but according to a 2023 technical bulletin from the Tile Council of North America (TCNA), vapor-permeable surfaces in high-steam environments account for over 40% of hidden wall cavity mold.
Why Is Your Shower Pan Making That Popping Sound?
It’s a terrifying noise, right? You step into the shower and hear a distinct ‘pop’ or ‘crunch’ beneath your feet. Most people immediately panic, thinking their house is settling or the floor is collapsing. The reality is usually less dramatic but equally annoying: your mortar bed isn’t fully bonded to the substrate. If you didn’t use the dry-pack method for a level shower base correctly, or if the mix was too dry to create a mechanical bond, the pan can detach. This creates a tiny air gap that flexes under your weight. It’s a classic ‘oops’ factor—skipping the floor prep because you were in a hurry to see the pretty tiles. Often, the root cause is a failure to how to reinforce a subfloor for heavy stone tiles, leading to micro-deflections that snap the mortar bond over time.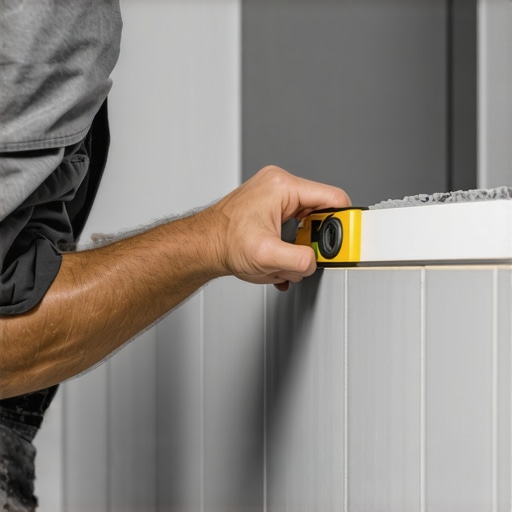
Stop Ruining Your Niches with Flat Ledges
Another trap I see professionals and DIYers alike fall into is the shower niche. I’ve seen people level the bottom shelf perfectly, which sounds like the right thing to do, but it is actually a recipe for disaster. Why your shower niche is collecting water usually comes down to a lack of slope on that bottom ledge. If that ledge is ‘perfectly’ level, water sits there, soap scum builds up, and eventually, the grout or sealant fails. In my own home, I learned this the hard way and had to redo a custom marble niche after only two years. It needs a slight 1/8-inch pitch toward the drain to ensure gravity does its job. If you haven’t checked your niche slope with a level recently, you might be surprised at what you find.
The Hidden Conflict Between Tile and Baseboards
When your bathroom floor spills out into the hallway, you hit the next major hurdle: the transition. Everyone tells you to just slap on some shoe molding and call it a day. I disagree. In my professional opinion, the quarter-round mistake that ruins baseboard lines is the hallmark of a rushed job. It looks bulky, gathers dust, and screams ‘I didn’t plan ahead.’ Instead, you should be scribing your baseboards to the tile for a seamless look. And please, for the love of your home’s value, stop using bathroom silicone on your baseboard-to-wall gaps. You need to understand the painter caulk vs silicone guide for baseboards; use acrylic caulk where you need to paint, or you’ll end up with a peeling mess that no primer can save. Have you ever fallen into this trap of using the wrong sealant in the wrong room? Let me know in the comments below.
Stop Relying on Your Knees for Carpet Work
I’ve seen it a hundred times: a homeowner spends thousands on a gorgeous frieze or plush pile, only to have it look like a wavy ocean two years later. Most people think they can get away with just a knee kicker. I’m here to tell you that unless you want to be re-stretching in eighteen months, you need to settle the power stretcher vs knee kicker debate once and for all. A knee kicker is for positioning; a power stretcher is for longevity. The Carpet and Rug Institute (CRI) specifies in their CRI 104 standard that power stretching is mandatory for all installations to prevent premature wear and delamination. If you skip this, why your carpet is coming loose in the hallway won’t be a mystery—it will be a mathematical certainty. When I finally invested in a senior stretcher with an auto-locking head, the physical strain on my body dropped by half, and my seams became virtually invisible because the tension was uniform across the room. Following carpet install secrets achieving flawless results every time starts with the right mechanical advantage.
How do I keep my new flooring from failing early?
The secret isn’t a special spray; it is a cheap tool called a pinless moisture meter. I never lay a single plank or tile without checking the substrate first. I’ve seen beautiful white oak buckle because the installer didn’t perform the moisture meter test for concrete subfloors. Wood and even some luxury vinyl are sensitive to the vapor drive coming up from the earth. In the future, I predict we will see ‘smart’ subfloors with embedded sensors that alert your phone if humidity levels spike under your laminate. For now, you are the sensor. Consistent monitoring during the first year of a new home settling is the only way to catch a leak or a subfloor issue before it ruins your investment.
The Tool That Saves Your Baseboard Miters from Opening
If you are tired of seeing your perfect 45-degree corners pull apart the moment the heater kicks on in November, you need to stop trusting nails alone. I started using miter clamps—specifically the spring-loaded variety—about five years ago, and I haven’t looked back. They provide 360-degree pressure that forces the wood fibers together while the glue dries. This is the miter clamp secret for professional baseboard corners that most ‘tailgate contractors’ won’t tell you about. To make them even tighter, I always employ the back-cutting secret for baseboard miters, which removes a sliver of material from the rear of the cut to ensure the front faces touch perfectly. It’s a tiny adjustment that adds maybe ten seconds to your cut but adds ten years to the look of your room. I challenge you to try the back-cutting trick on your next baseboard joint; once you see that hair-thin seam, you’ll never go back to ‘standard’ cuts again. Whether you are dealing with moisture in the shower or tension in the living room, the difference between a ‘job’ and a ‘craft’ is the willingness to use the tool the job actually requires.
Three Renovation Truths I Learned the Hard Way
After years of fixing my own mistakes, I’ve realized that the most expensive part of any remodel is having to do it twice. The first truth is that moisture is your home’s greatest enemy; whether it is steam in the shower or vapor rising through concrete, if you don’t account for it, your materials will fail. Second, “good enough” is the enemy of “done right.” A gap that is 1/16th of an inch too wide today will be an eyesore for the next ten years. Finally, never underestimate the power of the right chemical bond. Whether you are following the silicone-only rule for shower corner joints or choosing the right adhesive for your guide to durable flooring installation for a stylish home, the chemistry of your materials matters as much as your carpentry skills.
The Specific Tools That Saved My Sanity
I used to think I could out-skill cheap tools, but I was wrong. I now swear by a pinless moisture meter to prevent buckling before it starts—it is the only way to be sure your substrate is ready. For woodwork, I never head to a job site without my spring-loaded miter clamps because they are the only way to ensure the miter clamp secret for professional baseboard corners actually works to prevent seasonal gapping. I also recommend keeping a dedicated carbide grout saw for those delicate repairs to avoid the nightmare of how to replace a single broken tile without total demo. These aren’t just gadgets; they are the bridge between a DIY look and a professional-grade finish.
Your Home Deserves Professional-Level Precision
Renovating your own space is one of the most rewarding challenges you can take on. It’s about more than just aesthetics; it’s about the pride of knowing every joint is tight and every surface is properly waterproofed. By following a step-by-step flooring installation from planning to perfect finish and paying attention to the small details like niche slope and movement joints, you create a space that stands the test of time. Don’t be afraid to slow down and get it right the first time; the results will speak for themselves every time you walk into the room. Have you ever struggled with getting a perfect line on your shower sealant or getting those baseboard miters to stay shut? Let me know your biggest renovation hurdle in the comments below!