

I stood there, staring at my brand-new 12-foot ceilings, feeling like a total amateur. I’d just finished a massive renovation and, in my excitement, I’d grabbed a bundle of standard 3.25-inch baseboards from the local big-box store. I nailed one piece into the corner, stepped back, and almost laughed. It looked like a tiny strip of painter’s tape against a skyscraper. My beautiful, airy room felt completely disjointed because the proportions were all wrong. I learned the hard way that when you have vertical space, you can’t play small with your trim. If you’re tired of your rooms looking unfinished or ‘off,’ you’re in the right place. Today, we’re going to fix that scale problem once and for all so your home actually looks like a professional designed it.
Stop Letting Your Walls Swallow Your Trim
Most people make the same mistake I did: they think a baseboard is just a baseboard. But when your ceilings soar past eight or nine feet, those standard sizes just disappear. You need something that commands attention without overwhelming the space. According to architectural design standards often cited by the American Institute of Architects, interior trim should generally account for about 7% to 10% of the total wall height to maintain a sense of classical proportion. That means if you’re rocking 10-foot ceilings, you’re looking at at least an 8-inch profile. I’ve experimented with everything from modern baseboard styles to traditional beefy moldings, and the difference is night and day. Have you ever stepped back from a project and realized your trim looked like an afterthought? Maybe you felt like the room was ‘floating’ because there wasn’t a strong enough visual anchor at the floor?
Will Massive Trim Make Your Room Feel Smaller?
There’s always that fear that you’ll overdo it and end up with a room that feels ‘shrunken’ or heavy. I worried about that too. I thought if I went with a 10-inch board, it would eat up the wall. But here’s the secret: it’s almost always better to go slightly too tall than too short. A tall baseboard acts as an anchor for the whole room. It’s the foundation that makes your homes style feel intentional. Before you start your next flooring installation, you need to understand the visual weight of your walls. Even if you’re looking at 2025 baseboard trends, the rules of scale remain the same. I once tried to ‘cheat’ the height by adding a piece of shoe molding an inch above the baseboard and painting the gap—big mistake. It looked messy and cheap. Trust me, buying the right height from the start saves you a world of regret. You might even need to use a scribe tool if your floors aren’t perfectly level, but getting that height right is the first step to a baseboards makeover that actually works.
Build Up Your Profile by Stacking
One of the biggest hurdles is finding a single board that is actually tall enough for soaring ceilings. Most local lumber yards stop at seven inches, and if you need ten, you are usually looking at custom millwork which is code for extremely expensive. Instead of breaking the bank, I started stacking. This involves using a flat one-by board, like a 1×8, and topping it with a separate decorative base cap. When you paint them the same color, they look like one massive, expensive piece of trim. This technique is a staple in baseboard styles that elevate your interior design because it gives you total control over the height and depth without the custom price tag. 
Find Your Studs Without the Guesswork
When you are working with these beefy profiles, your standard stud finder is going to lie to you. It simply cannot see through an inch of MDF or solid wood plus the drywall. I learned this the hard way during a step-by-step flooring installation when I ended up with a dozen ‘oops’ holes in a pristine wall because I could not find the wood. I was shooting blind and almost felt like I was playing a high-stakes game of Battleship with my nail gun. Now, I use the magnet hack for finding wall studs behind thick baseboards. You drag a strong neodymium magnet across the wall to find the drywall screws. Since those screws are driven directly into the studs, you have a guaranteed roadmap for your nails. It prevents you from blowing out the back of your trim or hitting a hidden line.
Scribe for a Gap-Free Finish
No floor is perfectly level, even in new builds. If you just slap a long, stiff board onto a wavy floor, you are going to have massive gaps that even the best caulk cannot hide. Think of your baseboard like a custom suit; it has to be tailored to the specific body of your room. You need the scribing tool every diyed needs for tight baseboards. You run the tool along the floor, transferring those floor waves onto your wood, and then trim to that exact line. It is the difference between a DIY project that looks like a weekend hack and one that looks like a master carpenter stopped by. If you skip this, you are setting yourself up for flooring installation mistakes to avoid for a seamless look.
Nail the Corners Every Single Time
Corners are where dreams go to die for most beginners. A simple 45-degree cut rarely works because walls are almost never exactly 90 degrees. For outside corners, I swear by the back-cut secret for tight baseboard outside corners and the 45-degree trick for perfect baseboard outside corners. This involves angling the saw blade slightly away from the visible edge so the front faces touch first, creating a seamless joint even if the wall is slightly ‘blown out’ from corner bead buildup. For inside corners, do not just miter them. Use the back-bevel secret for inside baseboard corners to cope the joint instead. This allows the wood to expand and contract without the joint opening up like a hungry mouth. If you have tricky architectural features like support columns, you will need the double mitre trick for wrapping baseboards around small pillars. To prevent your hard work from splintering during these precision cuts, always stop baseboard splitting with this simple pre-drilling tactic.Everyone tells you that you need a level floor for your trim to sit right. Honestly? They are wrong. I have seen perfectly level floors that were wavy as a potato chip, and those waves are what create the gaps that drive you crazy. According to the National Wood Flooring Association (NWFA), the industry standard is not about being level to the horizon; it is about flatness—specifically being flat within 3/16 of an inch over a 10-foot span. If you focus on leveling the whole house, you are throwing money down the drain. You need to focus on the flatness where the wall meets the floor instead. If you ignore this, you will find that why your self-leveling compound is cracking before the floor goes down becomes a reality because you over-applied it in areas that did not need it. 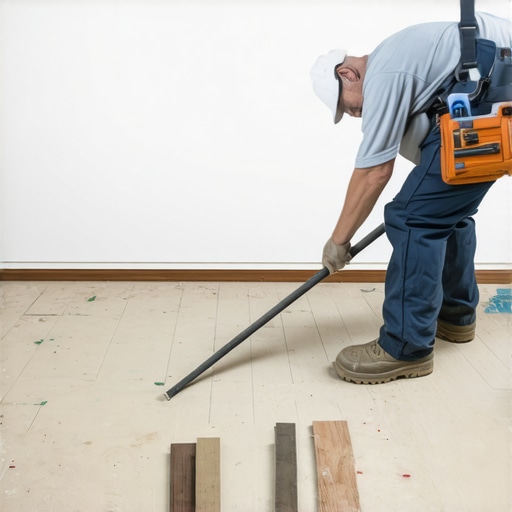
The Moisture Trap That Ruins Professional Finishes
Then there is the invisible trap: hydrostatic pressure. I have seen beautiful, expensive MDF baseboards literally turn into sponges and crumble within a year because the installer skipped the concrete moisture test that saves your vinyl floor. Even if you are not using vinyl, moisture moves through a slab and gets trapped behind your trim. This is usually why your baseboard paint is peeling off at the bottom. It is not a bad paint job; it is a moisture problem you did not address during the subfloor phase. If you are working on a wet area, like an ultimate shower renovation guide project, this lack of moisture awareness leads to even bigger headaches.
Why does your trim look like it is pulling away from the wall?
It is easy to blame the wood, but the real mistake is failing to account for the acclimation gap. Most DIYers bring their trim home and install it the same day. Professionals let it sit in the room for at least 72 hours to match the home’s humidity. This nuance of material behavior extends to every trade. For instance, in a carpet install, failing to follow the power stretcher rule for large living room carpets leads to those annoying ripples later. In a bathroom, you might face the trowel size mistake that ruins your shower tile bond, which is the same root issue: failing to respect the technical requirements of the materials. Have you ever fallen into this trap? Let me know in the comments.Thinking long-term is what separates a weekend warrior from a homeowner with a space that holds its value. Once you have tackled the scale of your baseboards and ensured your flooring is flat, you have to talk about stability. For those of you installing the massive 7-inch or 9-inch wide planks that are so popular right now, mechanical fasteners alone are not enough. I always use the glue assist method for wide plank hardwood floors. This isn’t just about extra security; it is about preventing that annoying ‘click-clack’ sound that happens when wood naturally expands and contracts. If you skip the adhesive, you are basically inviting gaps to form by next winter. According to the National Wood Flooring Association (NWFA) Technical Manual, any plank wider than five inches significantly benefits from a supplemental adhesive to reduce movement. I personally use a serpentine bead of high-quality urethane glue because it stays flexible, allowing the wood to breathe without letting go of the subfloor.
How do I keep my high-end finishes looking new for years?
Maintenance for these high-profile installs is different than a standard 1990s build. Those tall, stacked baseboards we talked about have a bad habit of becoming dust shelves. I have found that the vacuum seal trick for cleaning dust out of floor grooves works wonders for trim too. Instead of just wiping them down and pushing dust into the crevices, use a brush attachment to pull the debris out. If you notice things starting to look a bit dull, the no-sanding fix for scuffed hardwood floor finishes can save you a week of dusty sanding and thousands of dollars in refinishing costs. For your wet areas, keep an eye on the transition points. If you see a hairline crack where the tile meets the wall, do not just smear more grout over it. Use the blue tape secret for professional shower silicone lines every time to create a flexible, waterproof seal that actually moves with your house.
Invest in Tools That Save Your Back
If you are serious about scaling your projects, stop relying on the cheap plastic spacers. I upgraded to heavy-duty suction tools last year, and it changed everything. Use the suction cup hack for adjusting gapped laminate planks if you ever see a joint start to open up in the middle of the room. It lets you pull the floor back together without ripping up the baseboards. This kind of pro-level maintenance is how to avoid hollow spots under your new tile and ensures your step-by-step flooring installation from planning to perfect finish actually lasts twenty years instead of five. Looking ahead, I suspect we are going to see a massive shift toward waterproof composite cores even in high-end trim, making baseboard trends in 2025 more about durability than just aesthetics. If you are currently staring at a problematic area, I highly recommend trying the ‘Magnet Hack’ I mentioned earlier—it is the single best way to ensure your heavy trim stays pinned to the wall for the long haul. Take twenty minutes this weekend to check your shower seals; doing small shower repairs when to fix vs replace for longevity now is the best insurance policy you can buy for your home.
What Pro Installers Never Mention About Soaring Walls
After years of wrestling with trim on 12-foot walls, I realized that the biggest mistakes happen because we look at the project from two feet away. I recommend the “Step-Back Rule”: after every few sections, walk to the opposite side of the room to ensure the visual weight is balanced. Tall trim creates deeper shadows, and if you are using a dark paint color, the profile will look much heavier than it did in the store. Also, while solid wood is classic, MDF is often the MVP for baseboard styles that elevate your interior design because it stays perfectly straight on long runs—just make sure you seal the bottom edge against floor moisture to prevent swelling.
The Only Gear You Actually Need for Massive Trim
Scaling up your trim requires more than a standard hammer and a box of nails. To get that professional finish, I rely on a few specific tools that save time and your back. First, a set of high-strength neodymium magnets is essential for the magnet hack for finding wall studs behind thick baseboards. Second, for those intricate inside corners, skip the manual coping saw and use a specialized jigsaw attachment to save your wrists. Finally, never underestimate the power of a flexible adhesive; using the glue assist method for wide plank hardwood floors or heavy trim prevents the wood from pulling away when the seasons change and the humidity fluctuates. These tools turn a frustrating weekend into a smooth, satisfying build. #IMAGE_PLACE_HOLDER_E#
Bring Your High-End Vision to Life
Taking on a project with massive vertical space can feel daunting, but it is the ultimate way to define your home’s character and value. By mastering the scale and focusing on a baseboards makeover that respects architectural proportions, you are doing more than just decor—you are creating a professional-grade foundation. Whether you are in the middle of a step-by-step flooring installation from planning to perfect finish or just finishing your trim, trust the techniques you have learned here. You have the secrets to scale; now go make those rooms look intentional. Which part of the scribing or magnet-finding process are you planning to tackle first? Let me know in the comments!