

It was 2 AM, and I was staring at a six-inch gap where my brand-new baseboard refused to touch the floor. I had spent two days pouring self-leveler until that subfloor was as flat as a frozen lake, yet here I was, looking at a trim line that resembled a topographical map of the Andes. I felt defeated. I had done everything “by the book,” and yet the visual result screamed amateur hour. If you are standing in your living room wondering why your expensive trim looks wonky despite a perfect flooring installation, welcome to the club. We are going to fix that visual headache today by looking at what is actually happening behind the paint and beneath the wood.
Your Floor Usually Isn’t the Problem
Many homeowners assume that a gap under the trim means the floor is sagging. While that can be true in old houses, more often than not, the culprit is the wall itself or the way the drywall was finished. Early in my career, I made the classic flooring installation mistake of assuming walls were perfectly flat planes. I nailed a 12-foot stick of MDF directly to the studs without checking for humps, and the result was a wavy mess that looked like it belonged in a funhouse. The truth is, houses are rarely built with the precision of a Swiss watch.
Is a perfectly straight line even possible in a house?
You might think your home is a series of 90-degree angles, but most “crooked” baseboards are actually caused by drywall mud buildup or slightly bowed studs. According to the National Association of Home Builders, minor variations in wall straightness are actually within acceptable industry tolerances. However, “acceptable” to a builder and “acceptable” to your eyes are two very different things when you are trying to achieve a flawless finish. Have you ever stepped back from a project only to see a gap so big you could slide a deck of cards under it? Tell me about your worst “gap-tastrophe” in the comments!
Drywall Mud is Changing the Angle
When the drywall crew finishes their work, they apply joint compound over the tape at the bottom of the wall. Often, this creates a “flare” near the floor. When you push your baseboard against that flare, it tilts the top of the trim or forces the bottom out, creating the illusion that the floor is dipping away. If you have been looking at different baseboard styles, you will notice that taller profiles make this problem even more obvious because they cover more of the flared wall area. To get that pro look, we need to stop fighting the wall and start using the wood shim secret to bridge those imperfections and create the illusion of a perfectly straight line.
Find the High Spots Before You Reach for the Nail Gun
Before you even think about cutting your first piece of trim, you need to identify where the floor is fighting you. I treat a floor like a topographical map. Take a 4-foot or 6-foot level and slide it across the floor along the wall. You aren’t looking for level—you are looking for the ‘pivots.’ These are the high spots where the level teeter-totters. If you ignore these, your baseboard will hit that hump and leave massive ‘wings’ of air on either side. During a particularly stressful flooring installation in a 1920s bungalow, I tried to skip this step. I just started nailing from one corner to the other. By the time I reached the middle of the wall, the baseboard was sitting two inches off the ground because of a single hidden hump in the subfloor. I had to rip it all out, which is a great way to waste both time and expensive lumber.
Map the Floor with a Pencil
Mark the peak of every hump directly on the wall with a pencil. When you go to install the trim, you will start your nailing at these high points. Think of the baseboard like a bridge; you want to anchor it to the ‘piers’ (the high spots) first, and then work your way into the ‘valleys’ (the gaps). This prevents the trim from under-tensioning and snapping. If you are dealing with a particularly bad slab, you might even need the self-leveler move for perfectly flat vinyl installs before the trim even goes on, but for most cosmetic fixes, mapping is enough.
Stop Fighting the Drywall Flare
That annoying flare at the bottom of the wall is your biggest enemy. It’s caused by the buildup of joint compound over the drywall tape. If you push the baseboard tight against the bottom, the top will tilt away from the wall. If you push the top tight, the bottom kicks out. It’s like trying to wrap a stiff piece of cardboard around a basketball—it just won’t lay flat. 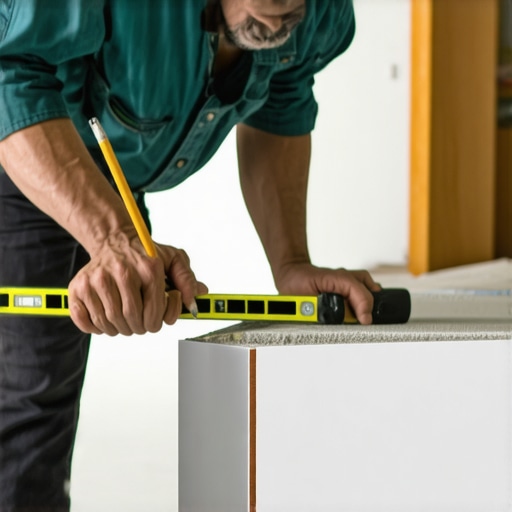
Drive a Screw to Neutralize the Flare
In extreme cases, I don’t just use nails. I’ll use a trim screw right at the bottom where the flare is most aggressive. By driving that screw into the bottom plate of the wall, you can pull the baseboard in just enough to square it up without cracking the wood. Just be careful not to over-tighten, or you’ll create a ‘smile’ in the wood. If you are worried about the finish, remember that stop baseboard splitting with this simple pre-drilling tactic is a lifesaver when using screws near the ends of a board.
Use Shims to Create the Perfect Illusion
This is where the magic happens. Instead of forcing the wood to bend—which it hates—you use the wood shim secret to fill the void behind the trim. If there is a gap between the back of the baseboard and the wall stud because of a bowed wall, don’t just nail it and hope the caulk covers it. Slide a cedar shim down from the top until it’s snug. Nail through the trim and the shim into the stud. Then, score the shim with a utility knife and snap it off. Now your baseboard is perfectly straight, and the wall ‘follows’ the trim, rather than the trim following a crooked wall.
Master the Back-Bevel for Tighter Corners
When floors are uneven, your inside corners will rarely be a perfect 90 degrees. If you cut them at a standard 45, you’ll have a gap at the top or bottom. I always use the back-bevel secret for inside baseboard corners. By cutting the miter at a slight inward angle, the front edges of the wood meet first, creating a seamless look even if the wall is leaning. This is especially critical if you are aiming for a flawless finish where the carpet meets the wood. If your paint starts failing later, it’s usually due to movement, so check why your baseboard paint is peeling off at the bottom to ensure your moisture barrier is intact.
Establishing a straight line with shims is only half the battle. If you want to move from intermediate to expert, you have to understand the physics of movement. Most DIYers believe that a baseboard should be pinned as tightly as possible against the flooring surface to eliminate any visible line. In my experience, this is the quickest way to cause a mechanical failure in your trim. When you jam a baseboard down onto a floating floor, you are essentially creating a clamp. As the seasons change and humidity fluctuates, that floor needs to expand and contract. If your trim is holding it hostage, the floor will buckle, or it will pull the baseboard right off the wall.
Stop Smashing Your Trim Against the Subfloor
The standard advice is always ‘no gaps,’ but pros know that a micro-gap is your best friend. For laminate or LVP, I use a thin spacer—sometimes just the thickness of a business card—to keep the trim from actually touching the floor. This prevents the friction that leads to that annoying clicking sound when you walk near the walls. If you’ve ever wondered why your vinyl plank floors are making a clicking sound, check if your baseboards are pinned too tight. It’s a common flooring installation mistake that even some seasoned contractors overlook because they are too focused on the visual at the expense of the structural.
Does your floating floor have the room it needs to expand?
This is the question that separates the amateurs from the E-E-A-T experts. The National Wood Flooring Association (NWFA) explicitly states that the perimeter expansion gap is the most critical component of a successful wood floor. If you ignore the expansion gap rule for heavy kitchen islands on laminate and then pin the rest of the room’s perimeter with heavy-duty baseboards and no breathing room, you are asking for trouble. When summer humidity hits, you will see why your hardwood floors are crowning. The wood has nowhere to go but up.
The Dangerous Allure of the Knee Kicker
If you are transitioning from hard surfaces to carpet, the baseboard height becomes even more nuanced. I see people all the time install their baseboards too low, thinking the carpet will just ‘tuck under.’ But if the trim is too low, the carpet installer can’t get the proper bite on the tack strip. This leads to the knee kicker mistake that ruins luxury carpets, where the installer over-stretches the material trying to force it into a gap that is too small. For a flawless finish, you should use the power stretcher rule for large living room carpets and ensure your baseboard is raised exactly 3/8 of an inch off the subfloor.
Don’t Turn Your Project into a Plumbing Nightmare
Here is the ‘oops’ factor that haunts my dreams: the hidden water pipe. In many modern builds, PEX tubing or copper lines run through the wall studs at the exact height of your baseboard. If you are using a 16-gauge nailer and 2.5-inch nails to reach through the drywall and into the studs, you are playing Russian roulette with your plumbing. I once saw a homeowner finish a beautiful room only to wake up to a flooded basement because one ‘perfect’ nail hit a manifold. Learning how to fix a baseboard nail that hit a water pipe immediately is a skill you hope you never need, but you should always use a stud finder or the magnet hack for finding wall studs to know exactly where the metal plates are protecting those pipes. Have you ever accidentally ‘plumbed’ your trim with a brad nail? Let me know your horror stories in the comments!
Even the most visually stunning project can turn into a nightmare within six months if you don’t respect the physics of your home. After surviving the ‘nail-the-pipe’ roulette, I realized that true expertise isn’t just about the initial flooring installation; it is about how that work behaves five years down the line. To keep everything looking pristine, you need to transition from the ‘build’ mindset to the ‘maintenance’ mindset. I always tell my clients that the best time to think about maintenance is before the first piece of trim is even cut.
Stop your shower from leaking before the mold takes over
Waterproofing is an invisible art. While many focus on the tile, the real hero is the liquid membrane underneath. According to the TCNA (Tile Council of North America) Handbook, the integrity of your shower depends on the proper application of these barriers at the transition points. I have seen countless DIYers skip the corners, only to find out why your shower niche keeps leaking through the bathroom wall later. To prevent this, I always use the masking tape trick for clean silicone joints which ensures a watertight seal that doesn’t look like a toddler applied it. If you catch a gap early, you can stop shower mold where the tile meets the tub with a quick silicone refresh before it becomes a structural issue.
The three tools I will never leave in the truck
People ask me all the time what ‘magic’ tool makes my baseboards look so much better than theirs. It isn’t magic; it is a 23-gauge pin nailer. Standard 16-gauge nails leave holes that require wood filler and sanding, which often leaves a ghosting effect under the paint. A 23-gauge pin is nearly invisible. For those impossible walls that look like a roller coaster, I rely on the scribe tool trick for baseboards against stone walls to trace the floor’s imperfections onto the wood. If you find your hardwood looking a bit dull after the chaos of a remodel, don’t jump to the sander; try the no-sanding fix for scuffed hardwood floor finishes to bring the life back into the grain. 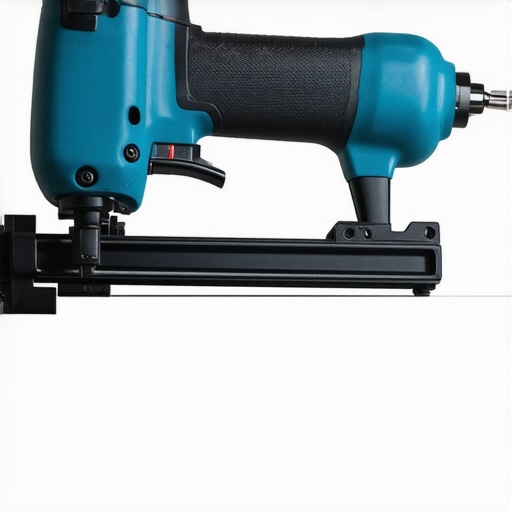
How do I maintain my flooring surfaces over time?
Maintenance is about regular micro-interventions. For carpet, that means more than just vacuuming. You need to use the vacuum seal trick for cleaning dust and debris that can act like sandpaper on your fibers. If you start to see ripples after a heavy furniture move, don’t panic—learning how to fix a bubbling carpet without calling a professional can save you hundreds in service fees. I predict that the future of this industry lies in ‘smart’ materials that can signal moisture via embedded sensors, but for now, your best sensor is a vigilant eye. I want you to try this right now: go to your shower or your baseboards and check the corners for any hairline cracks in the caulk. Fixing those tiny gaps today with a high-quality sealant is the single best thing you can do for the longevity of your home.
The Hard Lessons My First Crooked Wall Taught Me
Over the years, I have realized that the biggest mistake is aiming for absolute perfection in an imperfect environment. Houses are organic; they breathe and shift. I used to lose sleep over a 1/16th-inch gap, but now I know that shadow management is often more important than tight joinery. If you can control where the light hits your baseboard styles, you can hide almost any floor dip. I also learned that tension is the enemy. If you have to fight the wood to get it against the wall, the wood will eventually win and pull your nails out. Using the scribe tool trick for baseboards against stone walls or wavy floors isn’t just about looks; it’s about relieving the stress on the fasteners so your work stays put for decades.
Gear That Makes You Look Like a Pro Contractor
You don’t need a warehouse of tools, but you do need these three essentials for a flawless finish. First, a high-quality 23-gauge pin nailer is non-negotiable for delicate trim because it leaves holes that are virtually invisible after paint. Second, a digital protractor will save you from the math-induced headaches of out-of-square corners. Finally, I always recommend keeping a copy of The Visual Handbook of Building and Remodeling nearby to understand how your walls are actually put together. When you understand the ‘why’ behind the build, you will know exactly how to execute a flooring installation that doesn’t just look good but truly lasts. #IMAGE_PLACEHOLDER_E#
Your Home Deserves a Masterpiece Finish
Don’t let the fear of a crooked wall or a dipping floor keep you from starting your next renovation. Every pro you see today started with a box of shims and a lot of questions. By respecting the expansion gaps and learning how to fix a bubbling carpet without calling a professional, you are already ahead of most DIYers. You have the knowledge now to turn a ‘gap-tastrophe’ into a masterpiece. Your flooring installation is the foundation of your home’s aesthetic, so take it one board at a time. Have you ever encountered a floor so uneven you thought about just giving up? Let me know your stories in the comments below!