

I stood there with a cold beer in my hand, admiring my Saturday’s work, when the 4 PM sun hit the kitchen floor at just the right angle. My heart sank. What looked like a pristine, oak-textured surface an hour ago now resembled a topographical map of the Swiss Alps. Every tiny grain of sand I’d missed, every slightly high subfloor seam, and a rogue staple I’d forgotten to pull were all staring back at me through the “luxury” vinyl. I had fallen victim to the dreaded “telegraphing,” and let me tell you, it is a punch to the gut after you have spent hours on your knees. [IMAGE_PLACEHOLDER]
The Stealthy Saboteur Hiding Under Your Planks
Most people think that because vinyl is flexible and durable, it will act like a thick rug and just mask whatever is underneath. I made that exact same mistake early on. I figured a 1/8-inch dip wasn’t a big deal—until the clicking sound started every time I walked toward the fridge. If you do not want to end up like me, ripping up three rows of planks to find a single pebble, you need to realize that vinyl has a “memory.” It eventually settles into every nook and cranny of your substrate. Whether you are avoiding common flooring installation mistakes or trying to save a weekend project, the truth is that the floor you see is only as good as the subfloor you don’t. This is why pros insist on the self-leveler move before even opening a box of planks. We are going to talk about why this happens and how to prep your space so it stays as flat as a pool table.
Is Luxury Vinyl Actually Too Thin for Real Homes?
You might be wondering if you just bought the wrong product. But even the high-end stuff with the thickest wear layers cannot hide a poorly prepared subfloor. In fact, according to the Resilient Floor Covering Institute (RFCI), nearly 90% of resilient flooring failures are caused by improper subfloor preparation rather than the product itself. It is not the plank’s fault; it is the foundation’s. Before you start clicking planks together, have you ever noticed a weird bump or a dip in your floor that only shows up when the light hits it just right? Drop a comment or reach out—I have seen them all, and usually, it’s a fixable prep error. Sometimes it is a moisture issue, which is why we never skip the subfloor moisture test on concrete before proceeding. Let’s dive into the specifics of how to flatten that subfloor for good.
Get Every Single Grain of Dust Out
You might think your shop vac did the job, but vinyl is like a high-resolution camera for dirt; it captures everything. I once spent three days on a kitchen install only to realize a single dried bead of wood glue from the previous cabinet install was creating a literal mountain in the middle of the floor. It felt like a small pimple, but under the light, it looked like a crater. Now, I use a long-handled scraper to physically shave the subfloor before I even think about the vacuum. If you are dealing with an old renovation, you might even need the vacuum seal trick for cleaning dust out of floor grooves to ensure the substrate is surgical-grade clean. Any debris left behind will eventually lead to why your vinyl plank floors are making a clicking sound as the plank rubs against the grit every time you step on it.
Find the Hidden Dips Before They Find You
The industry standard for flatness is usually a 3/16-inch variance over 10 feet. To the naked eye, a 10-foot stretch of plywood looks flat. To a 6-foot level, it looks like a roller coaster. I take my longest level and sweep it across the room like a compass needle. Any gap where I can slide more than two quarters under the level needs attention. If you ignore these, you will experience that sinking feeling where why your laminate floor feels soft when you walk, and vinyl is even more sensitive. 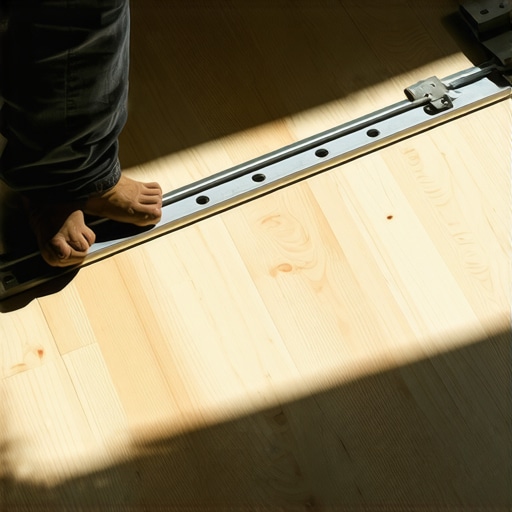 I remember a job in a sunroom where the slab had a subtle ‘bowl’ in the center. I thought the underlayment would cushion it. Two months later, the homeowner called because the short ends of the planks were popping up like see-saws. That was the day I realized that the self-leveler move isn’t an optional luxury; it is the insurance policy for the entire project.
Flatten the Peaks and Fill the Valleys
Once you’ve identified the trouble spots, you have to be aggressive. For wood subfloors, this means a belt sander for the high seams and a high-quality floor patch for the lows. Do not use drywall mud or generic wood filler; they will crumble under the constant flexing of foot traffic. If you find a massive hole from a relocated pipe, you need to know how to patch a hole in the subfloor properly so the vinyl has a solid bridge to rest on. For concrete, if the dips are widespread, pouring a self-leveling compound is your best friend. Just be careful, because why your self-leveling compound is cracking is usually due to skipping the primer. Once the floor is flat, you’ll find that using the block and hammer move for tight vinyl floor joints becomes ten times easier because the planks aren’t fighting the gravity of a slope. If your floor still feels slightly off near the edges, you might need the wood shim secret for baseboards on uneven slabs to hide the remaining sins of the subfloor where the wall meets the ground.
Don’t Let the “Floating” Label Fool You
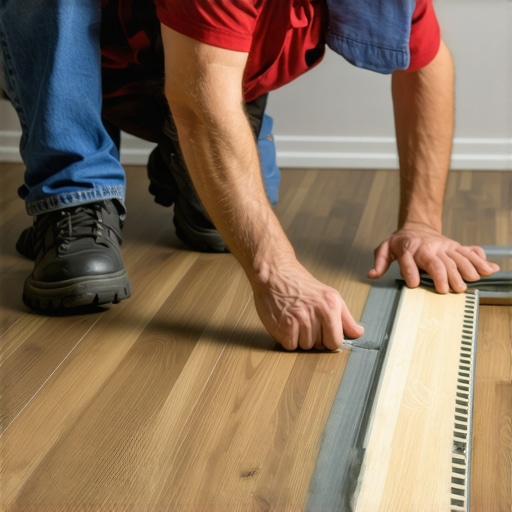
The biggest myth I see in DIY forums is that floating floors are “easy” because they aren’t nailed down. In my experience, floating floors are actually more temperamental than glue-down or nail-down options. Because the entire floor moves as a single unit, any friction point—like a heavy kitchen island or a door casing that is too tight—will cause the whole system to fail. I have seen beautiful planks buckle in the center because someone ignored the expansion gap rule for heavy kitchen islands on laminate. Most people think they can just build the cabinets on top of the floor to save time, but that pins the floor in place, leading to peaked seams when the humidity changes. If you are aiming for a professional finish, you have to treat the floor like a living, breathing entity that needs room to grow.
The Counter-Intuitive Truth About Thinset Coverage
When it comes to showers, there is a common belief that more glue is always better. This is a dangerous trap. If you just glob on thinset without proper trowel technique, you create air pockets that trap moisture, leading to mold or tiles that pop off in six months. The Tile Council of North America (TCNA) mandates at least 95% thinset coverage in wet areas, which is nearly impossible to achieve if you are making the trowel size mistake that ruins your shower tile bond. You need those ridges to be collapsed into a solid bed. It’s a nuance that separates a weekend warrior from a master installer. I’ve seen gorgeous marble showers ruined because the installer didn’t realize that the ridges weren’t fully compressed, leaving “channels” for water to travel behind the stone.
Why Does Your Vinyl Floor Gap at the Short Ends Every Winter?
This is a question I get constantly from homeowners who did everything “by the book.” They acclimatized the planks, they cleaned the subfloor, yet they still see why your vinyl plank floor is gapping at the short ends as soon as the heater kicks on. The nuance here is often the locking mechanism itself. If you aren’t using the stay-sharp blade rule for cutting luxury vinyl, you can actually create microscopic burrs on the edges of the planks. These burrs prevent the tongue and groove from seating 100% correctly. It might look closed when you tap it in, but the first sign of thermal contraction pulls those weak joints apart. Have you ever fallen into this trap? Let me know in the comments, because it happened to me on a massive living room project before I realized my utility blades were dulling faster than I thought.
The Trim Mistakes That Scream Amateur
Even if your floor is perfectly flat, your baseboards can betray you. I used to just butt two pieces of trim together and hope for the best, but wood shrinks. If you aren’t using the double-butt method for fixing wide baseboard gaps, you will eventually see a dark line where the two boards meet. Furthermore, if you want those crisp 90-degree angles on the outside, you need to master the back-cut secret for tight baseboard outside corners. It’s these small, technical details—the things most people ignore—that determine whether your remodel looks like a DIY project or a high-end renovation. Always remember: the floor is the stage, but the trim is the frame. If the frame is crooked, the whole picture looks off.
I’ve learned the hard way that the difference between a floor that lasts twenty years and one that fails in two is often found in the toolbox. When I’m tackling a carpet job, I never rely on just a knee kicker; that’s a recipe for back pain and loose fabric. If you want to avoid those ugly wrinkles that appear after a year, you have to follow the power stretcher rule for large living room carpets. It’s a beast of a tool that uses massive leverage to pull the carpet taut against the tack strips, but it’s the only way to get the tension right. For hard surfaces like vinyl or wood, it’s actually about what you use *after* the install is done. I’m a huge advocate for moving away from those cheap rubber casters on office chairs. In my experience, why we prefer felt pads over rubber for luxury vinyl is all about preventing the chemical reaction known as plasticizer migration, which can permanently stain and yellow your new planks. 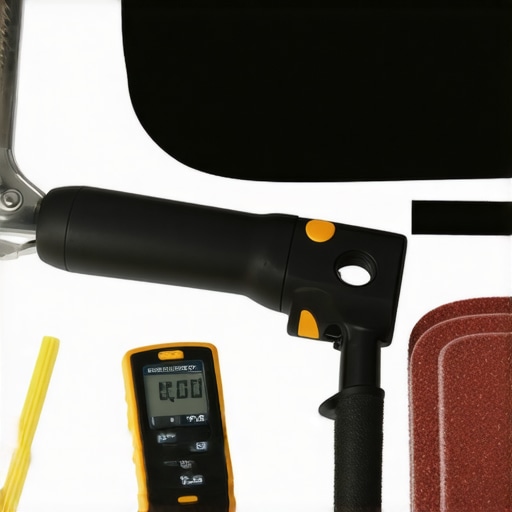
Invest in the Right Gear Early
If you’re serious about DIY or professional remodeling, grab a professional-grade pinless moisture meter. The National Wood Flooring Association (NWFA) specifically notes in their technical guidelines that interior humidity should stay between 30% and 50% to prevent ‘crowning’ or ‘cupping.’ Without a meter, you’re just guessing why why your hardwood floors are crowning in the summer. If you do find a stray ding after moving furniture, don’t panic—I’ve saved many projects using the iron and towel trick for dented hardwood planks. This method uses steam to swell the wood fibers back into place, and while it takes patience, it’s a lifesaver.
Stop the Scratches Before They Happen
Long-term maintenance isn’t just about cleaning; it’s about proactive monitoring. In a shower, the biggest threat is hidden movement. If you notice why your shower grout is crumbling just months after install, it’s usually because the house is settling or the subfloor was too weak to support the weight of the tile. I’ve found that using high-quality color-matched silicone in the change-of-plane corners is the real pro move, which is how we fixed the grout crack in the shower corner for good. Also, if you’ve opted for the luxury of natural stone, you must know how to seal a marble shower without changing the color to keep it from absorbing oils and soaps. Looking ahead, I suspect we will see more moisture-sensing underlayment systems that alert your phone to a leak before it ruins your ceiling.
How do I keep my new floor looking brand new?
The secret is consistent humidity and immediate response to spills. If you have radiant floor heating, keep an eye on the temperature settings because why your radiant floor heating is causing your tiles to crack is almost always due to rapid temperature spikes that stress the thinset. My best advice? Go swap out every single rubber chair leg cap in your house for high-density felt today—it’s a ten-minute job that will save you from a thousand-dollar refinishing bill later.
The Hard Truths My Sore Knees Taught Me
After years of fixing my own beginner mistakes, I have realized that flooring installation is ten percent laying planks and ninety percent managing what you cannot see. Here are the lightbulb moments that changed my approach: First, never trust your eyes from a standing position; place a work light on the floor to cast shadows on every tiny bump. Second, trust the leveler rather than the patch; learning why your self-leveling compound is cracking usually points back to skipping primer. Third, expansion is non-negotiable; I once pinned a floor under a heavy island and watched it buckle because I ignored the expansion gap rule for heavy kitchen islands on laminate. Finally, remember the one-grain principle: a single piece of grit under a luxury vinyl plank will eventually telegraph through, so vacuum twice and then vacuum again.
My Non-Negotiable Kit for a Professional Finish
If you want to move beyond basic results, you need tools that tell the truth about your subfloor. These are the items I never leave the shop without: [IMAGE_PLACEHOLDER] A pinless moisture meter is the only way to ensure your slab is ready; if you skip this, you will eventually wonder why your hardwood floors are crowning in the summer. I also swear by a 6-foot magnesium level to span the valleys in your subfloor and high-density felt pads for every furniture leg; I explain why we prefer felt pads over rubber for luxury vinyl to every client to protect their investment from chemical staining. For wet areas, avoid the trowel size mistake that ruins your shower tile bond by matching your notch size perfectly to the tile you are using.
Step Into Your New Space With Confidence
There is a specific kind of pride that comes from walking across a floor you laid yourself, knowing it is perfectly flat and built to last. Whether you are following a step-by-step flooring installation guide or tackling a complex bathroom project, remember that the slow parts of the job are actually the fastest way to a finished project. Don’t be afraid to pull up a plank if it does not feel right. The effort you put into the subfloor today is what makes your home feel like a luxury retreat for years to come. Your future self and your feet will thank you for the extra attention to detail. What is the weirdest thing you have ever found hiding under an old floor during a renovation? Let me know in the comments below!