

I’ll never forget the pride I felt after laying down my first ‘professional’ laminate floor in my guest bedroom. It looked gorgeous, the wood grain caught the light perfectly, and I was ready to celebrate. But as soon as I took that first step into the center of the room, my heart sank. Squish. It felt like I was walking on a stack of yoga mats rather than a solid floor. If you are dealing with that weird, springy movement right now, I know exactly how much it’s eating at you. You spent the money and the weekend on what was supposed to be a durable flooring installation, and now it feels like a trampoline. Let’s talk about why that happens and how we can get that rock-solid feel back under your feet.
Your Floor Shouldn’t Feel Like a Sponge
Softness in a floating floor is almost never a problem with the planks themselves; it’s usually about the invisible air pockets between the floor and the subfloor. When I was starting out, I made the classic mistake of thinking a thicker underlayment would hide a bumpy subfloor. I was so wrong. In fact, using a pad that’s too thick or too soft is one of those flooring installation mistakes to avoid because it actually encourages the joints to flex and eventually snap. You might even notice that your laminate floor is making a popping sound as those locking mechanisms struggle against the vertical movement. We need to identify if the issue is a dip in the wood, a lack of the penny gap rule causing the floor to bind, or something deeper.
Is a Bouncy Floor a Sign of Structural Failure?
I used to stay up at night wondering if my joists were rotting every time I felt a dip. While that’s a scary thought, the reality is usually much more mundane—though still annoying. Early in my career, I skipped the level check on a plywood subfloor, thinking the laminate would ‘bridge’ the gaps. It didn’t. Now, I always check how to stiffen the joists or use a compound to fill the low spots first. Have you ever felt that terrifying ‘sink’ right in the middle of a doorway? I’d love to know where your floor feels the softest—shoot me a message through my contact page. It’s worth noting that the North American Laminate Flooring Association (NALFA) emphasizes that subfloors must be flat within 3/16 of an inch over a 10-foot radius. Anything more, and you’re basically asking your floor to act as a bridge, which it wasn’t designed to do. Before we rip anything up, let’s look at the most common culprits for that mushy sensation. [image_placeholder]
Level the Playing Field Before the Planks Go Down
You can’t build a stable house on a swamp, and you can’t get a solid step-by-step flooring installation on a wavy subfloor. The very first thing I do now—before even opening the boxes—is take an 8-foot level or a perfectly straight board and sweep it across the room. If you see light under that level, you’ve found the culprit for your trampoline effect. I remember a job in a narrow hallway where I thought I could cheat the system. There was a 1/2-inch dip right in front of the linen closet. I figured a double layer of foam padding would act like a cushion. Within three days, every time the homeowner walked to get a towel, it sounded like a bag of potato chips being crushed. I had to go back, pull up the boards, and do it the right way.
Fill Those Low Spots with Precision
If you find a dip deeper than 3/16 of an inch, you need to use a floor patch or leveler. This is where the self-leveler move for perfectly flat vinyl installs applies to laminate too. You want a product that flows like heavy cream to fill the valley. However, be careful with the mix; if you add too much water, you’ll end up wondering why your self-leveling compound is cracking before you even get the first row down. Think of the leveler as a liquid shim. Once it hardens, your floor isn’t bridging a gap anymore; it’s resting on a rock-solid foundation.#IMAGE_PLACE_HOLDER_B#
Keep the Perimeter Loose and Lively
Sometimes the bounce isn’t because the floor is too low, but because it’s too tight. Laminate needs to breathe. If you didn’t follow the penny gap rule for installing laminate near drywall, the entire floor might be tenting. Imagine a piece of paper lying on a table. If you push the edges toward the center, the middle pops up. That’s exactly what your floor does when it hits a wall or a heavy cabinet. This is why the expansion gap rule for heavy kitchen islands on laminate is so critical. If the floor is locked in place, that vertical tension turns into a springy bounce.
Listen for the Snap and Lock
When you’re actually putting the boards together, every joint must be fully seated. I’ve seen DIYers leave a tiny 1mm gap in the tongue-and-groove. It doesn’t look like much, but it allows the boards to move independently. I always use the block and hammer move for tight vinyl floor joints to ensure that click is permanent. If you realize a board is loose after the fact, you might need to learn how to remove a single damaged floor board to fix the connection without dismantling the whole room. Tight joints equal a monolithic surface that moves as one, rather than a series of individual diving boards.
A lot of pros will tell you that the harder you stretch a carpet, the better it stays. I used to be one of them. But there’s a fine line between a tight fit and structural damage to the backing. I’ve seen too many DIYers—and even some ‘seasoned’ installers—rely solely on a knee kicker for a whole room. That is a massive mistake. The Carpet and Rug Institute (CRI) 105 Standard explicitly states that power stretching is mandatory for all residential carpet installations to prevent wrinkles and delamination. If you’re skipping the power stretcher rule for large living room carpets, you’re basically guaranteeing a wavy floor in three years. In my experience, the knee kicker mistake that ruins luxury carpets is the number one cause of premature wear I see in local homes. Have you ever fallen into this trap where you thought ‘good enough’ was actually good? Let me know in the comments.
Stop Fighting Your Walls When Installing Baseboards
People often assume that if their baseboards don’t sit flush, it’s because the wood is warped. Usually, it’s because your drywall has a ‘taper’ at the bottom where the tape and mud build up. If you try to force the trim flat, you’ll end up with a gap at the top. I learned the hard way that why your baseboards look crooked on perfectly level floors often has more to do with the wall’s belly than the floor’s level. To get those corners tight, I stopped relying on simple 45-degree cuts. Now, I swear by the back-cut secret for tight baseboard outside corners. It allows the front edge of the miter to touch first, creating a seamless joint even if the wall is slightly out of square. It’s these tiny details that separate a ‘weekend project’ from a high-end baseboard makeover that elevates your interior.
#IMAGE_PLACE_HOLDER_C#
Can Moisture Trapped in Your Slab Snap Your Locking Joints Months Later?
This is the nightmare scenario most people ignore until it’s too late. You can have the flattest floor in the world, but if you didn’t check for vapor emission, your laminate or vinyl is on a timer. I once installed a beautiful wide-plank floor in a basement that felt rock solid. Six months later, the joints started peaking and snapping. Why? Hydrostatic pressure was building up under the planks. This is why we never skip the subfloor moisture test on concrete. Even if the slab looks dry, it’s a porous sponge. If you’re working on a budget, carpet install secrets often involve using a proper moisture-rated pad, but for hard surfaces, a 6-mil poly film is your best friend. Don’t let a $50 roll of plastic be the reason your $5,000 floor fails. If you’re currently planning a remodel and aren’t sure which material handles moisture best, check out my guide on top trends in installation for 2025 for the latest waterproof tech.
Grab an Oscillating Multi-Tool for Seamless Doorway Transitions
If I had to pick one tool that saved my sanity during a step-by-step flooring installation, it is the oscillating multi-tool. I remember the days when I tried to use a manual pull saw to notch out door casings—it was a recipe for blistered hands and jagged wood. Now, I use the under-cut move for fitting flooring perfectly under door casings to create a professional look. This tool allows the new planks to slide right under the trim, hiding the expansion gap and making the floor look like it was built with the house. However, don’t skimp on the accessories. When you are working with tough materials, you must follow the stay-sharp blade rule for cutting luxury vinyl. A dull blade generates heat, which can melt the edge of your vinyl and ruin the click-lock system before you even get the board in place. Invest in carbide-tipped blades; they might cost double, but they last ten times longer. 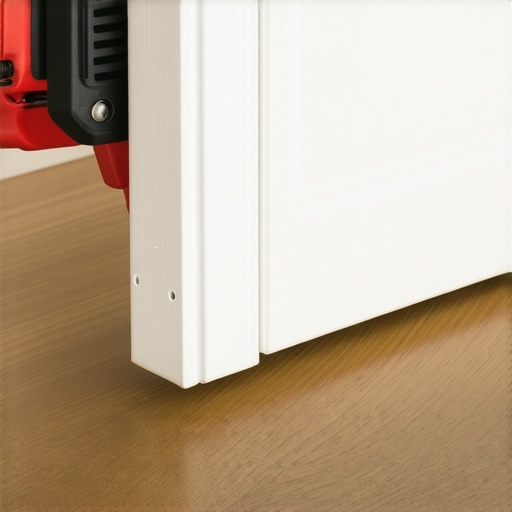
Stop Shower Mold Before the First Drop Hits the Tile
Maintenance starts the second the grout is dry. In my early days, I assumed grout was naturally waterproof. It isn’t. Grout is essentially a hard sponge. If you have opted for a high-end look, you need to know how to seal a marble shower without changing the color. I personally use a high-grade penetrating sealer because it coats the pores of the grout and stone without leaving that cheap, plastic-looking shine. This is the difference between a bathroom that looks new for five months and one that looks new for five years. According to the National Wood Flooring Association (NWFA) Technical Publication No. A100, the moisture content of the subfloor should be within a 2-4% margin of the flooring material itself to prevent long-term failure. The same logic applies to your bathroom; moisture management is everything. Understanding shower repairs: when to fix vs replace for longevity can save you thousands. If you see a crack in the corner grout, don’t just smear more grout over it; that is a sign of movement, and you likely need a high-flex silicone to bridge that gap permanently.
How do I maintain my floors and showers for the next ten years?
The secret to a durable flooring installation is consistent, low-impact cleaning. For hard surfaces, throw away the steam mop. I have seen more laminate floors destroyed by steam—which forces moisture into the joints—than by actual foot traffic. For those of you who just finished a carpet install, the maintenance is different but just as strict. If you chose the perfect carpet for a cozy living space, you must vacuum it at least twice a week with a CRI-approved vacuum. This prevents grit from settling into the backing and acting like sandpaper on the fibers. When it comes to the finishing touches, I always tell people that the scale matters. If you have tall rooms, you need to know how to choose baseboard heights for high ceilings to ensure the room feels balanced. In the next few years, I predict we will see smart moisture sensors integrated directly into underlayments that sync with your phone, alerting you to subfloor dampness before it ever reaches your planks. My challenge to you: before your next project, go buy a high-quality carbide blade for your multi-tool—it is a total game-changer for those door casings.
Hard Truths I Had to Learn the Expensive Way
In my two decades of swinging a hammer, I’ve realized that 90% of a flooring failure happens before the first plank is even unboxed. One of my biggest lightbulb moments was realizing that floating floors aren’t actually meant to float over messes; they need a flat, stable stage. If you ignore the subfloor, you’re basically building on a trampoline. I’ve also learned that moisture is a silent killer. Even if a slab feels bone-dry to the touch, it can still ruin a durable flooring installation from the inside out. Lastly, never underestimate the power of the right transition. If you’ve ever wondered how to fix a loose carpet transition that trips everyone, you know that the small details are what keep a family safe and a floor looking professional.
The Unsung Heroes in My Tool Bag
If you want to move beyond DIY-looking results, you need the right gear. I never step onto a job site without a high-quality moisture meter—it’s the only way to be sure about your concrete. For anyone tackling a bedroom or living room, knowing the best carpet types for high traffic areas in 2025 is only half the battle; you need a power stretcher to make it last. I also highly recommend keeping a dead blow hammer for those stubborn vinyl joints to avoid damaging the locking mechanisms. If you’re dealing with an existing floor that sounds off, check out my tips on how to fix a hollow sound under your vinyl plank floor to save yourself a full teardown. These tools aren’t just luxuries; they are insurance for your investment.
Build a Foundation You Can Actually Trust
Your home is your sanctuary, and it deserves more than a springy, popping floor that makes you wince with every step. Whether you are aiming for a spa-like shower experience or just want your hallway to stop shifting, the secret is in the patience of the prep work. Take the time to level those dips, test for moisture, and leave those expansion gaps. When you do it right, you won’t just have a new surface; you’ll have peace of mind. As you finish up the edges, don’t forget to look at the latest baseboard trends in 2025 to give your hard work the frame it deserves. You’ve got the knowledge now—go make that floor solid.
Have you ever encountered a subfloor dip that seemed impossible to level? Let me know your biggest flooring headache in the comments below!