

I’ll never forget the afternoon my sister-in-law nearly took a header down my front hallway. I had just finished what I thought was a ‘genius’ DIY job on our basement stairs, using leftover luxury vinyl planks and a whole lot of prayer. I didn’t use a proper transition; I just glued the planks down and hoped the adhesive would hold the edge. Fast forward two weeks, and that edge—the ‘nose’ of the step—snapped right off under her heel. It was a classic example of flooring installation mistakes to avoid if you actually want your house to stay in one piece. That terrifying ‘crack’ sound was my wake-up call. I realized that stairs aren’t just flat floors that happen to be vertical; they are high-stress zones that require a specific structural secret. Today, I’m going to show you exactly how to avoid my embarrassment and build stairs that can handle a stampede of kids and pets without budging an inch.
Stairs Aren’t Just Floors at Different Heights
Most folks think they can treat a staircase like any other room, but that’s how you end up with vinyl plank floors that click and pop every time you climb them. When I first started out, I made the huge mistake of assuming standard flooring glue could fight gravity and the sheer force of a human foot landing on a 1-inch edge. I was wrong. According to the Resilient Floor Covering Institute, stair treads endure significantly more localized pressure than any other part of your home’s flooring, making the ‘nose’ the most vulnerable point of failure. If you don’t get this right, you’re not just looking at an ugly gap; you’re looking at a trip hazard that will keep you up at night. This is especially true if you are working with durable flooring installation for a stylish home where the aesthetics often hide poor structural choices.
Does a dedicated stair-nose actually make a difference?
You might be looking at the price tag of those specialized trim pieces and wondering if you can just ‘wing it’ with a heat gun or some caulk. I’ve been there, and I’ve tried the heat gun trick to bend planks over edges, but let me tell you: it never ends well. A true stair-nose is the anchor for the entire tread. It locks the vertical riser and the horizontal tread together, creating a unified structure that won’t shift. Without it, you’re basically building a house of cards. Have you ever noticed a loose plank on your stairs and just tried to kick it back into place, only for it to slide out again the next day? That’s exactly what we’re going to fix. We’ll look at why the right stair-nose tactic is the only way to go for vinyl, even if it feels like an extra step during the planning phase. By the time we’re done, your stairs won’t just look like a million bucks—they’ll feel like concrete.
Get the Foundation Flat or Fail Fast
Before you even touch a piece of vinyl, you need to treat your subfloor like a surgical table. If there’s even a tiny 1/8-inch dip, your plank will flex every time you step on it. This constant movement is what leads to those flooring installation mistakes to avoid that I mentioned earlier. Think of your subfloor like the chassis of a car; if it’s warped, the whole ride is going to be bumpy and eventually break down. I once worked on a 1920s farmhouse where the stairs were so worn they looked like the letter ‘U’. I thought I could just fill the gap with a thick bead of construction adhesive. Two days later, the owner called because the stairs sounded like a haunted house. I had to rip it all up and use a self-leveler move for perfectly flat vinyl installs to actually create a stable base. Lesson learned: glue isn’t a filler; it’s a bond.
Why your subfloor is lying to you
You might look at a wooden tread and think it’s ‘flat enough,’ but wood breathes and shifts. If you are installing over concrete, you absolutely must check for moisture. I always recommend the moisture barrier move even on stairs if they touch an exterior wall or a damp basement. If you ignore this, the adhesive will emulsify and your beautiful planks will literally slide right off the riser. Use a straight edge to find the low spots. If you find a valley, you need to level a subfloor dip without removing the old subfloor by using a high-compressive strength patch. It’s a ten-minute fix that saves a decade of headaches.
The Proper Sequence for a Solid Step
The order in which you stack your materials is the difference between a pro job and a DIY disaster. You always want to install your risers—the vertical parts—first. This allows the horizontal tread to butt up against the riser above it and sit flush on the one below. It’s like building a puzzle where every piece locks the previous one in place. If you do the treads first, you leave a gap at the back that is nearly impossible to hide without a ton of caulk, and we all know caulk is just a magnet for dog hair and dust.
Glue is the Only Thing Standing Between You and a Lawsuit
Standard flooring adhesive is great for a bedroom, but for stairs, you need the heavy-duty stuff. I use a high-tack, urethane-based adhesive that essentially turns the vinyl and the wood into a single piece of stone. When you apply it, don’t just ‘dot’ it. Use a notched trowel to get 100% coverage. This prevents air pockets, which are the primary cause of that annoying clicking sound. If you’re worried about your cuts being jagged, remember the stay-sharp blade rule for cutting luxury vinyl. A dull blade will tear the wear layer, and on a stair edge, that tear will eventually catch on a sock and peel the whole finish back. Finally, once that tread is down, the stair-nose goes on last. This piece acts as the ‘lock.’ Use a combination of adhesive and a few discrete pin nails—I swear by the pin nail secret here to hold it while the glue cures. This ensures that even if someone ‘heels’ the edge like my sister-in-law did, the force is distributed across the entire tread rather than just snapping the lip.
Let’s dig deeper into the ‘waterproof’ myth that is currently sweeping the home improvement world. This is perhaps the biggest trap in the industry right now: homeowners believe that because they bought 100% waterproof luxury vinyl, they are immune to moisture damage. This is a dangerous misconception. While the plank itself won’t swell, water can still seep through the seams or sit trapped underneath the floor. According to the Tile Council of North America (TCNA), sub-surface moisture is the primary driver of structural rot and mold, regardless of the finish material. This is precisely why we never skip the subfloor moisture test on concrete, even when the box says ‘waterproof.’ If you trap moisture under a non-breathable surface, you’re basically building a greenhouse for mold. Have you ever fallen into this trap of thinking the material was more important than the prep? Let me know in the comments.
Can a heavy kitchen island actually pull your floor apart?
Most DIYers treat a floating floor like it’s invincible, but physics always wins. If you install a massive, 500-pound kitchen island directly on top of a floating floor, you are essentially pinning it to the subfloor. As the seasons change and the humidity fluctuates, the floor needs to expand and contract. Because the island is holding it down, the floor will eventually tear itself apart at the joints or buckle. You must follow the expansion gap rule for heavy kitchen islands on laminate and vinyl by flooring around the island or using specific anchoring tactics. It’s a nuance that separates a floor that lasts twenty years from one that fails in twenty months.
Don’t let your baseboards scream ‘DIY Project’
One of the most common flooring installation mistakes to avoid happens after the planks are down. I’m talking about the baseboards. Most folks think a miter saw and some wood glue will solve everything, but walls are never perfectly straight. If you just ‘butt’ your joints together, they will inevitably open up as the house breathes. Instead of standard miters, I always recommend the coping saw technique for flawless inside baseboard corners. It allows for wall movement without showing a single gap, giving you that high-end custom look. 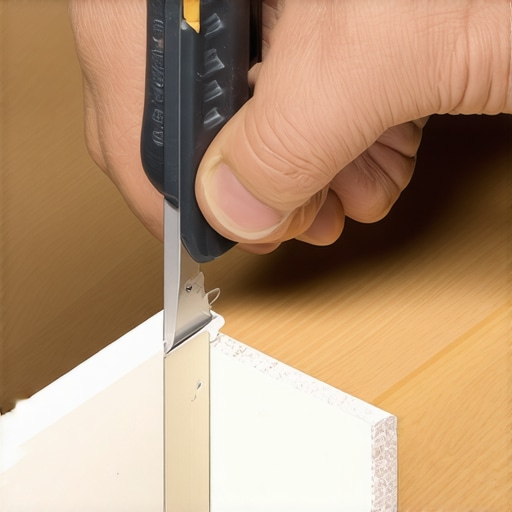
The hidden danger in your luxury shower
Finally, let’s talk about the ‘oops’ factor in bathrooms. People spend thousands on tile but pennies on the waterproof substrate. I’ve seen countless projects where the homeowner assumes a thick layer of grout will stop a leak. It won’t. Grout is naturally porous. This is why your shower curb is always the first part to fail; water gets behind the tile and rots the wooden framing from the inside out. To avoid a five-figure repair bill, you need to use the liquid membrane move for fail-proof shower pans. It creates a rubberized, monolithic bowl that stays waterproof even if the house shifts. If you’re working with a tight space, don’t forget the diagonal lay secret for making small rooms look larger to distract from any architectural quirks. Remember, a beautiful finish is only as good as the invisible layers underneath it.Even the best prep work can’t save you if you’re flying blind. I used to trust my ‘gut’ when it came to whether a subfloor was dry or a wall was level, but my gut was often wrong. Now, I never step onto a job site without a pinless moisture meter. It’s the only way to satisfy the moisture meter requirement for basement flooring jobs. According to the National Wood Flooring Association (NWFA) technical guidelines, failing to verify that the moisture content of your subfloor is within 2-4% of your flooring material is a recipe for catastrophic buckling. This isn’t just a suggestion; it is the industry standard for professionals who don’t want to come back for free repairs six months later. If you are doing a bathroom, you need to master the laser level move for perfectly horizontal shower tiles. A bubble level is fine for a picture frame, but over a six-foot shower wall, a 1/16-inch error at the bottom becomes a glaring 1/2-inch disaster at the top.
The Gear That Separates Amateurs From Pros
Beyond the heavy machinery, it’s the specialized hand tools that make the difference. For baseboards, I stopped using a standard hammer and started using a dedicated 18-gauge brad nailer with a no-mar tip. It prevents those ugly circular dents in your trim that you’d otherwise have to spend hours filling with putty. And when it comes to tile, the biggest game changer for me was a vibrating suction cup for large format planks. It collapses the ridges in the mortar, ensuring you never have to worry about how to fix a loose floor tile without a full demolition because the bond was weak from the start. 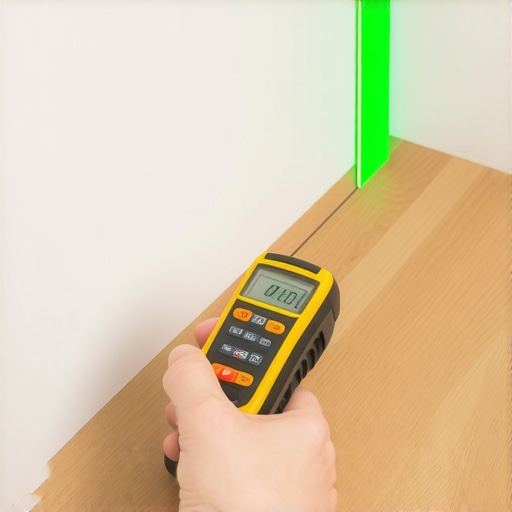
How do I keep my new floors and showers from aging overnight?
Maintenance is where most homeowners drop the ball. If you’ve just installed luxury vinyl, throw away those rubber-backed rugs immediately. I’ve seen beautiful floors ruined by chemical reactions that turn the wear layer yellow. This is why we prefer felt pads over rubber for luxury vinyl protection. For your daily routine, skip the heavy steam mops—they can force moisture into the seams of even ‘waterproof’ floors. Instead, use the vacuum seal trick for cleaning dust out of floor grooves to prevent abrasive grit from scratching the surface. If you have hardwood, you absolutely must stop hardwood scratches with the felt pad routine on every single piece of furniture, including that tiny end table you think is too light to do damage.
The Future of DIY is Laser-Guided and Digital
Looking ahead, the days of the tape measure are numbered. I’m already seeing a massive shift toward LiDAR-based smartphone apps that can map a room and calculate your square footage and waste percentage with 99% accuracy. In the next few years, I predict we will see Augmented Reality (AR) glasses that project your tile layout directly onto the floor before you even mix the thinset. This technology will make complex patterns like herringbones accessible to everyone. My best advice for your next project? Don’t wing it. Go out and buy a basic digital moisture meter today. It’s the single best $40 investment you’ll ever make to ensure your floor stays as flat as the day you laid it.
The Expensive Lessons That Changed My Approach to Remodeling
Looking back at that day with my sister-in-law, I realize that most of my early failures came from a place of overconfidence. I thought I could skip the ‘boring’ steps. If I could go back, I’d tell myself that the work you do before the floor arrives is twice as important as the floor itself. First, never ignore the tiny details; a single 18-gauge nail in the wrong spot can lead you to fix a baseboard nail that hit a water pipe immediately, which is a stress nobody needs. Second, the environmental conditions are non-negotiable. I now live by the acclimation test for avoiding hardwood floor gaps because wood and vinyl are ‘living’ materials that react to your home’s soul—its humidity and temperature. Finally, don’t be afraid to pull a plank up if it doesn’t feel right. It’s better to lose ten minutes now than to live with a clicking sound for ten years.
My Must-Have Gear for a Professional Finish
People often ask me if they really need the fancy gadgets. My answer is always: only if you want it to look professional. #IMAGE_PLACE_HOLDER_E# I never start a bathroom project without ensuring the laser level move for perfectly horizontal shower tiles is executed; it’s the difference between a spa-like retreat and a crooked mess. I also recommend keeping a high-quality coping saw and a digital moisture meter in your truck at all times. These aren’t just tools; they are your insurance policy against the most common homeowner complaints. I trust these specific items because they eliminate the guesswork and let you focus on the craft rather than the math.
Your Path to a Flawless Home Transformation
Whether you are tackling a single flight of stairs or a full-house renovation, remember that you are building more than just a surface to walk on—you are building the foundation of your daily life. Following expert flooring installation tips for 2025 ensures that your hard work survives the tests of time, kids, and pets. You have the knowledge and the strategy now; all that’s left is to pick up the tools and begin. I’ve made the mistakes so you don’t have to, so go into your next project with the confidence of a pro. Have you ever encountered a subfloor surprise that nearly ruined your project? Let me know in the comments below!