

I still remember the afternoon I stood back to admire my freshly finished living room. The paint was a perfect matte grey, and the new trim looked like something out of a magazine. But six months later, my heart sank. Every single corner looked like a spiderweb of tiny, jagged cracks. I’d spent a fortune on the perfect baseboards for my home, but I’d penny-pinched on the one thing that holds the look together: the caulk. I used a basic painter’s caulk in a high-traffic hallway that saw constant temperature swings, and the house literally pulled my hard work apart. It was a messy, frustrating lesson in why the ‘standard’ tube isn’t always your friend. Today, I’m going to save you from that same crawling-on-your-knees-twice fate by breaking down when to grab the silicone and when to stick with the acrylic. [IMAGE_PLACEHOLDER]
Why Your Baseboards Look Like a Cracked Desert After One Season
It’s easy to blame the house for ‘settling,’ but usually, the culprit is a mismatch between the sealant and the environment. Most people grab a tube of cheap acrylic because it’s easy to wipe away with a wet finger and, more importantly, it takes paint like a champ. But acrylic is brittle. If your home breathes—and they all do—that bead is going to snap. This is especially true if you are dealing with caulked baseboards cracking within weeks of installation. According to the Adhesives and Sealants Council, flexibility is the most critical factor in joint longevity, as many residential sealants fail simply because they cannot handle more than a 12.5% change in joint width. If you’re wondering why your hard work is literally pulling away from the wall, you’re likely dealing with a lack of ‘elongation’ in your choice of filler.
Is Paintable Silicone Actually Worth the Extra Mess?
I used to be terrified of silicone. It’s sticky, it smells like a pickle factory, and if you get it on your shirt, that shirt belongs to the trash can. You’ve probably heard the horror stories: ‘You can’t paint it!’ or ‘It leaves a greasy residue!’ While those used to be absolute truths, the industry has changed. We now have hybrids that offer the stretch of silicone with the finish of acrylic. If you are working on simple interior updates in a bathroom or kitchen, you absolutely need that moisture resistance. In fact, learning the silicon bead secret for waterproofing can be the difference between a beautiful trim and a rotted subfloor three years down the road. Have you ever finished a room only to have the gaps reappear before the seasons even changed? I’d love to hear if you’ve tried the ‘paintable silicone’ route or if you’re a die-hard acrylic fan despite the cracks. Let’s get into the nitty-gritty of which tube you should actually be loading into your gun this weekend.Before you even cut the tip of that tube, you have to realize that caulk is only as good as the surface it’s clinging to. I learned this the hard way back in 2018 during a living room remodel. I was so excited to see the finished product that I caulked right over a thin layer of fine drywall dust. Within three weeks, the caulk didn’t just crack; it literally peeled away like a layer of sunburned skin, leaving me with a weekend of scraping and scrubbing. Now, I never touch the gun without a shop vac and a damp microfiber cloth in hand. If you are following a step-by-step flooring installation, don’t let the final five percent of the project ruin the first ninety-five. You need a bone-dry, dust-free ‘V’ groove between the wall and the trim for the sealant to bite into.
Nail the Application with These Pro Techniques
When you are finally ready to squeeze, think of the caulk gun as a precision pen rather than a shovel. The most common DIY mistake is cutting the nozzle tip too wide, which results in a ‘slug’ of caulk that is impossible to smooth. You want a hole that is about 75% the width of your actual gap. If you’ve invested in high-end baseboard styles that elevate your interior design, you want the bead to be a subtle transition, not a chunky highlight. For those of us who weren’t born with the steady hands of a surgeon, the blue tape trick for cleaning up silicone beads is a literal lifesaver. You apply the tape to the wall and the top edge of the baseboard, leaving just the seam exposed. After you smooth the bead with a wet finger, you pull the tape while the caulk is still wet, revealing a line so sharp it looks factory-finished. 
Manage Those Stubborn Corners and Long Runs
Corners are where most DIY jobs go to die. If your miters aren’t tight, don’t try to solve the problem by pumping an entire tube of filler into the void. It will shrink as it cures and eventually look like a jagged canyon. Instead, use the back bevel move for tight baseboard miters to ensure the front faces touch perfectly before you ever apply sealant. On long walls where a single board won’t reach, remember the scarf joint rule for long baseboard runs. Caulking a butt joint is a recipe for a visible bump, whereas a scarf joint allows the caulk to blend the two boards into one seamless piece of wood.
When to Choose Waterproofing Over Paintability
In wet areas, the standard rules for acrylic simply don’t apply. You cannot use a basic decorator’s caulk in a bathroom and expect it to hold. You must master the silicon bead secret for waterproofing baseboards in bathrooms. This involves using a high-quality hybrid or 100% silicone that stays flexible enough to handle the constant expansion of the subfloor while resisting mold. It acts like a structural gasket; if it fails, water will find its way behind the trim and begin the invisible rot of your drywall and flooring.The most dangerous myth in trim work is the ‘tight-fit’ obsession. We’re taught that if a joint is tight on Monday, it’s a job well done. However, in my experience, a joint that is forced too tight during the humid summer is exactly what causes your baseboards to buckle or pop off the wall once the furnace kicks on in winter. Instead of fighting the wood, you have to work with its physics. This is where the back bevel move for tight baseboard miters becomes your best friend. It creates a tiny pocket of space behind the visible edge, allowing for micro-expansion without pushing the joint apart. If you ignore this, you will likely find that why your baseboard miters keep gapping in the winter becomes an annual headache. Expert data from the National Wood Flooring Association (NWFA) indicates that even premium hardwoods require a minimum expansion gap of 1/2 inch at all vertical obstructions to prevent structural buckling. 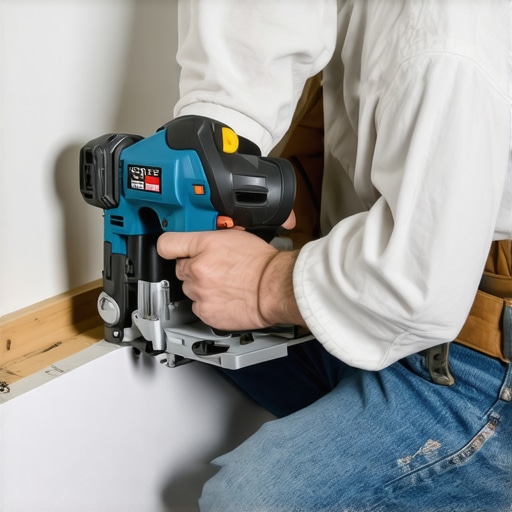
Stop Chasing Perfect Miters and Start Scribing Instead
If you are struggling with visible gaps in your corners, the problem usually isn’t your saw; it is your walls. No house is perfectly square, and forcing a 45-degree cut onto a 91-degree corner is a losing battle. This is why I always recommend the inside cope method for beginners and pros alike. Coped joints allow one board to nest inside the other, making it immune to the inevitable ‘wall wave.’ When dealing with heavy masonry or irregular surfaces, mastering the block scribe secret for baseboards on brick walls will save you hours of sanding and frustration.
Why Does Your New Flooring Feel Like a Trampoline?
There is a specific trap people fall into with luxury vinyl and laminate: ignoring the subfloor prep. Everyone says ‘it’s a floating floor, it doesn’t matter,’ but that is a recipe for disaster. If you feel a bounce when you walk, it is often because your laminate floor is spongy in the corners due to a lack of proper leveling or the wrong underlayment thickness. In the world of textiles, a similar ‘oops’ factor occurs when your carpet pad is too thick for the tack strip. People think a thicker pad equals more comfort, but if it is too tall, the carpet cannot grab the pins, leading to ripples and premature wear. To get that high-end feel, focus on carpet install secrets like power stretching rather than just buying the softest pad available.
The Invisible Danger of Improper Shower Slopes
Transitioning to the bathroom, the biggest nuance people miss is the shower curb. Many DIYers build a flat curb because it is easier to tile, but this is a catastrophic error. Without adhering to the curb slope requirement for waterproof shower pans, water will sit on that flat surface, eventually soaking through the grout and rotting the framing beneath. The same logic applies to internal corners; you must use the soft joint rule for shower wall corners—silicone, not grout—because planes of tile will always move independently. Have you ever fallen into this trap of thinking ‘tighter is better’ or ‘thicker is more comfortable’ only to see the project fail a year later? Let me know in the comments.The biggest mistake I see after a successful install is the bucket-and-mop mentality. If you’ve just put down high-end laminate or luxury vinyl, drenching it with water is the fastest way to ruin those seams. I personally swear by the microfiber mist rule for cleaning matte floors. Instead of soaking the surface, use a fine-mist spray bottle and a high-quality microfiber pad. This prevents moisture from seeping into the core of the plank, which is where those annoying edge-curling issues begin. According to the Tile Council of North America (TCNA) Handbook, maintaining the integrity of the surface through pH-neutral cleaners is essential for preventing the degradation of grout and sealant bonds over time.
How do I maintain my flooring and trim over time?
Maintenance isn’t just about cleaning; it’s about inspecting the ‘stress points’ of your home. Twice a year, I do a walk-through specifically looking at the baseboard-to-floor transition. If you see gaps appearing, don’t just keep adding more caulk. It might be time to evaluate if your humidity levels are swinging too wildly. For those delicate trim pieces where a standard nail gun would blow the wood apart, I always reach for a 23-gauge pinner. Learning the pin nail secret for delicate baseboard moldings allowed me to secure intricate transitions without the need for massive wood filler patches that eventually yellow and fall out. 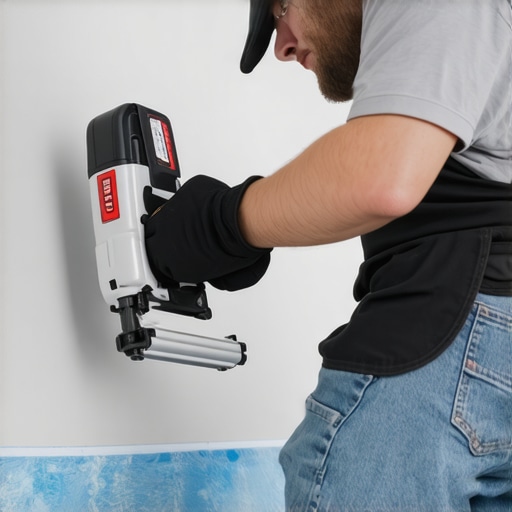
The Right Tools Make the Professional Difference
If you are still using a hand-saw and a prayer for your flooring, it’s time to upgrade. A dedicated flooring shear is a game-changer for vinyl and laminate; it’s dust-free and quiet, meaning you can work late into the night without waking the kids. For the bathroom, stop guessing your angles. A digital angle finder is the only way to handle those awkward shower bench returns. If you find yourself constantly patching up old work, you need to decide on shower repairs: when to fix vs replace for longevity. Sometimes, a patch is just a band-aid on a structural wound. Looking ahead to expert flooring installation tips for 2025, I predict we’re going to see a massive surge in integrated smart sensors. Imagine your baseboards notifying your phone the second a pipe starts leaking behind the drywall—that’s the level of protection we are moving toward. I challenge you to try the ‘blue tape’ method on your next silicone bead; it will change your DIY life. Let’s keep those floors flawless.
The Hardest Lesson I Learned While Watching My Caulk Lines Crack
One truth that took me years to accept is that houses are living, breathing entities. If you install your trim in a bone-dry winter without accounting for seasonal shifts, it will expand and potentially buckle come July. Always give your boards a few days to acclimate to the specific room temperature and humidity before you fire a single nail. Also, keep in mind that while most flooring installation mistakes to avoid focus on the visual layout, the real structural failures happen in hidden details like subfloor leveling and moisture barriers. If you’re venturing into the bathroom, don’t rush the prep; following a comprehensive ultimate shower renovation guide can help you spot drainage or slope issues long before they become permanent, expensive headaches. [IMAGE_PLACEHOLDER]
Gear That Will Make You Look Like a Pro Installer
You do not need a warehouse full of heavy machinery, but these three items earned a permanent spot in my toolkit. First, a 23-gauge pinner is a total game-changer for intricate work; using the pin nail secret for delicate baseboard moldings ensures your transitions stay tight without the need for massive wood filler patches that eventually yellow. Second, a digital angle finder is the only way to get those awkward 22.5-degree wall corners right on the first try. Finally, I always suggest staying ahead of the curve by reviewing expert flooring installation tips for 2025, which emphasize the shift toward more sustainable, high-durability materials that handle temperature swings better than older laminates.
Bring Your Flooring Vision to Life This Weekend
Home improvement can certainly feel intimidating when you’re staring at a pile of planks and a messy subfloor, but the quiet pride of looking down at a floor you laid yourself is worth every sore muscle. Whether you are planning a complete baseboards makeover or just refreshing a high-traffic hallway, take your time and focus on the prep work. Your home is your biggest investment, and it deserves that extra layer of craftsmanship. Have you ever had a caulk line crack on you just weeks after you thought the project was finished? Let me know your biggest DIY challenges in the comments below!