

I remember staring at a puddle of wet concrete in my hallway back in 2018, feeling like a genius. I had just poured three bags of self-leveling underlayment to fix a nagging dip by the front door. I figured gravity would do all the hard work while I grabbed a coffee and relaxed. Twenty-four hours later, I didn’t have a flat floor; I had a hardened concrete “mountain” in the middle of my entryway. Instead of a dip, I now had a permanent high spot that made my flooring installation mission nearly impossible. I had fallen for the biggest myth in the home renovation world: the idea that “self-leveling” actually means it fixes itself without your help. It was a visceral lesson in chemistry and physics that ended with me spending two days with a diamond grinder.
How Your Magic Floor Potion Creates More Work
We have all been tempted by it. You see a low spot and think, “I will just pour this liquid gold and it will find its own level.” But here is the cold, hard truth: self-leveler is inherently lazy. It has surface tension, it gets incredibly sticky as it begins to cure, and if you do not actively help it move, it will pile up exactly where you poured it. This creates a brand new high spot that is often significantly harder to fix than the original hole you were trying to fill. It is one of those flooring installation mistakes to avoid that can turn a simple weekend project into a week-long nightmare of dust and frustration. According to the Tile Council of North America (TCNA), substrate flatness is the single most critical factor for successful tile and plank installs, yet most people treat it as a secondary concern. If your floor varies by more than 1/8 inch over 10 feet, the structural integrity of your finished surface is at risk, and a poorly managed pour only makes that gap harder to bridge.
Is self-leveler actually worth the headache?
Absolutely, but only if you respect its limits and treat it with the care it deserves. Early in my career, I did not realize that the reasons why your floor leveler is cracking over plywood often start with the same sloppy pouring technique that creates these dreaded high spots. You must prime the floor correctly, gauge the depth with pins, and use a spike roller to break that surface tension. Otherwise, you are just making a bigger mess for your future self to clean up. Have you ever poured a leveler only to find it looks like a topographical map of a mountain range the next morning? I would love to hear your most frustrating floor leveling stories! If you are still in the planning phase, you might even find you can level a subfloor dip without removing the old subfloor using simpler, more controlled methods like feather-finishing. Today, we are going to walk through the “no-pour” and “smart-pour” strategies to keep your subfloor actually flat so your next floor looks like a professional did the work.
Before you even crack a bag of underlayment, you need to turn your room into a temporary swimming pool. Not literally, of course, but self-leveler behaves exactly like water. I learned this lesson the hard way on a job in a 1920s bungalow. I hadn’t properly sealed the floor vents, thinking the mix was thick enough to stay put. As I poured the first bucket, I watched in slow-motion horror as forty pounds of liquid cement vanished into the ductwork. That was a $400 HVAC cleaning bill I hadn’t budgeted for. You must use weatherstripping, spray foam, or even heavy-duty tape to create dams at every doorway and vent. Once the room is sealed, your next move is the subfloor screw routine for stopping floor squeaks, because once that concrete hardens, those squeaks become permanent residents of your home.
Seal the Substrate and Prime the Thirst
Subfloors are incredibly thirsty. If you pour leveler onto bare wood or old concrete, the substrate will suck the moisture out of the mix faster than a desert sponge. This causes the leveler to ‘flash dry,’ leading to catastrophic cracks and tiny pinholes. This is exactly why your floor leveler is cracking over plywood in many DIY projects. You need a dedicated primer—usually a milky acrylic liquid—rolled on until the floor stops absorbing it. It creates a chemical bridge between the old floor and the new material, ensuring the leveler stays fluid long enough to actually level itself.
Map Your Floor with Leveling Pegs
You cannot eyeball a level floor, no matter how good your vision is. I use ‘level pegs’ or depth pins for every pour. These are small plastic sticks with measurements on the side that you stick to the floor in a grid pattern. You use a laser to find the highest point in the room, then cut the tops of all the other pegs to that exact height. It is like having a GPS for your pour. If you are only dealing with minor transitions rather than a whole-room flood, you might prefer the feather edge secret for smoothing subfloor transitions, which allows for more surgical precision with a flat trowel.
Don’t Let Your Leveler Get Lazy
Once the mix hits the floor, you have about 10 to 15 minutes of ‘working time’ before it begins to gel. This is where most people panic. Think of the leveler as a thick soup that needs a little nudge to find its home. Use a gauge rake—a long tool with adjustable ‘feet’—to spread the material to the height of your pins. This ensures you aren’t leaving too much in the center and starving the corners. This mechanical movement is vital for a successful step-by-step flooring installation because it eliminates the high spots before they harden.
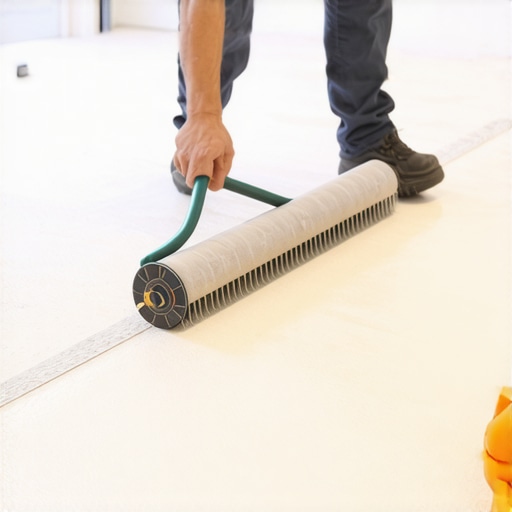
Use a Spike Roller to Kill Bubbles
The secret weapon of every pro is the spike roller. It looks like a medieval torture device on a stick, but its job is simple: it breaks the surface tension and releases trapped air bubbles. As you roll it through the wet mix, the spikes pop the tiny pockets of air that cause ‘volcano’ holes later. Without this, your floor will look like the surface of the moon once it dries. These extra ten minutes of rolling ensure your vinyl or tile sits perfectly flat without ‘telegraphing’ imperfections through the surface. It is the difference between a floor that looks okay and one that matches high-end baseboard styles that elevate your interior design.
Stop the Pour Exactly Where the Next Floor Begins
Where the leveler meets a doorway or a different flooring type, you need a clean exit strategy. If you are prepping for a mix of surfaces, such as moving from a leveled bathroom to a carpeted hallway, knowing how to hide a transition strip between carpet and tile early on helps you determine exactly where to stop your pour. I always set my dams about an inch back from where the final transition will sit, giving me room to adjust the final height with a bit of thinset during the actual tile lay.
The most dangerous thing in home renovation isn’t a lack of knowledge; it’s a little bit of knowledge applied with too much enthusiasm. I see this most often with carpet padding. There is a pervasive myth that a thicker, softer pad equals a more luxurious feel. Most homeowners walk into a showroom and pick the squishiest foam they can find, thinking they are upgrading their life. But here is the contrarian truth: a pad that is too thick will actually destroy your carpet in record time. According to the Carpet and Rug Institute (CRI) 104/105 standards, residential carpet padding should typically not exceed 7/16 of an inch for most styles. If you go thicker, the carpet backing flexes too much underfoot, creating a ‘hammock’ effect that pulls the fibers away from the primary backing. This is exactly why your carpet pad is too thick for the tack strip; the pins simply cannot grab the carpet through that mountain of foam, leading to those ugly ripples you see after just six months.
Can a carpet pad actually be too thick for your installation?
Yes, and it’s a mistake that even some ‘pros’ make when they aren’t paying attention to the specific requirements of the pile. When the pad is too tall, the carpet floats above the tack strip rather than being anchored by it. To get that high-end look, you are much better off investing in carpet install secrets for achieving flawless results, such as using a higher-density, lower-profile rubber pad. This provides support without the structural instability. If you’ve already made this mistake, you might find yourself searching for how to fix a carpet ripple without a power stretcher, but usually, once the backing has been stretched out by a bad pad, the damage is permanent. You have to think about the physics of the floor, not just the softness under your toes.
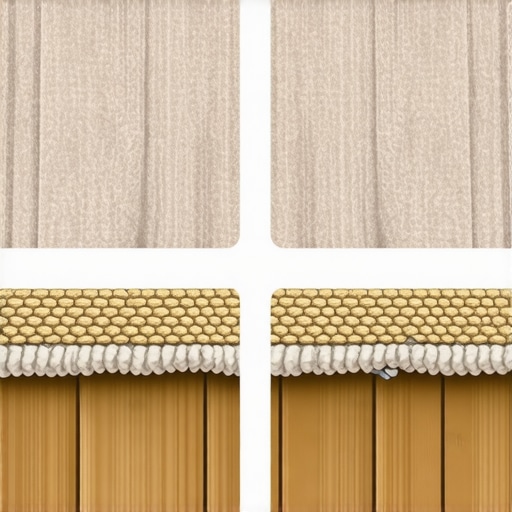
Another nuance that people miss involves the bathroom. We are taught to waterproof everything, which leads to the ‘Oops’ factor of sealing baseboards too tightly. Many DIYers will run a heavy bead of silicone along the bottom of the baseboard where it meets the tile. While this sounds smart, if you have a slow leak behind the wall or near the toilet, that silicone bead acts as a dam. Instead of the water leaking out onto the tile where you can see it, it stays trapped against the drywall and the baseboard’s back, causing rot and mold that you won’t discover for years. I prefer the silicone bead secret for waterproofing baseboards in bathrooms, which involves selective sealing and leaving small ‘weep holes’ in non-critical areas to ensure the wall can still breathe. It’s about managing moisture, not just blocking it.
This same level of precision applies to your shower. I have consulted on countless shower repairs where the choice to fix vs replace came down to a single missing element: the curb slope. Many builders treat the shower curb as a flat shelf, but if it doesn’t have a minimum 1/8 to 1/4 inch slope back into the shower, water will sit under your glass door track and eventually eat through the grout. Following the curb slope requirement for waterproof shower pans is the difference between a shower that lasts thirty years and one that fails in five. Whether you are performing a double-cut method for invisible carpet seams or pitching a shower floor, the nuance is in the math. Have you ever fallen into the ‘thicker is better’ trap or sealed a baseboard only to regret it later? Let me know in the comments, and let’s troubleshoot your floor together.
After a decade of crawling on my knees, I have realized that the difference between a floor that lasts five years and one that lasts fifty is usually the gear you use in the final hour. For me, that meant moving away from the $20 hardware store specials and investing in a professional-grade rotary laser. If you are still using a spirit level to check your bathroom walls, you are gambling with your grout lines. I always use the laser level hack for straight tile rows because it eliminates the cumulative error that happens when you manually move a level across a ten-foot span. One millimeter of tilt in the corner becomes a half-inch disaster by the time you reach the shower niche.
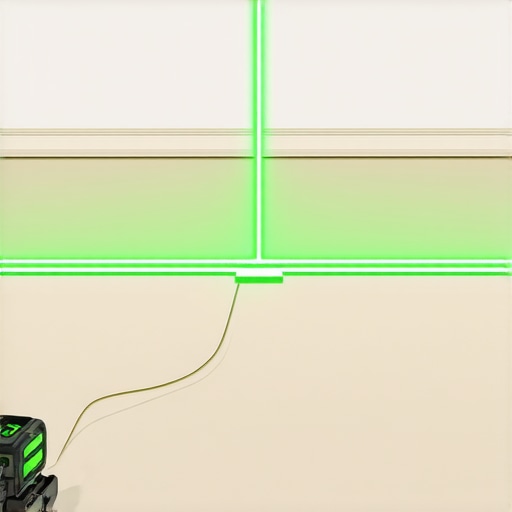
When it comes to wood, maintenance starts with understanding humidity. The National Wood Flooring Association (NWFA) Technical Publication No. C200 emphasizes that maintaining a consistent indoor environment—typically between 60 to 80 degrees Fahrenheit and 30% to 50% humidity—is the only way to prevent structural failure. If you skip this, no amount of glue will save you. For those annoying noises that develop in older homes, I swear by the powder lubricant trick to stop hardwood squeaks without having to pull up the planks. It is these small, technical wins that keep a home feeling solid and expensive.
How do I maintain my flooring investment over time?
Long-term care is less about heavy scrubbing and more about chemical intelligence. I always tell my clients to throw away the string mop and the bucket of soapy water. Excess water is the enemy of every floor type except maybe polished concrete. Instead, follow the microfiber mist rule for cleaning matte floors to ensure you aren’t leaving behind a residue that attracts more dirt. If you do run into trouble, like a stray cigarette burn or a dropped iron, you can often perform the iron burn repair for small carpet scars rather than replacing the whole room. For hardwood, knowing how to match wood grain when patching old hardwood floors is a master-level skill that saves thousands in restoration costs.
Protect Your Floors with Wire-Brushed Finishes
Looking ahead, I predict we will see a massive shift toward “smart” subfloors equipped with moisture sensors that alert your phone before a leak becomes a flood. But until then, we have to rely on smart material choices. I am seeing more homeowners opt for textured surfaces because why wire-brushed finishes hide scratches better than smooth semi-gloss is simply a matter of light refraction. As we move into 2025, the focus is shifting from “perfection” to “durability with character.” If you want to take your skills to the next level, I challenge you to try the double-cut method for invisible carpet seams on your next project. It is difficult to master, but the results are indistinguishable from a factory edge. If you get stuck or need a second set of eyes on your floor plan, don’t hesitate to contact us for a consultation.
Three Flooring Lies I Finally Stopped Believing
The biggest lie in the industry is that ‘good enough’ is acceptable for a subfloor. If the foundation is off by even a hair, your luxury planks will eventually fail. I have learned that spending four hours on prep saves forty hours of repair later. Another hard truth is that more expensive isn’t always better. You can buy the priciest tiles, but if you do not follow expert flooring installation tips for 2025, they will look like a DIY disaster. It is the technique, not just the ticket price, that defines the finish. Finally, never trust your eyes over a laser. Gravity and perspective are tricksters; professional-grade tools are honest and will never let you down mid-pour.
Gear That Saves My Back and My Sanity
I never walk onto a job site without my Bosch rotary laser. It is the gold standard for ensuring everything from your baseboards to your shower glass is perfectly plumb. For those working on bedrooms, reading how to choose the right carpet for a cozy living space is a better use of time than just browsing samples at a big-box store because it helps you understand density over fluff. I also recommend keeping a digital hygrometer in your toolbox; knowing the moisture content of your subfloor is the only way to avoid the heartbreak of cupped hardwood. For bathroom overhauls, I always point people toward modern shower renovation ideas that prioritize waterproofing over aesthetics, as a dry home is a healthy home.
Make Your Next Room Your Masterpiece
Starting a project is the hardest part, but once you lay that first row of tile or stretch that first corner of carpet, the anxiety melts away. Whether you are browsing high-end designs or simply trying to figure out how to choose the perfect baseboards for your home style, remember that every pro started exactly where you are now—with a few questions and a lot of determination. Your home deserves the effort that comes with a proper flooring installation. If you find yourself in over your head or just need a second opinion on your layout, you can always contact us for professional guidance. Have you ever had a flooring project go sideways because of a ‘self-leveling’ mishap? Let me know in the comments below!