

I stood there for twenty minutes, just staring at the jagged splinter of MDF lying on my new hardwood. That sharp crack echoed through the house, a painful reminder that wood isn’t naturally inclined to follow a radius. I’d spent weeks on my flooring installation, and this one curved corner in the foyer was threatening to ruin the entire seamless look I was going for. I’d even chosen the perfect baseboards to match the rest of the house, but I forgot one crucial detail: curves don’t care about your plans. If you have ever felt your heart sink as a piece of expensive trim snaps in your hands, you are in the right place. We are going to fix this, and we’re going to do it without losing your mind.
Stop Fighting the Wood and Start Working With It
We’ve all been there—trying to brute-force a piece of trim into submission. But here’s the truth: if you try to bend standard pine or MDF without a plan, you’re either going to snap it or pull the nails right out of the studs. The key is knowing when to use flexible trim and when to use the relief cut method. I made the mistake of thinking I could just nail it more on my first house. Spoiler alert: the tension eventually pulled the drywall anchors right through the paper. If you want to avoid the most common flooring installation mistakes, you have to respect the physics of the material. Today, I’m pulling back the curtain on how to handle these architectural headaches. We aren’t just slapping trim on a wall; we’re elevating your interior by mastering the curve. Whether you are dealing with a tight turret or a gentle hallway sweep, there is a way to get it done without the tears.
Does This Actually Work Without Buying Fancy Equipment?
You’re probably thinking you need a steam box or a thousand-dollar specialty kit. Honestly? You don’t. While professional installers sometimes use high-end flexible polymers, most of us can get a professional finish with a miter saw and a little bit of patience. I used to think baseboard trends in 2025 were only for people with custom-built homes, but a well-executed curve makes any builder-grade house look like a million bucks. According to the National Association of Home Builders, high-quality interior trim details are among the top features that increase perceived home value for buyers, and nothing says quality like a perfectly wrapped curve. [image-placeholder] Have you ever heard that sickening crunch of a board breaking halfway through a project? I would love to hear your horror stories in the comments—it’s a rite of passage for any DIYer!
The First Step Is Choosing Your Weapon
Before you even touch a hammer, you have to decide which path you’re taking. You can scribe baseboards to a curved wall surface if the floor is uneven, but the curve itself requires a specific material choice. I’ve found that many homeowners try to use the same thick, rigid stock they used in the bedrooms, which is a recipe for disaster. It’s often better to paint your baseboards before installing them anyway, especially when dealing with the mess of kerf cuts or flexible resins. Let’s get into the nitty-gritty of why your walls aren’t as round as you think they are, and how to prep the surface so your trim actually stays put for the next decade.
Turn Rigid Wood into a Slinky with Relief Cuts
If you are working with standard pine or MDF, the only way to make it hug a curve is to remove some of its ‘spine.’ This is called kerf cutting. Think of it like those wooden toy snakes that wiggle—you are creating segments that can compress or expand. I once tried this on a tight foyer curve using a piece of 5-inch poplar. I spaced my cuts an inch apart, thinking that would be enough. I was wrong. The wood fought back, and I ended up with a series of ugly facets instead of a smooth curve. Now, I space my cuts every half-inch and set my miter saw depth so it leaves just about an eighth of an inch of the ‘face’ intact. This allows the wood to follow the radius without the grain resisting you.
Find the Right Spacing for Your Saw Blade
The tighter the curve, the closer your cuts need to be. If you go too deep, you will ghost through the front and ruin the finish. If you do not go deep enough, the wood simply will not budge. This is why the pre-drill rule for wide baseboard installations is so critical here; you need to relieve the tension before you ever try to pin it to the wall. I always recommend testing your depth on a scrap piece of the exact same trim before committing to your long run.
Switch to Flexible Trim for Those Tight Radii
Sometimes, physics wins. If you are trying to wrap a baseboard around a column or a very tight bullnose corner, kerf cutting is going to make the wood look like a stop-sign rather than a circle. This is where flexible polyurethane trim saves your sanity. It looks and paints exactly like wood but has the consistency of stiff rubber. When I first used it, I made the mistake of not using enough adhesive. Because it has ‘memory,’ it wants to return to its straight shape. I had to go back and use the glue-assist strategy originally meant for hardwoods just to keep the trim from peeling away from the drywall overnight. Apply a zig-zag bead of high-quality construction adhesive to the back and then use your nails primarily as clamps until the glue sets.
Fasten It Once and Never Look Back
Nailing into a curve is not like nailing into a straight stud. You are fighting constant lateral tension. If you just fire a standard finish nail, the head might pull right through the soft MDF over time as the board tries to straighten itself out. I always use the pin nail secret for delicate baseboard moldings to tack the very top edge while the construction adhesive does the heavy lifting behind the scenes. By angling your nails—alternating left and right—you create a ‘dovetail’ effect inside the wall that makes it nearly impossible for the board to pull away.
Manage the Joints Between Straight and Curved Sections
The hardest part is not the curve itself; it is where the curve meets the straight run. This is where most flooring installation mistakes happen. If you try to miter this joint, it will inevitably open up as the house settles and the seasons change. Instead, I look at the butt joint vs scarf joint debate and almost always choose a scarf joint for these transitions. I overlap the pieces at a 45-degree angle, glued with CA glue for an instant bond. For the corners leading into the curve, mastering the inside cope method for beginners will ensure that even if the wall is not perfectly plumb, your joint stays tight and professional.Most DIYers believe that a tube of painter’s caulk is the ultimate eraser for poor carpentry. I’m going to challenge that right now: if you are relying on caulk to fill gaps larger than a sixteenth of an inch, you aren’t finishing; you’re just delaying the inevitable. High-end installers know that why your caulked baseboards are cracking within weeks is usually down to excessive shrinkage of the filler itself. A truly professional install relies on tight wood-to-wood contact, especially on those tricky architectural curves we discussed earlier. When you use caulk as a bridge rather than a seal, the natural seasonal expansion of your home will rip that bead apart before the first frost hits.
Caulk is a Tool, Not a Crutch
I’ve seen countless projects where the homeowner spent thousands on shower renovation ideas only to have the baseboards peel and rot near the bathroom door. The trap here is moisture wicking. If you don’t seal the bottom edge of your trim—the raw wood or MDF part that actually touches the floor—it will wick up mop water or bathroom humidity like a sponge. This absorption is exactly why your painted baseboards are peeling at the floor line within a year of installation. It’s a small detail that separates the amateurs from the pros. Have you ever fallen into this trap? Let me know in the comments.
Why Do Your Miters Open Every Winter?
It all comes down to the moisture content of the wood and the physics of the joint. According to the National Wood Flooring Association (NWFA), wood is hygroscopic, meaning it constantly gains and loses moisture to match its environment. If you install trim during a humid summer without letting the material acclimate for at least 72 hours, those perfect 45-degree angles will become 43-degree eyesores by January. This is why your baseboard miters keep gapping in the winter. The pro move is to back-cut your miters slightly—angling the blade about 1 degree past 45—so the front faces stay locked tight even when the back of the board shrinks. 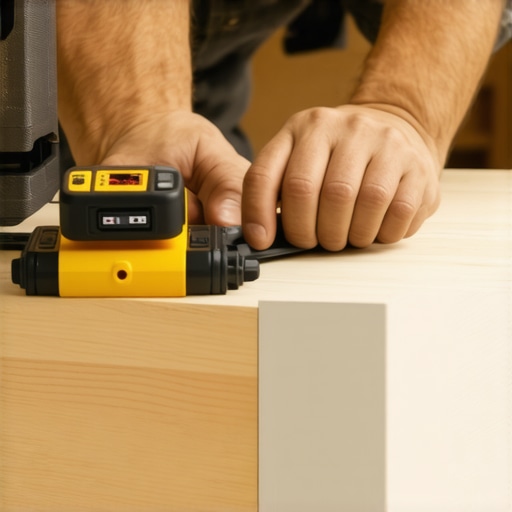
The Hidden Relationship Between Baseboards and Carpet
When it comes to carpet install secrets, most people think the baseboard should sit flush on the subfloor. That is a massive mistake that I see on nearly every builder-grade home. You actually want to hover the baseboard about 3/8 to 1/2 an inch above the subfloor. This allows the carpet installer to tuck the edge of the carpet and padding under the trim for a seamless, high-end finish. If you nail it directly to the floor, the installer has to butt the carpet up against the face, which eventually leads to fraying, visible tack strips, or unsightly staples that catch your vacuum. Similarly, for hard surfaces like porcelain, you must respect the expansion joint rule for large tile floors. Your baseboard isn’t just decoration; it is a structural cover for the necessary 1/4-inch breathing room your floor needs to move. Don’t let a tight fit today become a buckled floor tomorrow. By understanding these subtle interactions between materials, you ensure your home stays looking sharp through every season change.
Invest in the Tools That Don’t Lie
When I first started, I thought my old hand-me-down miter saw was good enough. I was wrong. If your detent plate has even a millimeter of play, your 45-degree angles will never actually meet. I upgraded to a 12-inch dual-bevel sliding compound miter saw with a precision laser guide, and it changed my life. The laser isn’t just a gimmick; it is essential for ‘eye-balling’ the exact placement of those kerf cuts we discussed earlier. To keep the face of your trim pristine, I always rely on the pin nail secret for delicate baseboard moldings. Unlike standard finish nails, 23-gauge pins leave a hole so small you barely need to fill it, preventing the unsightly ‘shrapnel’ effect on thin MDF or ornate pine. I also keep a dedicated pneumatic narrow-crown stapler for the hidden edges of carpet install transitions where extra holding power is needed against the tension of the stretch.
How can I maintain my flooring and trim over the long haul?
The biggest threat to your hard work isn’t wear and tear—it is actually how you clean it. I have seen beautiful, expensive installations ruined in months by steam mops that force moisture into the seams of the wood. To preserve the finish, I strictly follow the microfiber mist rule for cleaning matte floors. This method uses just enough moisture to lift dirt without saturating the expansion gaps. In bathrooms, you should inspect your sealant annually. If you notice a hairline crack near the tub, addressing it with shower repairs immediately will prevent the subfloor rot that eventually makes baseboards peel away. For those with high-traffic hallways, choosing the best carpet types for high traffic areas in 2025 is a great start, but you must also keep the transition strips tight to avoid trip hazards and fraying. 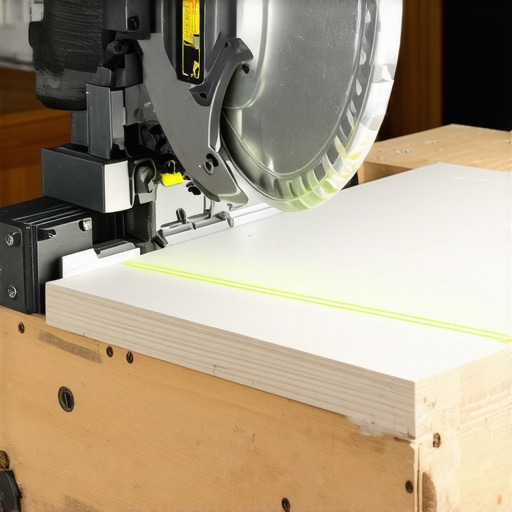
The Next Wave of Architectural Trim Innovation
Looking ahead, I predict we are going to see a massive shift toward ‘smart’ trim. We are already seeing prototypes for baseboards with integrated low-voltage LED channels and hidden raceways for home networking. People are moving away from the purely decorative and demanding baseboard styles that elevate your interior design through functionality. According to technical reports from the USDA Forest Products Laboratory, the industry is leaning heavily into wood-plastic composites (WPC) that offer the aesthetic of white oak with the moisture resistance of PVC. This means the days of worrying about winter miter gaps might finally be coming to an end. Before you finish your current room, I challenge you to go back and check every expansion gap with a spacer. It is the most boring part of the job, but it is the only way to ensure your floor doesn’t buckle three years from now. If you have run into a corner that seems impossible to wrap, contact us and let’s troubleshoot your specific layout before you cut your next piece of lumber.
The Hard Truth About My First Curved Foyer Project
Every time I look at a perfectly executed radius, I am reminded that patience is the most expensive tool in your shed. I used to rush through the kerf cuts, thinking I could “caulk it later,” but that is one of those classic flooring installation mistakes that haunts you every time the sun hits the floor. I also learned that the wood always tells you when it is about to break—you have to listen for those tiny micro-creaks before the big snap. Finally, remember that baseboard trends in 2025 are leaning toward bolder, taller profiles, which actually make curves even more challenging to navigate. Do not be afraid to mix materials like flexible poly with your standard wood runs to get that seamless look.
Gear That Actually Delivers a Pro Finish
For a successful step-by-step flooring installation, you need more than just a standard hammer. I swear by a 23-gauge pinner; it is the pin nail secret for delicate baseboard moldings that prevents splitting on those tight radii. I also recommend keeping a high-quality CA glue with an activator on hand for instant bonds on scarf joints. Lastly, a simple contour gauge is a lifesaver when you need to scribe baseboards to a curved wall surface that isn’t perfectly plumb. These tools transform a stressful afternoon into a satisfying craft. [image-placeholder]
Transform Your Space One Curve at a Time
Taking on architectural curves can feel intimidating, but it is also the most rewarding part of a baseboards makeover. When you stop fighting the material and start working with its physics, you are not just installing trim; you are creating a piece of art that defines your home’s character. Your dream home is just one well-placed cut away. If you ever hit a wall—literally or figuratively—don’t hesitate to contact us for a second opinion on your layout. Have you ever snapped a piece of trim right at the end of a long installation? Tell me your most frustrating DIY story in the comments below!