

It was a cold Tuesday morning when I heard that soul-crushing hollow thud under my boot. I’d spent three days meticulously laying out a beautiful slate entryway, feeling like a total pro. But six months later, a single tile decided it didn’t want to be part of the floor anymore. It moved. It clicked. And then, it cracked. That moment was my wake-up call. I realized that treating natural stone like a standard ceramic tile is a recipe for expensive heartbreak. Natural stone is a living, breathing, and incredibly thirsty material that demands more than just a quick trowel on the floor. If you want your floor to last through the next decade of foot traffic, you need to master the ‘double-butter’ technique.
The Secret to a Permanent Bond for Heavy Stone
The ‘Double-Butter’ method, or back-buttering, isn’t just some fancy extra step professional installers use to justify a higher bill. It is the absolute baseline for a step-by-step flooring installation that actually holds up. When I first started out, I made the classic flooring installation mistake of thinking that a heavy-duty trowel on the subfloor provided enough suction. I was wrong. Natural stone often has dust or uneven textures on the back that prevent the mortar from grabbing hold. By applying a thin ‘butter’ layer of thinset directly to the back of each tile, you’re essentially creating a bridge between the stone and the floor. This ensures you aren’t just setting the stone *on* the mortar, but actually welding it into the structure.
Is this extra work actually worth the hype?
I get it. You’re tired, your knees hurt, and the idea of picking up every single heavy tile twice sounds like a nightmare. But consider the alternative: ripping up a $20-per-square-foot marble floor because of poor adhesion. According to the Tile Council of North America (TCNA), natural stone requires at least 95% mortar coverage to prevent cracking under load, a standard that is nearly impossible to hit without back-buttering. This is especially true if you are working with larger pieces or have had to reinforce a subfloor for heavy stone tiles to begin with. Before you even think about laying that first piece, you need to know how to mix thinset for the perfect peanut butter consistency, because if your ‘butter’ is too dry, it won’t stick, and if it’s too wet, your tiles will slump and create lippage. Have you ever dealt with a tile that just wouldn’t stay put, no matter how much mortar you threw at it? It’s a frustrating spot to be in, but today we’re going to fix that. We are going to look at exactly how to apply this method so your tiles stay flat, secure, and silent for a lifetime.
Start with a Surface That Actually Sticks
I remember a bathroom renovation back in 2018 where I was installing heavy travertine. I was so focused on the layout that I neglected the simplest rule of the trade: cleanliness. I pulled a tile up to check coverage and saw that the mortar had barely touched the stone. It was sitting on a layer of fine, powdery dust from the shipping crate. If I hadn’t caught it, that floor would have clicked and cracked within a month. Now, I never set a stone without a damp sponge in one hand. You have to wipe the back of every single tile to remove that factory dust. It’s a tedious step, but if you skip it, your mortar is basically trying to stick to a handful of flour. This is the hidden foundation of a successful step-by-step flooring installation. Once the stone is clean and slightly damp, it’s ready to accept the bond.
Keep Your Trowel Ridges Straight and Narrow
Before the stone even touches the floor, the substrate needs to be perfect. Use the the notch trowel tactic for even backsplash glue even on floors to ensure the ridges are uniform. One of the biggest mistakes I see is the ‘swirl’ method. When you trowel mortar in circular motions, you trap air pockets under the stone. These air pockets are essentially weak points waiting to become cracks. Instead, trowel in straight lines. When you set the stone and shift it, those straight ridges collapse and air escapes through the channels. If your subfloor has minor dips, you might need to use the feather edge tactic for smoothing subfloor seams before you even break out the thinset. A flat floor is the only floor that doesn’t eat tiles for breakfast.
Butter Your Tile Like Morning Toast
Now we get to the core of the ‘double-butter’ technique. While your floor has those perfect ridges, the back of your tile is still bare. Using the flat side of your trowel, scrape a thin, even layer of mortar across the entire back of the stone. You aren’t looking for thickness here; you are looking for total coverage. Think of it like priming a wall before you paint. This layer ‘wets’ the stone, ensuring that when it hits the ridges on the floor, the two mortar surfaces fuse into a single solid mass. 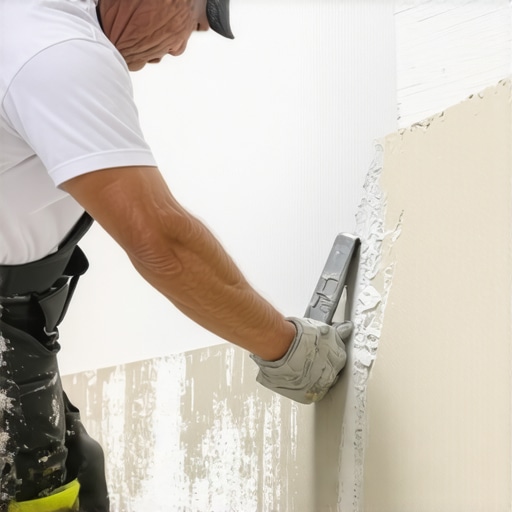 This is especially vital when you follow expert flooring installation tips for 2025 which emphasize the use of larger, heavier formats. Without this bond, a heavy slab is just a very expensive paperweight sitting on top of some dried mud.
The Drop and Twist for 100 Percent Contact
Once you’ve buttered the back, place the tile onto the floor ridges. Don’t just drop it and walk away. You need to give it a slight ‘wiggle’ or a back-and-forth movement perpendicular to the trowel ridges. This collapses the peaks of the mortar and fills the valleys. I’ve seen guys use a rubber mallet like they’re trying to drive a stake into the ground, but if you have the right thinset for the perfect peanut butter consistency, a firm hand-press and a gentle twist are usually all you need. Every few tiles, pull one back up. If you don’t see mortar covering 100% of both the floor and the tile, you aren’t using enough pressure or your mortar is drying out too fast. It’s better to waste five minutes checking your work now than five days fixing it later.
We have covered the basics of coverage, but now I want to challenge a common belief that gets homeowners into trouble. Most people think that the tile and grout are the primary defense against water in a shower. In reality, grout is a sieve. According to the Tile Council of North America (TCNA), grout is naturally porous and will eventually allow moisture to pass through. If you rely on the surface to stay dry, you are setting yourself up for a failure behind the walls. This is exactly why your shower waterproofing needs to go higher than the standard six-foot line, especially if you enjoy the high-moisture environment of a modern steam shower.
Grout is Not a Shield Against Water
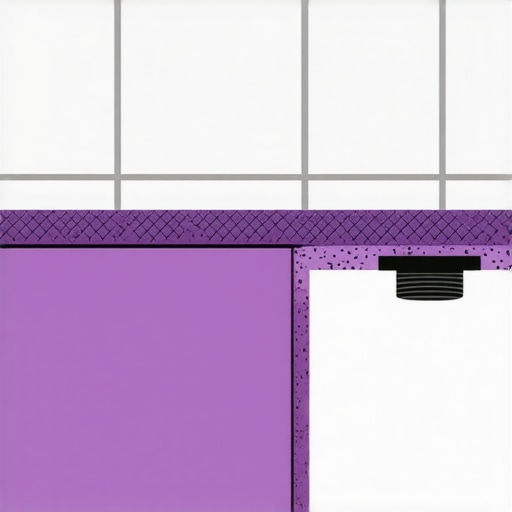
The real work happens in the layers you never see. When I’m planning shower renovation ideas for a luxury feel, I spend 90% of my time on the substrate. A common ‘trap’ is the shower niche. It’s the most requested feature, yet it is also the number one source of leaks. People build these beautiful recessed boxes but fail to provide a slight pitch to the bottom shelf. If that shelf is perfectly level, water sits. Over time, that standing water finds a pinhole in the grout and begins to rot the wall studs. This is why your shower niche is growing mold behind the tile despite your best cleaning efforts. You must use the overlap trick for waterproofing shower corners inside that niche to ensure a continuous, airtight seal.
Can You Actually Skip the Power Stretcher for a Small Room?
Moving away from the bathroom, let’s talk about the carpet myth that drives me crazy. I’ve heard plenty of guys say that a knee kicker is all you need for a small bedroom or a hallway. They are wrong. A knee kicker is meant for positioning the carpet on the tack strip, but it cannot provide the structural tension required to keep the backing stable over time. If you skip the heavy equipment, you’ll see ripples in eighteen months. It’s a central point in the power stretcher vs knee kicker debate: one is for looks, and the other is for longevity. Without that mechanical stretch, the carpet will lose its ‘memory’ and start to bunch up near the doors.
Stop Blaming the Paint for Your Cracking Caulk
Finally, we have to address the finishing touches. I often get calls from clients asking why your white baseboards are turning yellow or why the seams are splitting. Most people blame the paint brand, but the culprit is almost always seasonal movement. If the baseboard wasn’t nailed into the studs properly, or if you didn’t leave a micro-gap for expansion at the floor, the wood will twist. This tension is why your caulked baseboards are cracking within weeks of installation. Before you reach for the tube, check the painter caulk vs silicone guide for baseboards to ensure you are using a product with enough flexibility to handle the house’s natural breath. Have you ever fallen into the ‘it looks flat enough’ trap only to have a tile pop or a seam split later? Let me know in the comments.
Installing the floor is only half the battle. If you’ve ever seen a beautiful hardwood floor buckle two years after a high-end remodel, you know that the ‘set it and forget it’ mentality is a dangerous myth. Longevity is built into the maintenance schedule you establish the very day the glue dries. Whether you are managing best carpet types for high traffic areas in 2025 or a custom stone shower, you have to stay ahead of the inevitable wear and tear. I’ve seen homeowners ignore a tiny hairline crack in their grout, only to find a $5,000 structural rot problem three years later. Knowing shower repairs when to fix vs replace for longevity is the difference between a quick weekend touch-up and a total, soul-crushing demo.
Keep the Shine Without the Stress
In my experience, the biggest threat to a new installation isn’t actually heavy boots—it’s the wrong cleaning equipment. I remember a client who used a steam mop on a brand-new laminate floor because a commercial told her it was the ‘cleanest’ way. Within three months, the edges were peaked and the core was swollen. For those following baseboard trends in 2025, the key is a dry microfiber cloth and a very specific ‘no-slop’ mopping technique. Water is the enemy of wood and its composites. I always tell my clients that if they wouldn’t use a product on their fine wooden furniture, they shouldn’t use it on their hardwood floors.
How do I keep my new floors looking like Day One?
The secret isn’t a magical cleaning solution; it’s consistency and the right mechanical settings. For carpets, I always recommend a high-quality vacuum with an adjustable beater bar. If you chose a plush pile, you can actually destroy the fibers if the bar is set too low. If accidents happen, don’t panic. You can learn how to blend a new carpet patch into an old room rather than replacing the entire floor. For hard surfaces, keep a small ‘homeowner touch-up kit’ with matching caulk and paint. This is a lifesaver for when the house goes through its first winter and small gaps appear in your miters due to wood shrinkage.
Why a Moisture Meter is My Most Trusted Employee
If you ask me what tool I can’t live without, it’s not my miter saw or my laser level—it’s my Tramex Concrete Moisture Encounter. I’ve seen too many ‘pro’ installers wing it on concrete slabs because the floor ‘looked’ dry. According to the ASTM F2170 technical standards, you must know the relative humidity inside a slab before you ever think about sealing it. If you don’t perform the moisture meter test for concrete subfloors, you are gambling with thousands of dollars. Moisture is a silent killer that will delaminate vinyl or rot hardwood from the bottom up. I use a non-invasive meter for every single bid because visual inspection is a flat-out lie in the world of flooring. 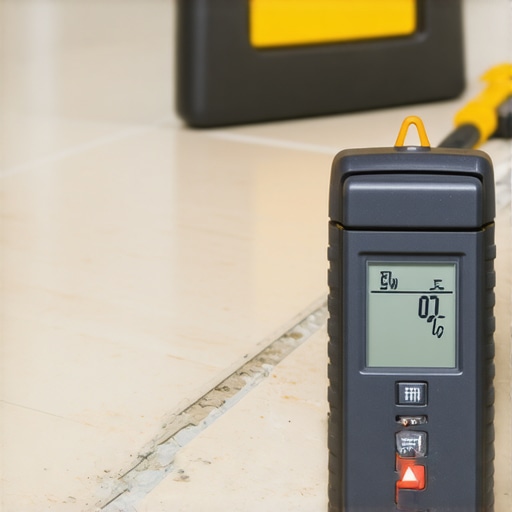
Looking toward the future, I predict we will see even more ‘smart’ flooring solutions entering the mainstream. We’re already seeing prototypes for sensors that can be embedded in shower subfloors to alert your phone to leaks before you ever see a water stain. Until those are affordable for every homeowner, you have to be the sensor. Take ten minutes every month to walk your transitions and check the corners of your shower. If you see a gap, fill it immediately with a high-flexibility sealant. I challenge you to try the paper template method for complex tile cuts on your next project—it’s an old-school trick that ensures a perfect fit every time, drastically reducing the need for massive caulk lines that eventually fail.
How I Finally Stopped Fighting the Subfloor and Started Winning
Looking back at years of worn-out knee pads and mortar dust, the biggest lightbulb moment wasn’t about a specific tool, but about time. I used to rush the prep to get to the ‘pretty’ part, but now I know that if the subfloor isn’t perfect, the finish will be painful. I’ve learned that a tiny 1/8-inch dip today becomes a hairline crack tomorrow. Another hard truth? Never trust your eyes alone—always trust your straightedge. I also realized that while I love the look of natural stone, it’s a high-maintenance relationship that requires constant attention to sealing and PH-neutral cleaners to stay beautiful. If you’re feeling stuck, remember that a your guide to durable flooring installation for a stylish home is built on patience, not speed.
My Non-Negotiable Kit for a Flawless Finish
If you’re serious about getting results that don’t squeak, click, or crack, you need more than just a hammer. I never step onto a job site without my moisture meter; it’s the only way to avoid the heartbreak of why your vinyl floor is bubbling in one spot or hardwood warping. I also swear by high-quality suction cups for large tiles—they save your back and allow for precision placement that you just can’t get with your bare hands. For those finishing touches, I always keep a copy of the TCNA Handbook nearby; it’s basically the professional bible and settles any debate on proper mortar coverage. #IMAGE_PLACEHOLDER_E# Using the right gear is the only way to follow carpet install secrets achieving flawless results every time without losing your mind.
Your House is Waiting for Its New Foundation
It’s easy to feel overwhelmed by the technicalities, but remember that every master installer started with a single crooked tile and a messy bucket of thinset. The beauty of a successful flooring installation is that it transforms the entire energy of your home. Whether you are picking out baseboard styles that elevate your interior design or finally tackling a luxury upgrade your bathroom the ultimate shower renovation guide, the effort you put into the hidden layers will pay dividends for decades. You have the knowledge, the method, and the drive—now it’s time to get to work. Have you ever discovered a hidden subfloor disaster after pulling up old carpet? Let me know in the comments below!