

The first time I tried to tile a backsplash, I looked like I’d been in a flour fight with a baker and lost. I had thinset on my elbows, in my hair, and—somehow—on the ceiling. I was using a flat margin trowel to smear adhesive onto the drywall like I was frosting a birthday cake. By the time I got the third row of tiles up, the first row was already starting a slow, agonizing slide toward the countertop. It was a humiliating mess that cost me an entire Saturday and three boxes of wasted tile. I learned the hard way that a backsplash isn’t just about the pretty ceramic pieces you see on the surface; it’s about the hidden architecture of the glue beneath them. Today, I’m going to show you how to skip my ‘sticky floor’ phase and get professional, even results every single time by using the notch-trowel tactic. We are going to solve the problem of sagging tiles and messy ooze-out once and for all.
Stop Slathering and Start Notching for a Cleaner Finish
If you’ve spent any time looking at flooring installation mistakes to avoid, you know that preparation is everything. When it comes to walls, the biggest blunder is thinking more glue equals a better bond. It doesn’t. In fact, too much adhesive is exactly why your grout lines end up filled with thinset before you even open the grout bag. When I finally switched from a flat blade to a properly sized notched trowel, it was a lightbulb moment. The notches aren’t just for decoration; they act as a metering system. They ensure that every square inch of your wall gets the exact same amount of mortar. This prevents those annoying high spots that make your backsplash look like a mountain range when the under-cabinet lights hit it. If you are also working on other areas of the house, like a bathroom, you’ll find this precision is just as vital in an ultimate shower renovation guide. Getting the right depth is a game changer.
Does the trowel shape really change how long a backsplash lasts?
It might seem like overkill to obsess over whether your trowel has square or V-shaped notches, but the physics is real. According to the Tile Council of North America (TCNA), proper mortar contact—which requires at least 80% coverage for interior dry areas—is nearly impossible to achieve consistently without the ridges created by a notched trowel. These ridges allow air to escape as you press the tile into place, creating a vacuum-like suction that holds the tile steady. I used to think I could just ‘feel’ if it was right, but that’s a lie we tell ourselves to avoid a trip to the hardware store. Now, I always make sure I’m following the back-buttering rule for larger pieces and how to mix thinset for the perfect consistency before I even touch the wall. Have you ever stepped back from a project only to see your tiles slowly sagging toward the floor while you weren’t looking? It’s a gut-punch, but it’s totally avoidable once you master the comb-and-set rhythm.
Stop Swirling Your Mortar and Start Combing Straight Lines
To get that perfect bond, you need to abandon the ‘swirl’ method. When I first started, I thought making circles with the trowel was the way to go—it looked like I was painting a mural. But those swirls trap air pockets, which eventually lead to tiles popping off. Instead, you want to comb the mortar in straight, parallel lines. This allows the air to escape as you press the tile in. I remember a kitchen island project where I ignored this; by the time I finished the grout, three tiles sounded hollow because I’d trapped so much air behind them. I had to learn how to replace a single broken tile just to fix my own mistake. For the best results, you need to understand the thin-set consistency secret for wall tiles—if it’s too runny, the ridges will collapse before the tile even touches them. 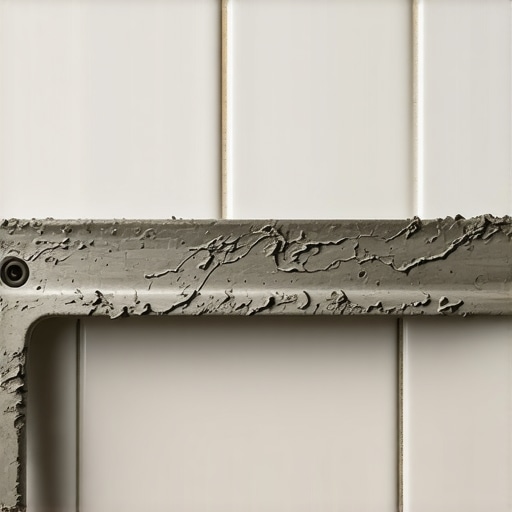
Find the Sweet Spot with a Forty-Five Degree Tilt
The angle at which you hold the trowel is the difference between a tile that stays put and one that ends up in your sink. If you hold it too flat, you aren’t creating those deep valleys that allow the tile to seat properly. If you hold it too vertical, the ridges will be too tall and thin, causing ‘ooze-out’ between the tiles. Aim for a consistent 45-degree angle. It feels a bit awkward at first, like trying to hold a pencil for calligraphy, but once you find that rhythm, the coverage becomes uniform. This level of precision is exactly what separates DIY work from the techniques found in step-by-step flooring installation. Getting the depth right ensures the tile is embedded, not just resting on top.
Use a Ledger Board to Defeat Gravity
If you are using heavy subway tiles or stone, gravity is your constant enemy. This is where the ledger board trick for heavy wall tiles comes in. You screw a straight piece of scrap wood to the wall exactly one tile-height above the counter. It acts as a temporary shelf so your tiles don’t slide while the mortar sets. It’s a lot like how pros handle carpet install secrets; you need a solid foundation before you worry about the aesthetics. If you’re working with uneven walls, using the laser level hack for straight tile rows will keep your horizontal lines from drifting upward as you move across the kitchen.
Back-Butter Your Tiles for a Permanent Bond
For tiles larger than 4×4 inches, the notches on the wall aren’t enough. You need to apply a paper-thin layer of mortar to the back of the tile itself—a process called back-buttering. Think of it like using wood glue on both surfaces of a joint. I once skipped this on a 12×24 porcelain job, and a month later, a tile literally fell off when the homeowner bumped it with a toaster. Now, I follow the back-buttering rule for large format wall tiles religiously. It fills in the micro-pores of the ceramic and ensures the ridges on the wall actually fuse with the piece. Once you press the tile into the ridges, give it a little wiggle. This ‘collapses’ the ridges and creates a solid, void-free bed of adhesive. If you do end up with a mess, knowing how to fix a chip in a ceramic tile backsplash early on can save the day before the mortar cures into concrete.It’s a common misconception that ‘more is more’ when it comes to flooring comfort. I see homeowners all the time opting for the thickest, softest carpet pad available, thinking they’re creating a plush oasis. But here’s the expert reality: why your carpet pad is too thick for the tack strip is often the reason your expensive installation looks like a series of ocean waves within six months. According to the Carpet and Rug Institute (CRI), pads that exceed 7/16 of an inch for many residential carpets can actually void the manufacturer’s warranty because it allows too much vertical movement, which breaks down the carpet backing. If the pad is taller than the tack strip pins, the carpet has nothing to bite into. You’re better off choosing high-density over high-thickness to ensure carpet install secrets like long-term tension stay intact. This principle applies to almost every floor type; support beats softness every single time. 
Thicker Padding Isn’t Always the Luxury You Think It Is
Beyond the living room, this ‘hollow’ mistake ruins bathrooms too. Most DIYers think a pre-fab shower pan is a plug-and-play solution, but if there is air under that pan, it’s only a matter of time before it fails.
Why does my shower base feel like it’s sinking?
This is one of the most terrifying feelings for a homeowner—stepping into a brand-new shower and feeling a slight ‘give’ underfoot. Most DIYers and even some ‘pro’ handymen rely on plastic shims or spray foam to level a pre-fab base. That is a recipe for disaster. If you don’t use the dry-pack method for a level shower base, the weight of the water and the user will eventually cause the base to flex, cracking the drain seal and leading to a structural nightmare. It’s why why your shower base is sinking into the floor usually traces back to a hollow void where there should have been a solid mortar bed. If you’re planning an ultimate shower renovation guide, never skip the mortar bed. The mortar provides the 100% contact needed to prevent the fiberglass or acrylic from fatiguing.
Stop Cutting Your Door Jambs Too High
Another classic ‘oops’ factor happens during the transition from tile to hardwood or vinyl. I’ve walked into dozens of jobs where someone made the door jamb saw mistake that leaves huge gaps between the casing and the floor. They use a scrap piece of flooring as a guide but forget to account for the underlayment or the thinset thickness. The result is a daylight gap that no amount of caulk can fix. Similarly, why your caulked baseboards are cracking within weeks is usually because the house is settling or the baseboards weren’t acclimated to the room’s humidity for at least 72 hours. You have to leave the penny gap rule for hardwood expansion space or you’ll end up with buckled boards by mid-summer. Professionalism is found in the gaps you don’t see. Have you ever fallen into this trap or noticed a gap you couldn’t explain? Let me know in the comments.
Ditch the Bubble Level for Laser Precision
If I could go back in time and hand my younger self one tool, it would be a self-leveling cross-line laser. For years, I relied on a four-foot bubble level and a prayer, only to find out halfway across a room that my tile rows were slightly ‘diving.’ Now, I never start a project without my Bosch or DeWalt laser. It creates a perfectly level ‘datum line’ around the entire perimeter of the kitchen or bathroom. Using the laser level hack for straight tile rows isn’t just about being a perfectionist; it’s about preventing that agonizing realization that your last row of tile is a half-inch thinner on one side than the other. This tool is also a lifesaver when you are trying to figure out how to install baseboards on a curved wall or ensuring your baseboard trends in 2025 look sharp and intentional.
How do I keep these new installations looking fresh for a decade?
Maintenance is the part of the job most people ignore until it’s too late. For example, if you’ve installed beautiful new matte-finish planks, you cannot just douse them with a wet mop. Excess water is the enemy of any joint. I always recommend following the microfiber mist rule for cleaning matte floors to avoid streaks and swelling. According to the National Wood Flooring Association (NWFA), maintaining a consistent indoor relative humidity between 30% and 50% is the most critical factor in preventing gaps and cracks. If you ignore this, you’ll find that even the best work can’t stop wood from moving. I’ve seen homeowners panic because of why your white baseboards are turning yellow, which is often just a result of using the wrong oil-based cleaners or high UV exposure. Switching to pH-neutral cleaners specifically designed for your floor type is the simplest way to protect your investment.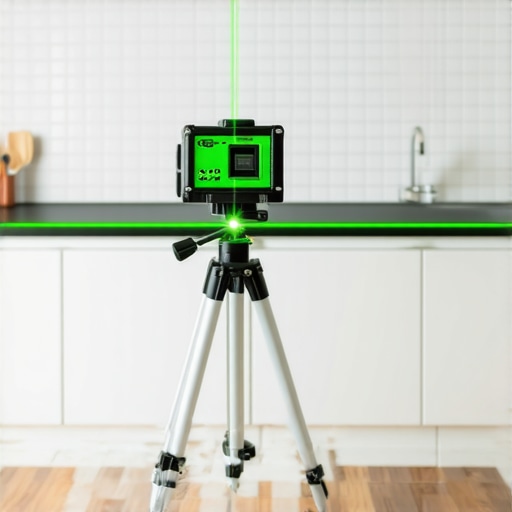
Stop Fighting with Corner Miters
When it comes to the perimeter of the room, many DIYers struggle with gaps in their trim. My secret weapon here isn’t a better saw; it’s the coping saw. Instead of trying to cut two 45-degree angles that never quite meet up, I use the inside cope method for beginners. By cutting the profile of one board to fit over the face of the other, you create a joint that stays tight even when the house shifts. If you are working with premium, wider materials, don’t forget the pre-drill rule for wide baseboard installations to prevent the wood from splitting at the ends. As we look toward the future, I predict we will see a massive shift toward ‘smart’ waterproof trim and baseboards made from high-density polymers that mimic wood grain perfectly but never rot or warp, especially in high-moisture areas like basements. If you really want to level up your game, try using an oscillating multi-tool for your door jamb undercuts; it offers a level of control that a standard hand saw simply can’t match. I challenge you to try the coping method on your next room—it’s a small learning curve that delivers a lifetime of better results.
The Expensive Lessons My First Hundred Square Feet Taught Me
After years of getting my hands dirty, I have realized that the difference between a amateur job and a master craftsman isn’t just talent; it is patience. One of the biggest lightbulb moments for me was realizing that moisture is an invisible contractor that never stops working. If you don’t account for expansion, your hard work will literally pull itself apart. For instance, I learned that the scarf joint rule for long baseboard runs isn’t just a suggestion—it is the only way to keep your trim looking seamless year-round. Another revelation was the ‘sound’ of quality. A hollow-sounding floor or shower base is a ticking time bomb of structural failure. Whether you are dealing with a carpet install or a complex tile layout, the prep work under the surface determines the lifespan of the project. Finally, never trust your eyes over a tool. I once thought I could ‘eyeball’ a level line, only to find out my kitchen was leaning two degrees to the left. Now, I use the step-by-step flooring installation method to ensure every measurement is verified twice before the first cut.
The Gear That Turned My DIY Chaos into Craftsmanship
You do not need a warehouse full of tools, but you do need the right ones for high-stakes areas like showers and high-traffic floors. My essential toolkit always includes a self-leveling cross-line laser, which is the only way I handle baseboards and tile rows now. For those diving into wet areas, the flood test secret for guaranteed leak-proof showers is a non-negotiable step that I trust more than any ‘waterproof’ label on a box. If you are working with textiles, understanding why your carpet seam looks like a speed bump will save you from the most common finishing error in the book. I personally swear by high-density spacers and a high-quality oscillating tool for those tricky undercuts that a standard saw just can’t reach. These tools don’t just make the work look better; they make the process significantly less stressful.
Take the Leap and Transform Your Space Today
There is a unique kind of satisfaction that comes from walking across a floor you laid yourself or seeing the perfect mitered corners on your new baseboards. It turns a house into a home tailored specifically to your standards. Don’t let the fear of a ‘messy’ phase stop you from starting. With the right techniques and a focus on expert flooring installation tips for 2025, you have everything you need to create a professional-grade result. The ‘hidden architecture’ of your home is now in your hands. Have you ever found a mysterious gap in your flooring that drove you crazy, or did you manage to get a perfect fit on your first try? Let me know your biggest renovation wins or ‘oops’ moments in the comments below!