

I still remember standing in my socks on a freshly tiled floor, feeling that cold, damp realization hit me as a rogue puddle of water drifted toward the back corner instead of the drain. It was my first big solo project, and I had ignored the fundamentals of a proper sub-base. I thought I could just eyeball the slope with thinset. Big mistake. That mistake eventually led to a full tear-out because, as I learned the hard way, a shower base sinking into the floor or pooling water isn’t just an annoyance; it’s a ticking time bomb for your subfloor.
Stop Guessing and Start Sloping Your Shower Like a Pro
Today, we are diving deep into the dry-pack method, which is essentially the gold standard for anyone who wants a rock-solid, perfectly pitched shower floor. When you are looking for shower renovation ideas, you often see the beautiful finishes, but the magic happens in the mud. Dry-pack (or deck mud) gives you the structural integrity that pre-sloped foam pans sometimes lack, especially in custom-sized spaces. We’re going to fix that drainage anxiety once and for all. Have you ever spent hours tiling only to find a birdbath puddle the next morning? Believe me, you’re not alone.
Is This Method Actually Better Than a Pre-Made Pan?
Many DIYers ask me if mixing sand and cement by hand is really worth the sweat. The truth is that while a foam kit is fast, it doesn’t offer the same custom fit feel. According to the Tile Council of North America (TCNA), a shower floor must maintain a slope of at least 1/4 inch per foot toward the drain to ensure proper drainage. Achieving that precision with a dry-pack method for a level shower base allows you to compensate for wonky subfloors that aren’t perfectly level to begin with. [image] In my early days, I once made the mistake of making my mix too wet—it turned into a slumped mess that wouldn’t hold a shape. It looked more like a pancake than a pitched floor. But when you get that snowball consistency just right, you can sculpt the perfect pitch every time. We will also touch on why this foundation prevents issues like why your shower niche is collecting water by ensuring the entire system works together. Mastering this slope check tactic is the difference between a bathroom that lasts five years and one that lasts fifty. Let’s look at what you need to get the mix exactly right.
Get the Snowball Consistency Right
To start, you need a mixture of portland cement and sharp sand, usually at a 1:4 or 1:5 ratio. The biggest hurdle for beginners is the water content. You aren’t looking for a pourable slurry; you want something that feels like damp beach sand. I remember my third attempt at a mud bed where I was so worried about it drying too fast that I over-saturated the mix. Instead of a firm base, I essentially created a gray pond that wouldn’t hold a slope. I had to shovel the whole mess out into buckets and start over. That’s when I realized the ‘snowball’ test isn’t a suggestion—it’s the law. When you squeeze a handful of the mix, it should hold its shape without dripping water or crumbling instantly. This consistency allows you to pack it tightly, ensuring the density needed for a durable flooring installation for a stylish home. If your mix is too wet, it will shrink and crack; too dry, and it won’t bond. Much like learning how to mix thinset for the perfect peanut butter consistency, getting your mud right is 90% of the battle.
Don’t Forget the Dry Fit Test for Your Drain
Before a single grain of sand hits the floor, you must execute the dry fit test for shower drain alignment. The drain assembly needs to be set at the exact height to account for the thickness of the mud bed and the tile. If it sits too high, you’ll have a lip that catches water; too low, and you’ll be buried in thinset trying to make up the difference. I always follow the drain flange rule for leak-proof showers to ensure the weep holes remain unobstructed. If those holes get clogged with mortar, moisture trapped in the mud bed has nowhere to go, eventually leading to a musty smell that no amount of cleaning can fix. 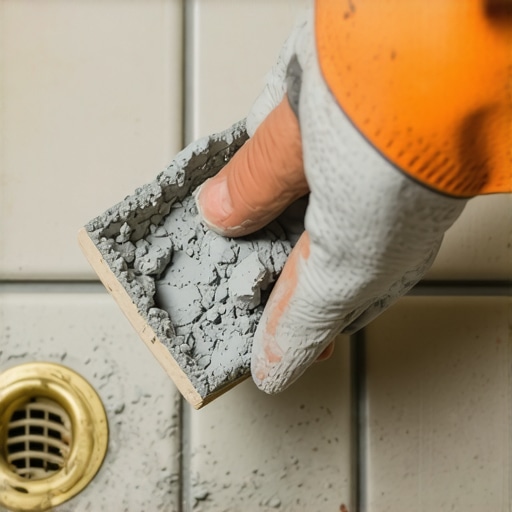
Pull Your Way to a Perfect Quarter Inch Pitch
Once the drain is set and your subfloor is prepped, start by dumping your dry-pack around the perimeter. You want to establish your ‘high point’ at the walls. Using a level and a straightedge, mark a line around the room that represents your 1/4 inch per foot rise. For example, if the distance from the drain to the wall is three feet, your perimeter mud should be 3/4 of an inch higher than the drain flange. This is where the slope check tactic for shower floors becomes your best friend. I use a wood float to firmly pack the mud against the walls and then ‘screed’ or pull the excess toward the drain.
Protect Your Investment with Vertical Waterproofing
While we are focused on the floor, remember that the transition where the floor meets the wall is the most common failure point. This is why why your shower waterproofing needs to go higher than just the base. I always employ the overlap trick for waterproofing shower corners, ensuring the membrane from the walls sits over the floor pan or mud bed. This creates a shingle effect, directing every drop of water toward the drain. Following a step-by-step flooring installation from planning to perfect finish ensures you don’t skip these small but vital structural details. When you finish packing the mud, it should feel hard enough to walk on with ‘kneelers’ almost immediately, providing a flat, perfectly pitched surface ready for tile.
The Drainage Plane Myth That Destroys Subfloors
Let’s dig deeper into what actually happens beneath the surface. Most installers think that as long as the rubber liner or the liquid membrane is intact, the job is bulletproof. In my experience, that is a dangerous half-truth. Everyone says the waterproofing layer is your last line of defense, but the real hero is the drainage plane. If you place a liner directly on a flat subfloor without a pre-slope, you aren’t building a shower; you’re building a stagnant pond. Water that permeates the grout and the mud bed will sit on that flat liner indefinitely, eventually rotting the curb and the bottom of your wall studs. Avoiding flooring installation mistakes to avoid for a seamless look starts by acknowledging that water always finds a way in, so you must give it a way out.
The Silicone Trap and the Weep Hole Disaster
Here is the ‘oops’ factor that separates the pros from the amateurs: the drain weep holes. I once consulted on a six-month-old renovation where the homeowner complained of a constant ‘swamp’ smell. The installer had been so thorough with his silicone that he accidentally plugged the tiny weep holes in the drain assembly. This essentially turned the dry-pack into a water-logged sponge. This is why following the drain flange rule for leak-proof showers is non-negotiable. You need to place crushed tile or pea gravel around those holes to keep the mud from clogging them. Much like why your baseboards are pulling away from the wall due to expansion issues, shower failures are usually caused by things you can’t see once the finish is applied.
Is it possible to over-waterproof a shower assembly?
Believe it or not, yes. This is a nuance many advanced DIYers miss. If you use a traditional lead or PVC liner on the floor and then apply a topical liquid membrane on the walls that overlaps it incorrectly, you can create a ‘moisture sandwich.’ This is similar to the vapor trap mistake that peels your geist garage coating. According to the National Tile Contractors Association (NTCA), moisture trapped between two impermeable layers has no way to evaporate, leading to mold growth within the wall cavity. For high-end projects, I prefer the double membrane tactic for curb-less showers to ensure a continuous, singular drainage path.
Nailing the Finish Beyond the Tile
Once the floor is set, don’t let your guard down on the trim. I see so many beautiful tile jobs ruined by sloppy baseboard transitions. If you’re working with carpet in the adjacent room, you need to master the tuck and roll secret for professional carpet stairs and transitions to ensure a flush look. And when it comes to the walls, avoid the quarter round mistake that ruins baseboard lines. Use a scribe tool to fit your baseboards tightly against the floor for that high-end, custom-built feel. Have you ever fallen into the trap of over-sealing your drain or skipping the pre-slope? Let me know in the comments below—I’d love to hear your horror stories or how you fixed them!
Stop Guessing with a Digital Moisture Meter
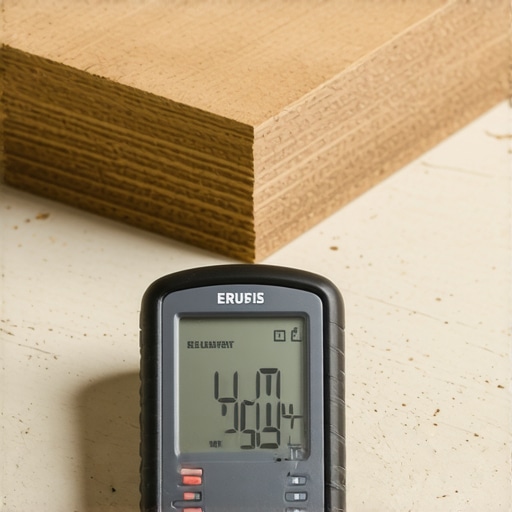
If you want to avoid expensive callbacks, you need to stop relying on your gut and start relying on data. I never start a project without performing the moisture meter test for concrete subfloors. It’s the only way to know if your slab is actually dry enough to accept a durable flooring installation for a stylish home without the adhesive failing six months later. I personally use a pinless meter because it’s non-destructive, and I’ve seen too many DIYers skip this step only to find their luxury vinyl bubbling or their hardwood cupping. For those working in basements, the self-leveler tactic for basement flooring fixes is often necessary, but you can’t even pour that until you know your moisture levels are stable. This precision is what separates a weekend hobbyist from a professional whose work lasts a lifetime.
How Can I Keep My Floors Pristine for Decades?
Maintenance is where most homeowners drop the ball. People spend thousands on a beautiful walk-in shower then use harsh chemicals that eat right through the grout. I always recommend learning how to clean grout without stripping the sealer to preserve the integrity of your wet areas. If you notice a crack in a corner, don’t just ignore it; check my guide on why your tile grout is cracking in the corners to see if it’s a structural issue or just standard settling. For carpet lovers, maintenance means preventing the dreaded ‘speed bump’ look. In the power stretcher vs knee kicker debate, I will always side with the power stretcher. A knee kicker is for positioning, but a power stretcher is for longevity. If you don’t stretch the carpet properly during the carpet install secrets achieving flawless results every time, it will eventually ripple and require a full re-stretch.
The Future of Flooring is High-Tech and High-Performance
Looking ahead to 2025 and beyond, we are seeing a massive shift toward larger tiles and epoxy-based systems. According to the Schluter-Systems North America Technical Manual, movement joints are becoming more critical than ever as we move toward these massive porcelain slabs that offer very little flex. This means mastering expansion gaps isn’t just for wood anymore. I predict we’ll see more homeowners opting for shower repairs when to fix vs replace for longevity rather than full demos, as topical waterproofing systems make targeted fixes easier. Even in woodworking, the miter clamp secret for professional baseboard corners is being combined with fast-acting cyanoacrylate glues to create joints that simply cannot pull apart. We are entering an era where the tools are more precise, and the materials are more resilient, but the fundamentals of a good layout never change.
When you are working with carpet transitions, remember that heat is your friend but also your enemy. Getting the iron temperature secret for flat carpet seams right is the difference between an invisible joint and a melted mess. I want you to try one thing on your next project: spend the extra twenty dollars on a high-quality scribe tool or a miter clamp. That small investment in your toolkit will immediately elevate the quality of your finish. Go ahead and test out that ‘Iron Temperature’ trick on your next seam—you’ll never go back to ‘eyeballing’ it again.
Lessons Bought with Sweat and Scrapped Mortar
If there is one thing I’ve learned from years of renovating wet areas, it’s that the ‘working time’ of your mud bed is a fickle friend. If you’re tiling over a large area, don’t mix the whole batch at once unless you have a helper. I’ve seen seasoned pros get caught out by a dry-pack that started setting before they finished the screed, leading to a surface that won’t bond properly. You must also remember the full bond rule for large format porcelain if you’re upgrading to modern, oversized tiles; without that solid contact, your beautiful new floor is prone to cracking. I also tell everyone to double-check their subfloor fasteners before the mud goes down. Ignoring a single loose screw or a weak joist is often why your shower pan is making a popping sound months later, and by then, the fix is a nightmare. Precision at the start saves you from a total demo later.
My Go-To Kit for Flawless Finishes
I don’t leave for a job site without a few specific tools that guarantee a professional result. First, a dedicated magnesium float is essential—it provides just the right amount of ‘bite’ for smoothing out dry-pack compared to a standard wood float. Second, if you’re dealing with tricky corners where the floor meets the wall, I swear by the coped join tactic for crown molding style baseboards to ensure those transitions look seamless even when your walls aren’t perfectly square. When it comes to design, knowing how to choose the perfect baseboards for your homes style is just as important as the structural work. Finally, a high-quality six-foot straightedge is your best defense against ‘birdbaths’ or low spots in your slope. These tools haven’t just made me faster; they’ve made me more consistent.
#IMAGE_PLACEHOLDER_E#
Turn Your Vision into a Solid Reality
Mastering a dry-pack floor or a perfectly stretched carpet isn’t just about following a manual; it’s about the pride of building something that lasts. When you take the time to upgrade your bathroom the ultimate shower renovation guide style, you aren’t just increasing property value—you’re creating a space that functions perfectly every time you step into it. It’s okay to be nervous about your first mud bed or your first miter cut. Every pro you see started exactly where you are: standing over a pile of sand and cement, hoping the slope is right. Take your time, trust your measurements, and you’ll achieve a durable flooring installation for a stylish home that you can be proud of for decades. Did you find the ‘snowball’ consistency as tricky as I did on your first try? Let me know in the comments below!