

I remember the first time I noticed that ugly, dark shadow creeping along the bottom of my hallway. I had just finished a massive flooring installation project, and I was feeling pretty proud of myself—until the house started moving. It felt like my walls were literally trying to escape the floor. If you have looked down and seen your trim slowly separating from the drywall, you are not alone. It is one of those home maintenance gremlins that keeps us up at night, wondering if the foundation is sinking or if the house is just tired of holding itself together. I am here to tell you that it is usually something much simpler, but no less annoying.
The Real Reason Your Trim is Playing Hide and Seek
Truth be told, when I first started DIYing, I made a classic rookie mistake: I thought more nails solved every problem. I practically turned a section of my living room into a pincushion, only for the gap to return even wider by the time winter rolled around. I did not realize that baseboards are not just decorative; they are the front lines of your home’s battle with humidity and structural settling. Whether you are dealing with modern baseboard styles or old-school moldings, the laws of physics do not care about your aesthetic. Usually, it is a mix of seasonal expansion, wet studs, or even a poor flooring installation that does not leave enough expansion room for the floor to breathe.
Will a simple bead of caulk actually hold?
It is the question I get most often from my neighbors. Can I just fill it and forget it? Well, yes and no. If you do not address the underlying tension, that caulk will just crack like a dry desert within weeks. According to the National Association of Home Builders, the wood framing in a new home can take up to a year to fully dry out and reach its equilibrium moisture content, which is a fancy way of saying your walls are still shrinking while you are trying to decorate them. We are going to look at how to use the right caulk and adhesive to ensure that once you fix it, it stays fixed. Have you ever noticed your gaps getting wider in the winter and nearly disappearing in the summer? Drop a comment and tell me what your walls are doing!
Setting the Stage for a Permanent Fix
Before we grab the hammer, we need to talk about why using flex glue or specialized fasteners is better than just firing more nails into thin air. If you are missing the studs, you are just making holes. We will get into the nitty-gritty of finding the solid wood behind that drywall and how to deal with those tricky transitions that always seem to pull away first.
Stop Firing Nails into Empty Air
Finding the wall studs is non-negotiable if you want a fix that lasts longer than a week. I remember helping a friend with a flooring installation in an old 1920s bungalow where the plaster was so thick my stud finder just gave up. The walls were as wavy as the ocean. Instead of just hammering away and hoping for the best, I used the flex glue fix for loose baseboard sections combined with a few well-placed finish nails into the bottom plate. Asking a nail to hold a warped board against a hollow wall is like trying to staple a garden hose to a cloud; it just won’t stay. You need a mechanical bond and a chemical bond working together. Before you apply any adhesive, use the painters point hack for baseboard nail holes to mark exactly where your solid wood is. This ensures your fasteners actually have something to bite into. 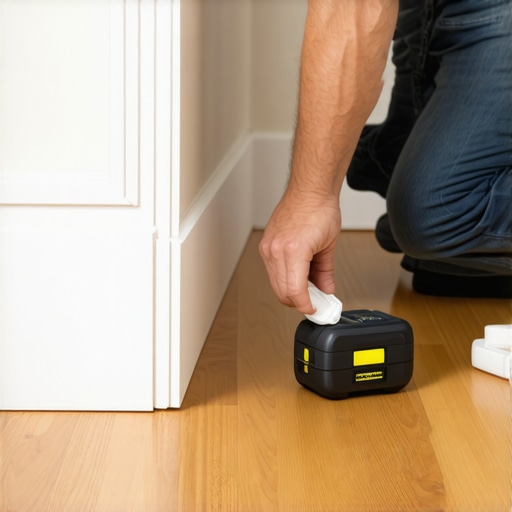
Master the Miter Before the Caulk Comes Out
A common mistake is trying to hide a 1/4-inch gap in a corner with a mountain of caulk. It looks like white toothpaste squeezed into a canyon. To avoid this, you need to tighten up your joints before the board even touches the wall. I always rely on the miter clamp secret for professional baseboard corners to keep the edges flush. If you are dealing with slightly off-angle walls—and let’s be honest, every wall is off-angle—you can use the hot glue hack for holding baseboard miters while nailing. This holds the joint tight while you drive your finish nails, preventing the board from sliding as the nail enters the wood. For those tricky spots where the board ends abruptly, the hidden miter secret for baseboard returns gives you that high-end, finished look that makes the whole room feel more expensive.
Leave Room for Your Floor to Breathe
Whether you just finished a carpet install or laid down new luxury vinyl, the floor needs to move. If you pin your baseboards too tightly against the flooring, the floor will eventually buckle or push the trim right off the wall. When working with carpet, I always recommend the carpet tucker move for clean baseboard edges to ensure the fibers are tucked neatly under the wood without creating a massive dirt-trapping gap. If you have hard floors, make sure you are not making the t-molding mistake most vinyl installers make by ignoring expansion zones. A baseboard should sit just a hair above the floor—about the thickness of a business card—to allow for natural seasonal shifts. If the gap at the bottom is driving you crazy, check if you missed the quarter round mistake that ruins baseboard lines, which is often used as a band-aid for poor measuring. Always scribe your boards to the floor if the subfloor is uneven, rather than forcing the wood to bend to the floor’s will.Most people think ‘waterproof’ means they are safe from every liquid threat, but in the world of professional flooring installation, that word is often a dangerous marketing trap. If you lay luxury vinyl over a damp concrete slab without performing the moisture meter test for concrete subfloors, you aren’t protecting your home; you’re building a petri dish. Moisture naturally rises out of concrete and becomes trapped under those ‘waterproof’ planks. This creates what I call the vapor trap mistake, which can lead to mold and subfloor rot that you won’t notice until the smell hits you. Have you ever fallen into this trap? Let me know in the comments! Even the best materials fail if you ignore the science of the subfloor.
Why You Need to Take the Waterproofing Higher Than You Think
When creating a spa-like shower experience, most DIYers stop their waterproofing membrane right at the showerhead level. However, the Tile Council of North America (TCNA) Handbook suggests that for high-moisture environments or showers with multiple jets, waterproofing should ideally extend to the ceiling. If you don’t, steam penetrates the drywall above the tile line, eventually causing why your shower niche is growing mold behind the tile or peeling paint on the ceiling. It’s not just about the splashes you see; it’s about the water vapor you don’t. 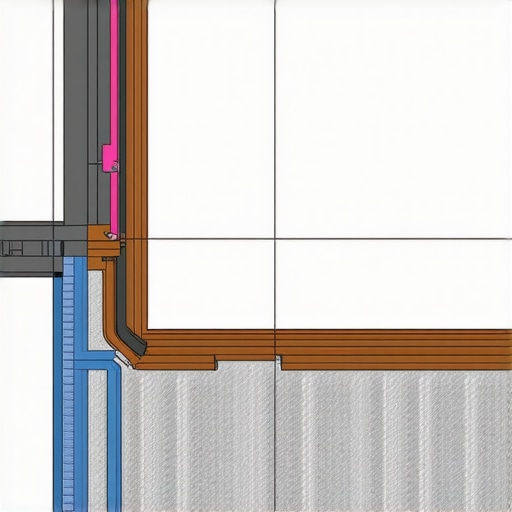
Why does your rigid core floor sound hollow when you walk?
It’s a nagging frustration that often follows a durable flooring installation. You followed the box instructions, yet every footstep sounds like a plastic drum. This usually happens because the installer focused on ‘level’ but ignored ‘flat.’ You can have a floor that is perfectly level according to a bubble, but a 1/8-inch dip over a six-foot span will cause why your rigid core floor sounds hollow when you walk. Before laying a single plank, you must perform the straight edge test for vinyl plank subfloors. If you find a dip, be careful with the solution. I’ve seen the self-leveler mistake that creates new high spots ruin more floors than the original dips ever would have. You need to use the feather edge tactic for smoothing subfloor seams to ensure the transition is gradual and truly flat.
Stop Trusting the Thickest Carpet Pad for Quality
In the world of carpet install secrets, there is a common myth that the thicker the pad, the better the carpet. In reality, a pad that is too thick and soft acts like a trampoline, causing the carpet’s primary backing to stretch and flex every time you step on it. This leads to why your carpet pad is crushing down too fast and eventually causes those ugly ripples that explain why your carpet is coming loose in the hallway. For the best longevity, stick to a high-density pad (at least 8 lbs) that is no more than 7/16-inch thick. It might feel slightly firmer underfoot, but your carpet will last twice as long and stay tight to the walls.If you are serious about a carpet install, throw away the knee-kicker for anything other than positioning. I learned the hard way that a tool which relies on your kneecap is a recipe for physical therapy and a wavy hallway. For a truly professional finish, you need to dive into the power stretcher vs knee kicker debate and realize that the stretcher is the only way to meet the Carpet and Rug Institute (CRI) 104 standards, which require a 1% to 1.5% stretch in both directions. Without that mechanical tension, the carpet will eventually lose its grip on the tack strip and start to ripple within three years.
How do I maintain my flooring and trim over time?
The biggest threat to your hard work isn’t foot traffic; it’s neglect of the seals. I make it a habit every six months to walk the perimeter of my rooms with a flashlight. I’m looking for small cracks in the corner joints of the trim or gaps where the floor meets the wall. If you notice discoloration, you might be dealing with why your white baseboards are turning yellow, which is often a sign of UV damage or improper oil-based paint usage. In the bathroom, check your silicone every single year. Once that bead fails, water gets behind the tile and causes the very rot you worked so hard to prevent when you decided why your shower waterproofing needs to go higher during the initial build. 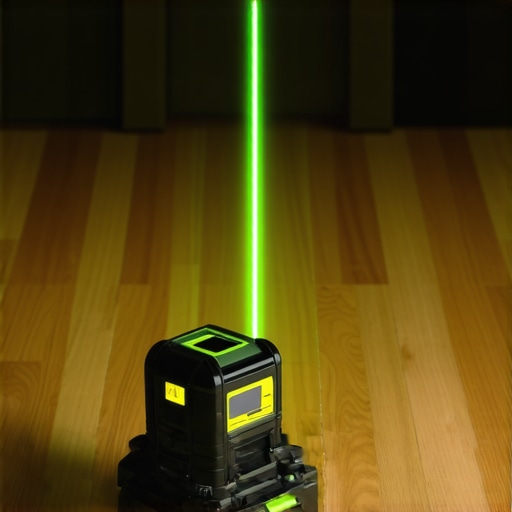
Trust the Laser Instead of Your Eyes
I used to think I had a ‘calibrated eye’ for level surfaces until I bought a 360-degree green beam laser. Now, it’s the first tool out of the bag for any durable flooring installation. Whether I am setting the first row of a flooring installation or checking the slope check tactic for shower floors, the laser doesn’t lie. It’s particularly vital for stairs; if your layout is off by even an eighth of an inch, you’ll violate the stair nose safety rule for hardwood steps, creating a trip hazard that a simple bubble level might miss. Looking ahead, I suspect we are moving toward augmented reality apps that will scan our subfloors and highlight dips in real-time, but for now, that high-visibility green line is your best friend. If you really want to level up your game, I challenge you to try the laser method on your next baseboard project—it’ll show you exactly how ‘flat’ your floors really are. Don’t be afraid to get technical; the best results always come from the best data.
Hard Lessons from a Decade of Trim and Tile
If there is one thing my years of DIY has taught me, it is that the best results come from the things you cannot see once the job is finished. For instance, I spent years struggling with gaps in my corners before I discovered the back cutting secret for baseboard miters. It allows for a tighter fit even when walls are not perfectly square. Another lightbulb moment happened in the bathroom; I realized that a solid foundation starts with the dry pack method for a level shower base rather than just relying on pre-fab pans that might flex. Also, never underestimate the power of a good stretch—learning the power stretcher vs knee kicker debate saved my back and ensured my carpets did not ripple after two years. These are the small nuances that transform a ‘good enough’ job into a professional masterpiece.
The Gear That Separates Amateurs from Pros
I am often asked what is actually worth the investment. First, stop guessing on your mortar; learn how to mix thinset for the perfect peanut butter consistency to ensure your tiles actually stay on the wall. I also highly recommend the TCNA Handbook for anyone doing wet area work—it is the industry bible for a reason. For transitions, skip the cheap plastic and look into the hidden screw method for metal transition strips to get that sleek, flush look. Finally, a high-quality moisture meter is your best defense against the ‘vapor trap’ issues we discussed earlier.
Build Something That Outlasts the Trends
At the end of the day, a successful flooring installation is about more than just a pretty surface; it is about the peace of mind that comes from knowing the bones of your home are protected. Whether you are tackling a shower renovation or just refreshing your baseboards, take the time to do it right the first time. You have the tools and the knowledge now—it is time to stop overthinking and start building. If you ever feel stuck, you can always contact us for advice or professional help. Have you ever encountered a subfloor surprise that nearly ruined your project? Let me know in the comments below!