

I’ll never forget the sound of the first drop hitting the drywall in my kitchen. It wasn’t a pipe bursting; it was a slow, rhythmic ‘plink… plink… plink’ that told me my weekend bathroom project had just become a five-figure nightmare. I was so proud of my tile work, but I’d committed the cardinal sin of shower builds: I ignored the drain flange. I thought as long as the water went into the hole, I was golden. I was wrong. The ‘drain-flange’ rule is the difference between a spa-like retreat and a moldy mess, and today, I’m going to make sure you don’t repeat my $12,000 mistake.
The Night I Realized I’d Ruined My Subfloor
The problem didn’t show up right away. For months, I enjoyed my shower renovation, thinking I’d nailed it. But beneath the surface, water was wicking into the subfloor because I hadn’t properly integrated the waterproofing membrane with the drain flange. I’d basically built a beautiful bowl with a hole in the bottom that didn’t quite line up. If you’ve ever dealt with shower repairs, you know that by the time you see the stain on the ceiling, the damage is already done. It’s visceral—that sinking feeling in your gut when you realize the tile has to come up. According to the Tile Council of North America (TCNA), moisture-related failures account for nearly 80% of all tile litigation, usually stemming from poor drainage or waterproofing.
Does This One Piece of Plastic Actually Matter?
I get the skepticism. You’re tired, your back hurts from lugging thin-set, and you just want to get the floor down. You might be wondering if this precise flange alignment really matters if you’re using a high-quality liner. The answer is a resounding yes. Without that mechanical bond between the flange and your waterproofing layer, you’re just hoping for the best. And ‘hope’ is a terrible strategy for plumbing. Before you even mix your mud, you need to perform the dry-fit test for shower drain alignment to ensure everything sits flush and centered.
How to Stop Your Shower from Becoming a Slow-Motion Flood
The core of the rule is simple: the waterproofing must be sandwiched and sealed directly to the flange, not just ‘near’ it. Early in my career, I made the mistake of thinking silicone would bridge a gap between the liner and the drain. Spoiler alert: it didn’t. You need to ensure you are using the dry-pack method to create a stable base that directs every single drop toward the drain. We aren’t just making it look good; we’re engineering a system. Have you ever noticed a soft spot near your drain or seen grout that stays wet for hours after you’ve finished showering? That’s the warning sign. Tell me in the comments—have you spotted a mysterious damp patch lately, or are you starting your build from scratch to avoid it? Let’s talk about why we need to double-check the slope check tactic before we even think about the decorative stuff.
Make the Drain the Center of Your Universe
The first thing you have to do is treat your drain like the center of the universe. If that flange is even a fraction of an inch off-level or the wrong height, your entire slope is compromised. I remember a job in a tight secondary bathroom where I rushed the subfloor prep. I didn’t use the dry-fit test for shower drain alignment because I thought the existing pipe was ‘good enough.’ It wasn’t. When I poured my mortar, the drain sat slightly higher than the surrounding floor, creating a literal moat where water pooled under the tile. I had to chip out cured concrete for four hours the next morning. Don’t be that guy. Ensure your subfloor is rock solid by following how to reinforce a subfloor for heavy stone tiles to prevent any shifting that could crack your waterproof seal later.
Why You Must Sandwich the Membrane
Next comes the actual bonding. Think of your waterproofing membrane as a high-tech raincoat. A raincoat only works if it’s tucked into your boots so the water runs into them, not down your socks. In this case, the ‘boots’ are the drain flange. You need to apply a bead of specialized sealant between the liner and the flange base before bolting the top ring down. This creates a mechanical squeeze that no amount of water can bypass. If you’re working with a bonded membrane, you must ensure 100% coverage. This is where the overlap trick for waterproofing shower corners becomes your best friend. Every seam is a potential highway for a leak, and the drain is the main intersection. If you don’t get this right, you’ll eventually find out why your shower base is sinking into the floor as the wood rots beneath it. 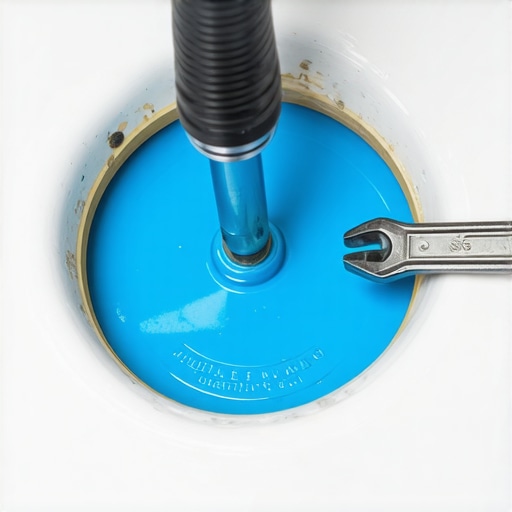
Stop Your Walls from Ruining Your Floor
Once the drain is secured, we move to the walls. Many people stop their waterproofing too low, thinking the tile and grout are waterproof. They aren’t. Grout is a sponge. You need to know why your shower waterproofing needs to go higher than the splash zone to prevent moisture from wicking behind the pan. If you’re using backer boards, adhere to the backer board rule for tile wall stability. A wall that flexes will eventually snap the waterproof seal at the floor-to-wall transition. I always use a level and a straight-edge to verify the base. It’s the same logic as the straight-edge test for vinyl plank subfloors—if it isn’t flat before you start, it won’t be flat when you finish. To ensure proper drainage, utilize the dry-pack method for a level shower base and never skip the slope check tactic.
The Secret to a Permanent Tile Bond
When you finally go to set your tile, the consistency of your mortar is your next hurdle. I see so many DIYers mix their thin-set too dry, which prevents it from grabbing the membrane. Learn how to mix thinset for the perfect peanut butter consistency to ensure that your tile actually stays stuck. This is especially vital for floor tiles where you need to follow the full bond rule for large format porcelain. If the bond is weak, the tile will shift, and that movement will eventually tear the membrane at the drain flange, leading right back to the disaster I faced in my own kitchen.It’s a common misconception in the DIY world that if you buy the most expensive waterproofing membrane, your job is done. But here’s the contrarian truth: you can actually over-seal a shower to death. If you are using a traditional clamping-ring drain, those tiny ‘weep holes’ are there for a reason. I’ve seen ‘pros’ slather silicone over them, thinking they were being extra thorough. Instead, they trapped water in the mortar bed with nowhere to go. According to the IICRC (Institute of Inspection Cleaning and Restoration Certification), improper drainage within the sub-layers of a flooring system is a leading cause of secondary mold growth, even when the surface looks pristine. This is exactly why you need to understand why your shower drain is clogged with construction debris or blocked by poor installation technique.
Don’t Block the Exit for Trapped Moisture
When you build a shower pan, you have to realize that water *will* get past your grout; it’s just a matter of when. The weep holes in your drain assembly are the emergency exits for that moisture. If you pack mortar too tightly around them, or worse, use a non-porous material, you’re creating a stagnant pond under your tiles. This leads to the ‘sour shower’ smell that no amount of bleach can fix. This mistake is as common as flooring installation mistakes to avoid for a seamless look in other parts of the home. Always place a bit of pea gravel or specialized plastic spacers around those holes before you finish your mud bed.
Why is Your ‘Waterproof’ Shower Still Smelling Like Mildew?
It usually comes down to the niche. People slope the floor but leave the niche flat. I once walked into a luxury master bath where the niche was essentially a petri dish because water sat on the bottom ledge. This is why why your shower niche is collecting water is such a common troubleshooting topic for homeowners. You have to slightly pitch that shelf toward the drain—it’s a nuance that separates the weekend warriors from the artisans. 
The Tension Secret That Stops Carpet Ripples Forever
Moving out of the bathroom, let’s talk about the ‘Oops’ factor in bedrooms. Everyone thinks a knee kicker is enough for a small room. In reality, a knee kicker is for positioning, not for stretching. If you don’t use a power stretcher, your carpet will eventually develop those ugly ‘speed bumps’ in the middle of the room. This is the core of carpet install secrets achieving flawless results every time. Without proper mechanical tension, the backing relaxes over time. I’ve seen thousand-dollar carpets ruined because the installer skipped the power stretcher to save twenty minutes. Also, pay attention to the heat; the iron temperature secret for flat carpet seams is the difference between an invisible join and a melted mess.
Tight Miters Require More Than Just a Saw
Finally, there’s the baseboard trap. Most people think a standard 45-degree miter is the gold standard for corners. In reality, house walls are rarely perfectly square. If you don’t use the miter clamp secret for professional baseboard corners, your joints will open up the second the humidity changes. I used to just ‘caulk and walk,’ but that’s a rookie move that leads to why your baseboards are pulling away from the wall. You need to back-cut your miters slightly to ensure the front edge touches first, creating a seamless look even if the wall is wonky. Have you ever fallen into this trap where you thought you were doing everything right, only to find a puddle or a gap months later? Let me know in the comments.
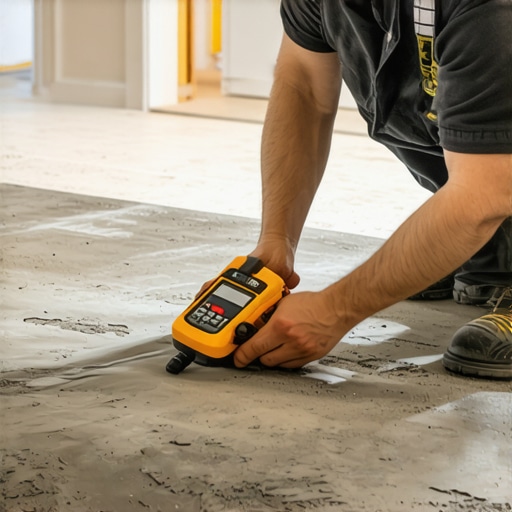
If there is one thing I’ve learned from years of fixing my own (and others’) blunders, it’s that the work doesn’t stop when the last tile is buffed or the final nail is driven into the trim. You need a long-term strategy. To start, let’s talk about the one tool that stays in my truck regardless of the job: a professional-grade moisture meter. Before I even think about laying down a single plank, I perform the moisture meter test for concrete subfloors. I’ve seen beautiful hardwood buckle like a cheap suit because the installer ‘felt’ the concrete was dry. The National Wood Flooring Association (NWFA) is very clear about this: they state that maintaining a consistent relative humidity between 30-50% is the only way to prevent permanent structural gapping in organic floor materials. If you aren’t measuring, you’re guessing, and guessing is expensive.
The Tools That Separate Amateurs from Artisans
I used to think my hands were the only tools I needed, but then I got a power stretcher. If you’ve ever followed the power stretcher vs knee kicker debate, you know my stance: the knee kicker is for the corners, but the power stretcher is for the life of the room. It’s the difference between a carpet that lasts fifteen years and one that ripples in three. Similarly, when it comes to those tricky baseboard joints, I stopped relying on luck and started using the back-cutting secret for baseboard miters. This little trick ensures your joints stay tight even if your house breathes and shifts. It’s about having the right leverage for the specific material you’re working with.
How can I keep my flooring investment looking brand new?
Maintenance is where most homeowners drop the ball. For your luxury vinyl, don’t just reach for the harshest chemical you find under the sink. Knowing how to fix a scuffed vinyl plank with household items can save you from an early replacement. In the shower, the secret isn’t more scrubbing; it’s better ventilation. If you followed my advice on waterproofing, your subfloor is safe, but your grout needs to breathe. Keep those weep holes clear to avoid that stagnant moisture smell. We are seeing a massive shift in transform your flooring top trends in installation for 2025 toward antimicrobial grouts and smarter drainage systems that practically maintain themselves.
Where Flooring Technology is Heading in 2026
I’m predicting a surge in ‘smart subfloors’—systems that actually alert your phone if a leak is detected beneath your tile before it hits the drywall. Until then, we rely on the fundamentals. Whether you are following baseboard trends in 2025 fresh styles for every room or sticking with classic subway tile, the longevity of your home depends on the discipline you show during the prep phase. My challenge to you? Next time you’re installing trim, try that back-cutting method I mentioned. It’ll change the way you look at a miter saw forever. Don’t just build for the ‘reveal’ photo; build for the next decade of your life.
Lessons My $12,000 Kitchen Puddle Taught Me
Building a home is really about managing water and tension. I’ve learned that a ‘good enough’ drain flange setup is just a slow-motion demolition project. First, remember that silicone is not a substitute for proper flashing; it eventually fails, and when it does, the water will find the path of least resistance. Second, never assume a subfloor is ready just because it looks okay. Always perform the moisture meter test for concrete subfloors to avoid the heartbreak of buckling planks later. Third, those tiny weep holes in your drain are there for a reason—block them, and you’re inviting a ‘sour’ smell that no candle can mask. Finally, when it comes to trim, the wall is always wrong; learn to back-cut so your miters stay tight for decades.
My Secret Weapon Toolkit for Every Room
You don’t need a warehouse full of tools, but you do need the right ones for the ‘invisible’ work. For any bedroom project, I refuse to work without a power stretcher; if you’ve seen the power stretcher vs knee kicker debate, you know it’s the only way to prevent ripples. I also highly recommend the TCNA (Tile Council of North America) Handbook; it’s the industry standard that keeps you from making flooring installation mistakes to avoid for a seamless look. Lastly, keep a set of miter clamps in your pouch to master the back-cutting secret for baseboard miters, ensuring those corners never open up when the seasons change.
Crafting a Home That Outlives the Trends
It’s easy to get caught up in transform your flooring top trends in installation for 2025, but the most beautiful floor is one that doesn’t fail. Whether you are tackling a spa-like shower or a cozy living room, the discipline you show in the prep phase—the stuff no one sees—is what makes you a true craftsman. Don’t be afraid of the learning curve. Every mistake is just a lesson in how to do it better the next time. Your successful flooring installation starts with that first, precise measurement. Have you ever found a mysterious wet spot near your shower drain or a bump in your carpet that drove you crazy? Let me know below and let’s troubleshoot it together!