

I was shuffling toward the kitchen for my midnight snack when I felt that unmistakable, sharp ‘tug’ on my sock. You know the feeling. It’s the sound of a single fiber of your expensive carpet being pulled to its absolute limit. I looked down, and my heart sank. A loop had pulled up, and like a loose thread on a vintage sweater, I knew one wrong move would turn my living room into a crime scene of unraveled yarn. I’ve been there—trust me. In my early days, I actually tried to just ‘trim’ a snag on a level loop carpet, and by the next week, I had a four-inch bald spot because the weave just kept coming apart. It was a total amateur disaster. But here’s the good news: if you catch it now, you can fix it in five minutes with stuff you already have in your junk drawer. We’re going to stop that run in its tracks today. [image_placeholder_1]
Your Living Room Is One Tug Away from Disaster
We tend to treat carpet as this indestructible slab of fabric, but it’s actually a complex web of loops and backing. When one loop snags—whether it’s from a pet’s claw, a sharp furniture leg, or a rogue vacuum—it puts immense tension on the surrounding fibers. If you’ve ever seen a ‘run’ in a pair of stockings, you know exactly what’s at stake here. This is especially true for best carpet types for high traffic where the weave is tight and under constant pressure. The ‘Why’ is simple: a five-cent drop of glue today prevents a thousand-dollar replacement tomorrow. According to the Carpet and Rug Institute, neglecting minor repairs is a primary contributor to carpets failing to meet their expected lifespan. Have you ever noticed a tiny snag and thought, ‘I’ll get to it later,’ only to have it triple in size by the weekend? Tell me I’m not the only one who has played that dangerous game!
Wait, Will This Just Make the Hole Bigger?
I get the fear. The last thing you want to do is start poking at your floor with tools. You’re worried that by trying to fix one loop, you’ll accidentally pull up ten more. It’s a valid concern, especially if you’ve already had issues with flawless carpet installation in the past and know how delicate those seams can be. But doing nothing is actually the riskiest move you can make. Think of it like a loose tooth; you can’t just ignore it and hope it heals itself. We aren’t going to be ‘pulling’ anything. We are going to be ‘resetting’ the fiber. If you can handle a toothpick and a little patience, you can do this. If you can fix a squeaky floor through carpet, you can certainly handle a simple snag repair without making things worse.
Clear the Area and Prep Your Surgical Kit
The first rule of carpet repair is that you never, ever use scissors first. It’s like trying to fix a leaky pipe by cutting the pipe; you’re just making the problem permanent. Instead, grab a small bottle of clear fabric adhesive or a hot glue gun (if you have a steady hand), a couple of toothpicks, and a heavy book. You want to avoid the common flooring installation mistakes to avoid, which often involve using the wrong chemical that ends up melting the synthetic fibers or leaving a permanent yellow stain. If you’re working on something more significant, like when you have to patch a hole in carpet from a door stop, the stakes are higher, but for a simple snag, we just need to re-anchor the yarn to the backing rather than replacing the whole section.
Apply the Adhesive Without Creating a Messy Clump
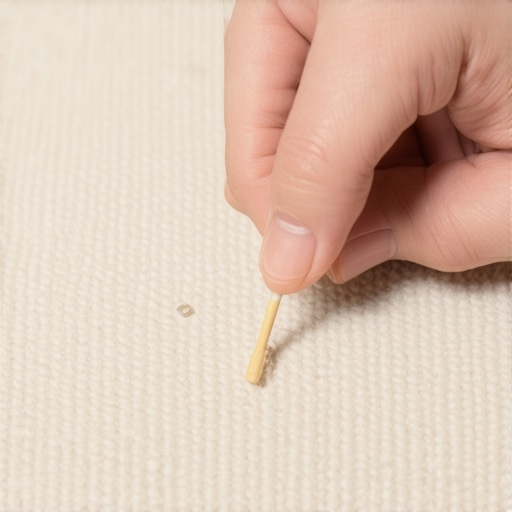
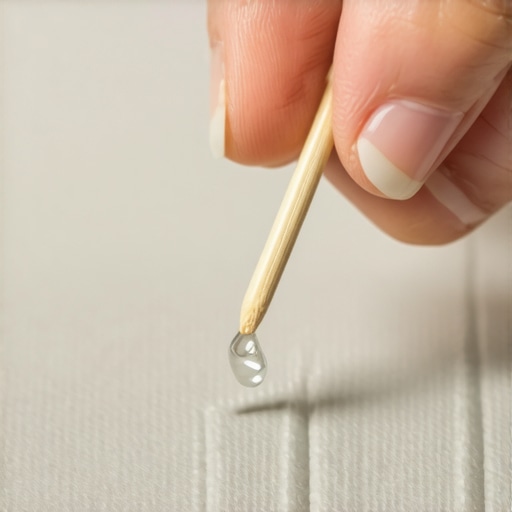
I remember a job in a tight hallway—this was years before I learned the carpet install secrets that pros use—where I thought I could just tuck a snag under the baseboard and hope for the best. I ended up pulling it so hard that the whole row started to unzip. It looked like a zipper on a hoodie that went off the rails. That’s when I realized that every single loop is connected to its neighbor, and you need a surgical approach, not a brute-force one. Take your toothpick and dip it into the adhesive. You don’t want a glob; you want just enough to coat the tip. Gently lift the snagged loop and find the exact spot in the backing where it originated. This is similar to how we handle the level loop fix for frayed office carpets where high traffic makes every loose thread a hazard. Apply a tiny dot of glue directly to the carpet backing, not the fiber itself. If you get glue all over the top of the yarn, it will dry hard and scratchy, and you’ll feel it every time you walk by in bare feet.
Push That Loop Back Home for Good
Once the glue is in place, use a clean toothpick to push the loose loop back down into the adhesive. You want it to sit flush with the surrounding loops so it blends in perfectly. This is the part where patience pays off. If the fiber is particularly stubborn, you might need to hold it there for thirty seconds. I once tried to rush this on a dense Berber and didn’t wait for the glue to tack up. When I let go, the loop sprang back up like a jack-in-the-box, spreading glue onto the surrounding fibers. It was a nightmare to clean up. After you’ve successfully seated the loop, place a heavy object—like a thick book—over the spot and leave it for at least four hours. This ensures the bond is solid and that the loop doesn’t shift. If you’re dealing with transitions, make sure to stop carpet transitions from tripping your guests by ensuring the edges are tucked properly, but for the middle of the room, the “glue and press” method is your best friend. It’s a lot like ensuring durable flooring installation; the foundation and the bond are everything. If the fiber has ‘frizzed’ out at the tip, you can very carefully trim just the tiny fuzzy ends with embroidery scissors after the glue is bone dry. This is a far cry from the amateur mistake of hacking at the base of the yarn, which is one of the biggest flooring installation mistakes to avoid when maintaining your home’s interior.
The Super Glue Trap and Why Less Is More
Most homeowners believe that the stronger the glue, the better the fix. I’ve walked into dozens of living rooms where a well-meaning DIYer used industrial-strength cyanoacrylate (Super Glue) on a minor snag. Here is the contrarian truth: the strongest glue is often your worst enemy. Super glue dries into a brittle, glass-like shard that doesn’t flex. When you walk over that spot, the rigid adhesive actually acts like a tiny saw, eventually cutting the very fibers you were trying to save. Instead, pros use specialized latex-based adhesives that remain pliable. This is one of the biggest carpet install secrets for longevity—allowing the floor to breathe and move underfoot without snapping the bond. Have you ever fallen into this trap and ended up with a crunchy spot on your rug? Let me know in the comments!
Why does my repair look like a tiny speed bump?
If you’ve followed the steps but your repair still sticks out like a sore thumb, you’ve likely fallen victim to the ‘pile height’ disparity. When you push a loop back into the backing, you have to ensure it sits exactly at the same level as its neighbors. If it’s even a millimeter too high, it will catch the light and create a shadow, or worse, why your carpet seam looks like a speed bump. This is why I always recommend the ‘weighted book’ method for at least four hours. It forces the fiber to stay flush while the adhesive sets. According to a technical bulletin by the International Certified Floorcovering Installers Association (CFI), improper pressure during the curing phase is a leading cause of visible repair ‘ghosting’ in residential settings. You aren’t just gluing; you are re-engineering the surface tension of the room.
Mastering the Tension for a Seamless Finish
There is a hidden nuance when dealing with older carpets that have started to lose their stretch. If you find yourself fixing snags frequently in a specific area, the problem might not be your vacuum—it might be that your carpet is loose. In these cases, a simple glue fix is just a band-aid. You may need to settle the power stretcher vs knee kicker debate for yourself to truly stabilize the floor. When the backing is taut, loops are less likely to ‘pop’ and become snags in the first place. If the damage is too far gone for a simple reset, you might need to learn how to blend a new carpet patch into an old room, which requires a much higher level of precision regarding grain direction and ‘nap’ alignment. I once spent three hours trying to match a patch in a sunny bedroom only to realize I had the fibers facing 180 degrees the wrong way. It looked like a different color entirely! To avoid this, always brush the carpet with your hand to see which way the ‘shimmer’ goes before you apply a single drop of glue.
For those diving even deeper into the mechanics of a perfect floor, understanding the iron temperature secret for flat carpet seaming can help you understand how heat affects synthetic fibers. If you use a hot glue gun that’s too hot, you won’t just bond the loop; you’ll melt the polypropylene, creating a permanent, shiny scar that no amount of grooming can hide. It’s all about the subtle balance of heat, pressure, and the right chemistry.
Stop Your White Oak From Turning Yellow Before It Starts
If you want your home to look like a showroom five years after the installers pack up, you have to stop thinking about maintenance as just ‘cleaning’ and start thinking about it as ‘stability.’ One of the most heartbreaking calls I get is from a homeowner wondering why your white oak floor is turning yellow. Usually, they’ve been using a generic oil-based soap that reacts with the tannins in the wood. I personally recommend only using pH-neutral cleaners specifically designed for water-based finishes. This same attention to detail applies to your trim; if you don’t understand why your caulked baseboards are cracking within weeks, you’ll spend every spring with a caulk gun in your hand instead of enjoying your patio. It’s almost always due to the lack of a ‘flexible’ bead or applying it to dusty surfaces where the bond never truly took hold.
The Tool I Never Leave Home Without
I’ve learned the hard way that ‘eyeballing it’ is a recipe for a callback. That is why I am obsessed with my digital moisture meter. I never start a project without performing the moisture meter test for concrete subfloors. If that slab is holding onto hidden water, your expensive flooring will buckle, and no amount of glue can save it. According to the National Wood Flooring Association (NWFA) technical guidelines, the moisture content between a wood floor and its subfloor should not exceed a 4% difference for strip flooring. If you skip this check, you’re essentially gambling with your bank account. For my trim work, I’ve ditched the ‘nail and pray’ method for the miter clamp secret for professional baseboard corners. These clamps apply pressure from the outside of the joint, forcing the wood fibers together so tightly that the seam becomes invisible even as the house settles.

How do I keep my flooring and showers from aging prematurely?
The secret to longevity in wet areas isn’t the tile—it’s the water management you can’t see. I always tell my clients that the slope check tactic for shower floors is the single most important step in a bathroom build. If water sits for even an hour, it starts a countdown to mold. This is also why your shower niche is collecting water; if it isn’t pitched slightly toward the drain, it becomes a petri dish. To keep things looking crisp, I stick to the soft joint rule for shower wall corners, using 100% silicone instead of grout in the changes of plane. Grout will crack, but silicone moves with your house. If you’re already seeing failures, you need to evaluate shower repairs: when to fix vs replace for longevity before a small leak turns into a subfloor rot nightmare.
Sensors and Smart Surfaces are the Next Big Thing
I predict that within the next decade, we won’t just be ‘guessing’ if a pipe is leaking behind the wall. We are already seeing the emergence of smart underlayments and moisture sensors that can be embedded directly into the shower pan or under high-value hardwood. Imagine getting a notification on your phone that your dishwasher has a pinhole leak before you ever see a drop of water on your floor. This technology will revolutionize how we handle flooring installation mistakes to avoid by providing real-time data on the environment under the boards. For now, your best bet is to grab a professional-grade moisture meter and check your ‘hot spots’ every six months. Go ahead and test the floor near your refrigerator or under the kitchen sink today—you might be surprised at what the meter finds before the damage becomes visible!
I was shuffling toward the kitchen for my midnight snack when I felt that unmistakable, sharp ‘tug’ on my sock. You know the feeling. It’s the sound of a single fiber of your expensive carpet being pulled to its absolute limit. I looked down, and my heart sank. A loop had pulled up, and like a loose thread on a vintage sweater, I knew one wrong move would turn my living room into a crime scene of unraveled yarn. I’ve been there—trust me. In my early days, I actually tried to just ‘trim’ a snag on a level loop carpet, and by the next week, I had a four-inch bald spot because the weave just kept coming apart. It was a total amateur disaster. But here’s the good news: if you catch it now, you can fix it in five minutes with stuff you already have in your junk drawer. We’re going to stop that run in its tracks today. [image_placeholder_1]
Your Living Room Is One Tug Away from Disaster
We tend to treat carpet as this indestructible slab of fabric, but it’s actually a complex web of loops and backing. When one loop snags—whether it’s from a pet’s claw, a sharp furniture leg, or a rogue vacuum—it puts immense tension on the surrounding fibers. If you’ve ever seen a ‘run’ in a pair of stockings, you know exactly what’s at stake here. This is especially true for best carpet types for high traffic where the weave is tight and under constant pressure. The ‘Why’ is simple: a five-cent drop of glue today prevents a thousand-dollar replacement tomorrow. According to the Carpet and Rug Institute, neglecting minor repairs is a primary contributor to carpets failing to meet their expected lifespan. Have you ever noticed a tiny snag and thought, ‘I’ll get to it later,’ only to have it triple in size by the weekend? Tell me I’m not the only one who has played that dangerous game!
Wait, Will This Just Make the Hole Bigger?
I get the fear. The last thing you want to do is start poking at your floor with tools. You’re worried that by trying to fix one loop, you’ll accidentally pull up ten more. It’s a valid concern, especially if you’ve already had issues with flawless carpet installation in the past and know how delicate those seams can be. But doing nothing is actually the riskiest move you can make. Think of it like a loose tooth; you can’t just ignore it and hope it heals itself. We aren’t going to be ‘pulling’ anything. We are going to be ‘resetting’ the fiber. If you can handle a toothpick and a little patience, you can do this. If you can fix a squeaky floor through carpet, you can certainly handle a simple snag repair without making things worse.
Clear the Area and Prep Your Surgical Kit
The first rule of carpet repair is that you never, ever use scissors first. It’s like trying to fix a leaky pipe by cutting the pipe; you’re just making the problem permanent. Instead, grab a small bottle of clear fabric adhesive or a hot glue gun (if you have a steady hand), a couple of toothpicks, and a heavy book. You want to avoid the common flooring installation mistakes to avoid, which often involve using the wrong chemical that ends up melting the synthetic fibers or leaving a permanent yellow stain. If you’re working on something more significant, like when you have to patch a hole in carpet from a door stop, the stakes are higher, but for a simple snag, we just need to re-anchor the yarn to the backing rather than replacing the whole section.
Apply the Adhesive Without Creating a Messy Clump
I remember a job in a tight hallway—this was years before I learned the carpet install secrets that pros use—where I thought I could just tuck a snag under the baseboard and hope for the best. I ended up pulling it so hard that the whole row started to unzip. It looked like a zipper on a hoodie that went off the rails. That’s when I realized that every single loop is connected to its neighbor, and you need a surgical approach, not a brute-force one. Take your toothpick and dip it into the adhesive. You don’t want a glob; you want just enough to coat the tip. Gently lift the snagged loop and find the exact spot in the backing where it originated. This is similar to how we handle the level loop fix for frayed office carpets where high traffic makes every loose thread a hazard. Apply a tiny dot of glue directly to the carpet backing, not the fiber itself. If you get glue all over the top of the yarn, it will dry hard and scratchy, and you’ll feel it every time you walk by in bare feet.
Push That Loop Back Home for Good
Once the glue is in place, use a clean toothpick to push the loose loop back down into the adhesive. You want it to sit flush with the surrounding loops so it blends in perfectly. This is the part where patience pays off. If the fiber is particularly stubborn, you might need to hold it there for thirty seconds. I once tried to rush this on a dense Berber and didn’t wait for the glue to tack up. When I let go, the loop sprang back up like a jack-in-the-box, spreading glue onto the surrounding fibers. It was a nightmare to clean up. After you’ve successfully seated the loop, place a heavy object—like a thick book—over the spot and leave it for at least four hours. This ensures the bond is solid and that the loop doesn’t shift. If you’re dealing with transitions, make sure to stop carpet transitions from tripping your guests by ensuring the edges are tucked properly, but for the middle of the room, the “glue and press” method is your best friend. It’s a lot like ensuring durable flooring installation; the foundation and the bond are everything. If the fiber has ‘frizzed’ out at the tip, you can very carefully trim just the tiny fuzzy ends with embroidery scissors after the glue is bone dry. This is a far cry from the amateur mistake of hacking at the base of the yarn, which is one of the biggest flooring installation mistakes to avoid when maintaining your home’s interior.
The Super Glue Trap and Why Less Is More
Most homeowners believe that the stronger the glue, the better the fix. I’ve walked into dozens of living rooms where a well-meaning DIYer used industrial-strength cyanoacrylate (Super Glue) on a minor snag. Here is the contrarian truth: the strongest glue is often your worst enemy. Super glue dries into a brittle, glass-like shard that doesn’t flex. When you walk over that spot, the rigid adhesive actually acts like a tiny saw, eventually cutting the very fibers you were trying to save. Instead, pros use specialized latex-based adhesives that remain pliable. This is one of the biggest carpet install secrets for longevity—allowing the floor to breathe and move underfoot without snapping the bond. Have you ever fallen into this trap and ended up with a crunchy spot on your rug? Let me know in the comments!
Why does my repair look like a tiny speed bump?
If you’ve followed the steps but your repair still sticks out like a sore thumb, you’ve likely fallen victim to the ‘pile height’ disparity. When you push a loop back into the backing, you have to ensure it sits exactly at the same level as its neighbors. If it’s even a millimeter too high, it will catch the light and create a shadow, or worse, why your carpet seam looks like a speed bump. This is why I always recommend the ‘weighted book’ method for at least four hours. It forces the fiber to stay flush while the adhesive sets. According to a technical bulletin by the International Certified Floorcovering Installers Association (CFI), improper pressure during the curing phase is a leading cause of visible repair ‘ghosting’ in residential settings. You aren’t just gluing; you are re-engineering the surface tension of the room.
Mastering the Tension for a Seamless Finish
There is a hidden nuance when dealing with older carpets that have started to lose their stretch. If you find yourself fixing snags frequently in a specific area, the problem might not be your vacuum—it might be that your carpet is loose. In these cases, a simple glue fix is just a band-aid. You may need to settle the power stretcher vs knee kicker debate for yourself to truly stabilize the floor. When the backing is taut, loops are less likely to ‘pop’ and become snags in the first place. If the damage is too far gone for a simple reset, you might need to learn how to blend a new carpet patch into an old room, which requires a much higher level of precision regarding grain direction and ‘nap’ alignment. I once spent three hours trying to match a patch in a sunny bedroom only to realize I had the fibers facing 180 degrees the wrong way. It looked like a different color entirely! To avoid this, always brush the carpet with your hand to see which way the ‘shimmer’ goes before you apply a single drop of glue.
For those diving even deeper into the mechanics of a perfect floor, understanding the iron temperature secret for flat carpet seaming can help you understand how heat affects synthetic fibers. If you use a hot glue gun that’s too hot, you won’t just bond the loop; you’ll melt the polypropylene, creating a permanent, shiny scar that no amount of grooming can hide. It’s all about the subtle balance of heat, pressure, and the right chemistry.
Stop Your White Oak From Turning Yellow Before It Starts
If you want your home to look like a showroom five years after the installers pack up, you have to stop thinking about maintenance as just ‘cleaning’ and start thinking about it as ‘stability.’ One of the most heartbreaking calls I get is from a homeowner wondering why your white oak floor is turning yellow. Usually, they’ve been using a generic oil-based soap that reacts with the tannins in the wood. I personally recommend only using pH-neutral cleaners specifically designed for water-based finishes. This same attention to detail applies to your trim; if you don’t understand why your caulked baseboards are cracking within weeks, you’ll spend every spring with a caulk gun in your hand instead of enjoying your patio. It’s almost always due to the lack of a ‘flexible’ bead or applying it to dusty surfaces where the bond never truly took hold.
The Tool I Never Leave Home Without
I’ve learned the hard way that ‘eyeballing it’ is a recipe for a callback. That is why I am obsessed with my digital moisture meter. I never start a project without performing the moisture meter test for concrete subfloors. If that slab is holding onto hidden water, your expensive flooring will buckle, and no amount of glue can save it. According to the National Wood Flooring Association (NWFA) technical guidelines, the moisture content between a wood floor and its subfloor should not exceed a 4% difference for strip flooring. If you skip this check, you’re essentially gambling with your bank account. For my trim work, I’ve ditched the ‘nail and pray’ method for the miter clamp secret for professional baseboard corners. These clamps apply pressure from the outside of the joint, forcing the wood fibers together so tightly that the seam becomes invisible even as the house settles.
How do I keep my flooring and showers from aging prematurely?
The secret to longevity in wet areas isn’t the tile—it’s the water management you can’t see. I always tell my clients that the slope check tactic for shower floors is the single most important step in a bathroom build. If water sits for even an hour, it starts a countdown to mold. This is also why your shower niche is collecting water; if it isn’t pitched slightly toward the drain, it becomes a petri dish. To keep things looking crisp, I stick to the soft joint rule for shower wall corners, using 100% silicone instead of grout in the changes of plane. Grout will crack, but silicone moves with your house. If you’re already seeing failures, you need to evaluate shower repairs: when to fix vs replace for longevity before a small leak turns into a subfloor rot nightmare.
Sensors and Smart Surfaces are the Next Big Thing
I predict that within the next decade, we won’t just be ‘guessing’ if a pipe is leaking behind the wall. We are already seeing the emergence of smart underlayments and moisture sensors that can be embedded directly into the shower pan or under high-value hardwood. Imagine getting a notification on your phone that your dishwasher has a pinhole leak before you ever see a drop of water on your floor. This technology will revolutionize how we handle flooring installation mistakes to avoid by providing real-time data on the environment under the boards. For now, your best bet is to grab a professional-grade moisture meter and check your ‘hot spots’ every six months. Go ahead and test the floor near your refrigerator or under the kitchen sink today—you might be surprised at what the meter finds before the damage becomes visible!
The Unspoken Rules of Fiber Tension Every Homeowner Should Know
After years of fixing minor issues, I’ve realized that a carpet isn’t just a rug; it’s a living system under constant tension. First, never trust your reflex to pull. That tiny thread is often the anchor for an entire row, and one tug can lead to a literal zipper effect across your room. Second, remember that the natural lighting in your room is your toughest critic. Always check your repair from the angle of your windows; if you don’t use the weighted book trick to force the loop flush, that tiny fiber will cast a shadow that drives you crazy every afternoon. Finally, if you are constantly seeing snags near doorways, it’s a sign your carpet install secrets weren’t followed correctly, and the surface is moving too much underfoot.
The Gear I Actually Use for a Flawless Repair
I don’t believe in overcomplicating things, but these three items are non-negotiable in my toolkit. I always keep a bottle of flexible latex-based fabric adhesive—it mimics the natural movement of the backing unlike brittle household glues. For more complex projects, I rely on a digital moisture meter to perform the moisture meter test for concrete subfloors, ensuring no hidden dampness is loosening my glue bonds. When I’m moving from the floor to the walls, the miter clamp secret for professional baseboard corners is what keeps my joints from opening up as the house settles. I also recommend checking the technical guidelines from the Carpet and Rug Institute for specific fiber care advice.
Your Path to a Seamless Floor Starts Today
Fixing a snag might seem like a small win, but it’s the gateway to mastering your home’s longevity. Whether you are learning how to choose the right carpet for a cozy living space or performing a surgical glue fix, you are taking pride in your investment. Don’t let a single loose thread intimidate you; with a little patience and the right approach, you can keep your floors looking showroom-ready for decades. If you ever feel a repair is out of your depth, you can always reach out through our contact us page for expert advice. Have you ever tried to fix a snag only to have it turn into a much larger run? Let me know your story below!