

I’ll never forget the sound. It was a sharp, heart-sinking ‘tink’ as my favorite 12-inch cast iron skillet clipped the edge of my pristine white backsplash. I stood there, frozen, staring at a jagged little crater that looked like a moon landscape right above the stove. One second, my kitchen was perfect. The next, it felt like a construction zone. If you’re like me, your kitchen is your sanctuary, and seeing that tiny imperfection feels like someone drew on your favorite painting with a permanent marker. It’s annoying. It’s distracting. And honestly, it’s all I could see while making coffee the next morning. But here’s the good news: you don’t have to live with it, and you certainly don’t have to call a contractor for a massive service fee. Today, I’m going to show you exactly how to make that chip disappear using a few simple tools and a bit of patience.
You Don’t Need a Full Remodel for One Tiny Crater
When I first started doing my own home repairs, I made a massive mistake. I thought I could hide a chip in my tile using white nail polish. It looked okay for about three days, but between the heat from the stove and the kitchen grease, it turned a sickly shade of yellow within two weeks. It looked worse than the original hole! That was my first lesson in using the right materials. If you’ve been looking at your wall and wondering if how to fix a loose floor tile without a full demolition logic applies here, the answer is yes. It’s about precision, not destruction. Most of the time, the structural integrity of the wall is fine, but the aesthetic is shot. We need to focus on filling that void and matching the sheen. Back when I first laid this tile, I was obsessed with the trowel notch secret for better tile adhesion to make sure everything stayed put, but even the best install can’t withstand a flying frying pan. According to the Tile Council of North America, ceramic tiles are celebrated for their longevity, but their brittle glaze can be susceptible to high-velocity impacts from heavy cookware. Have you ever dropped a pan and felt that instant ‘oh no’ moment in your gut? If so, you’re in the right place. We are going to tackle this together.
Can a Simple Patch Really Fool the Eye?
The biggest fear I hear from my neighbors is that the patch will be obvious. They worry it’ll look like a glob of gum stuck to the wall. I get it. I’ve seen some “DIY” jobs that made me want to cover the whole wall in wallpaper. However, if you use a high-quality epoxy or a ceramic repair kit, the result can be virtually invisible. The trick isn’t just the color; it’s the texture. Often, when people see why your kitchen backsplash is pulling away from the wall, they panic and over-apply adhesive, creating more mess. With a chip, less is more. We are going to aim for a flush finish that matches the light reflection of the surrounding tile. Even if you’ve had issues in the past where how to repair a chipped ceramic tile in a shower didn’t go as planned because of the moisture, the dry environment of a kitchen backsplash is much more forgiving. You’ve got this.
Get Your Hands Dirty with the Repair Process
Fixing a chip is less about brute force and more about the finesse of a jeweler. If you approach this like you are slapping mud on a wall, you will see the repair every time you walk into the room. Instead, think of this as a miniature restoration project. You are rebuilding the ceramic ‘skin’ of your tile. Much like a step-by-step flooring installation from planning to perfect finish, the outcome depends entirely on how you handle the middle stages.
Clean the Area Until It Squeaks
Your first move is to eliminate the enemy of adhesion: kitchen grease. Even if your kitchen looks spotless, microscopic oils from cooking are likely sitting inside that chip. I use a Q-tip dipped in high-percentage isopropyl alcohol to scrub the crater. If you leave even a hint of residue, your filler will eventually pop out like a loose tooth. This prep work is as critical as the trowel notch secret for better tile adhesion; without a clean surface, the bond is nonexistent. Think of the filler as a tiny piece of custom-molded material. If the edges of the chip are dusty, that material is just floating. This mirrors many flooring installation mistakes to avoid for a seamless look where people skip the cleaning phase and wonder why their materials don’t stay put.
Mix Your Colors Like a Renaissance Painter
Most repair kits come with a base white and a few primary tints. Never use the color straight out of the tube unless your tile is a perfect ‘appliance white.’ I remember a project where I tried to match a ‘cream’ subway tile with pure white epoxy. Against the natural light, the repair glowed like a neon sign. It was embarrassing. Now, I mix my colors on a piece of scrap cardboard first. Add your tint one toothpick-drop at a time. It’s a slow process, but it’s how you achieve an invisible result. When the wet mixture matches your tile, you’re ready to fill. 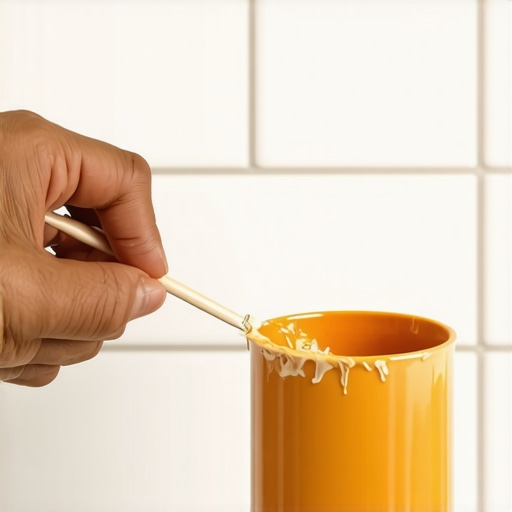
Level the Patch for a Flush Finish
Once you have the color right, use a toothpick or a tiny craft spatula to fill the void. You want the filler to be slightly higher than the tile surface because most epoxies shrink slightly as they dry. I learned this the hard way when I was learning how to fix a cracked tile without removing the whole floor; if you level it perfectly while wet, you’ll end up with a shallow divot once it cures. To get a clean edge, you can use the blue tape trick for cleaning up silicone beads by masking off the healthy tile around the chip. This prevents you from spreading excess goop across the glazed surface, which is a nightmare to scrape off later. Once it’s semi-dry, take a fresh razor blade and gently shave the excess until it’s perfectly flush with the surrounding glaze. This creates that seamless transition that fools the eye into thinking the tile was never damaged in the first place.
That tile repair is often a gateway drug to home maintenance. Once you realize you can make a jagged crater disappear, you start noticing the other tiny imperfections: the hairline gaps in your trim or the way your carpet feels slightly ‘off’ in the corners. But here is where the average DIYer and the expert diverge. Most people think home repair is about brute force or buying the most expensive tool, but the real secret lies in understanding the physics of your house. Houses breathe, shift, and expand. If you don’t account for that, even the most beautiful repair is just a ticking time bomb.
Stop Chasing the Perfect 45-Degree Miter
Everyone tells you that the sign of a pro is a perfectly tight 45-degree miter joint on your baseboards. In my experience, that’s actually a recipe for disaster. If you cut your corners at exactly 45 degrees and jam them together, they might look great on a Tuesday, but come January, you’ll be wondering why your baseboard miters keep gapping in the winter. Wood is a living material that reacts to humidity. Instead of aiming for a textbook angle, I’ve learned to use the back-bevel move for tight baseboard miters. By shaving away a bit of the material from the back of the joint, you allow the visible faces to press tightly together even when the drywall behind them isn’t perfectly square. It’s a nuance that separates a ‘handyman’ look from a high-end architectural finish.
The Invisible Moisture War Under Your Feet
If you are moving from wall repairs to the floor, the ‘Oops’ factor increases exponentially. The biggest trap is rushing the installation because the boxes of flooring are taking up space in your living room. I’ve seen beautiful white oak floors turn into a series of miniature mountain ranges because the homeowner skipped the acclimation test for avoiding hardwood floor gaps. According to the National Wood Flooring Association (NWFA), moisture imbalance is the primary cause of flooring failure. They recommend that the moisture content of the wood and the subfloor be within 2% to 4% of each other before a single nail is driven. If you ignore this, the floor will buckle or gap regardless of how much glue you use. It’s one of those flooring installation mistakes to avoid for a seamless look that you can’t fix after the fact without a complete tear-out. 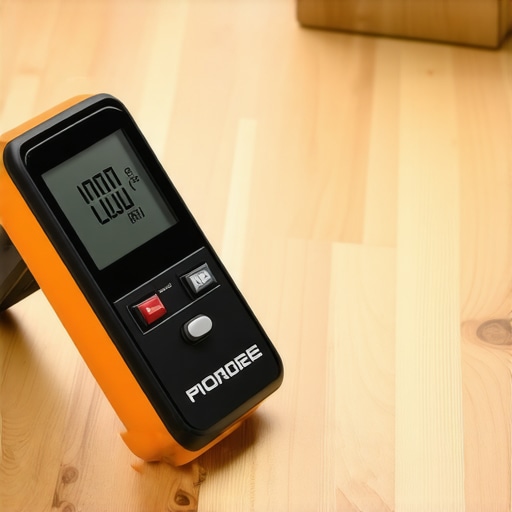
Is Your Carpet Pad Actually Killing Your Warranty?
When it comes to carpeting, people often assume that a thicker, softer pad is always better. It feels great underfoot, right? Wrong. This is a classic ‘more is better’ fallacy. If your pad is too thick, it creates too much vertical play, which puts immense stress on the carpet backing and leads to premature stretching and ripples. In fact, you might find why your carpet pad is too thick for the tack-strip is the reason your installation feels ‘mushy’ or unstable. Most manufacturers have very specific density and thickness requirements; straying from them can void your warranty. Before you lay a single yard, check the subfloor. I always tell my neighbors that learning how to level a subfloor dip without removing the old subfloor is the most valuable skill you can have. A flat floor makes everything else—from carpet to baseboards—look like it was installed by a master. Have you ever fallen into this trap of thinking more material meant a better result? Let me know in the comments!
I’ve spent more hours than I’d like to admit on my hands and knees, re-tucking carpet edges or scrubbing grout lines because I tried to cut corners years ago. If you want your home to look like a showroom, you have to stop thinking about installation as a one-time event and start thinking about it as a long-term relationship. The tools you choose today are the insurance policy for your sanity five years from now. When I first started, I thought a knee kicker was enough for a living room, but I quickly learned that gravity and foot traffic are relentless enemies.
Stop Fighting Your Carpet and Start Stretching It
If you see a ripple in your rug, don’t just try to smooth it with your foot. You need mechanical force. I never step onto a job site without a power stretcher. According to the Carpet and Rug Institute’s (CRI) 105 Residential Installation Standard, power stretching is a mandatory requirement for all residential installs to prevent the carpet from losing its tension over time. If your installer only uses a knee kicker, they are leaving you with a floor that will eventually look like a crumpled bedsheet. This is why the power stretcher move to fix loose carpet bubbles is my absolute favorite trick; it’s about restoring the structural tension of the fabric. It makes the difference between a floor that lasts a decade and one that needs a how to patch a carpet seam that is coming apart fix by next summer.
How do I keep my shower looking brand new for years?
Maintenance starts before the first drop of water hits the tile. Most people wait for a stain to appear before they care about their grout, but the pros know about the ‘pre-seal.’ I always recommend you stop shower grout from staining with the pre-seal move, which involves treating the tiles before you even apply the grout. This prevents the porous edges of your ceramic or stone from sucking in the pigment of the grout, leaving you with a muddy, hazy mess. For those with luxury finishes, using the deep seal tactic for porous natural stone showers is the only way to ensure that iron in your water doesn’t turn your beautiful marble yellow over time. It’s much easier to seal a floor now than it is to research shower repairs: when to fix vs. replace for longevity down the road.
The Laser Level is Your Best Friend
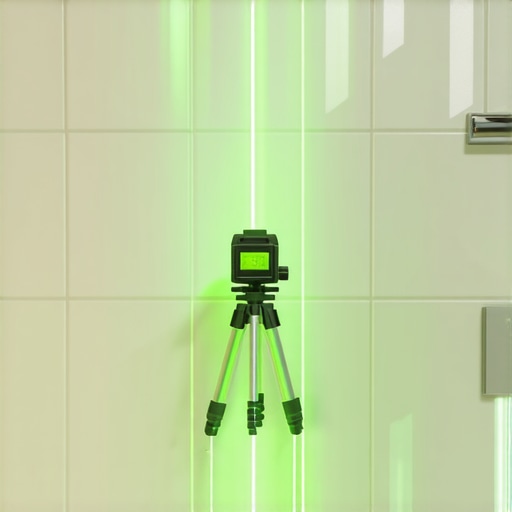
Accuracy isn’t just for architects. When I’m laying out a shower wall or a long run of baseboards, I don’t trust my eyes or a bubble level. I use a 360-degree green beam laser. It shows you every dip in the subfloor and every curve in the wall before you make a single cut. Using the laser level move for perfectly horizontal shower tiles ensures that your top row of tile doesn’t look like a staircase. In the future, I predict we will see AI-driven augmented reality glasses that project these layout lines directly onto the wall, but for now, a high-quality laser is the gold standard. As we look at how to transform your flooring with top trends in installation for 2025, the focus is moving toward this level of hyper-precision. I challenge you to try this: on your next project, skip the tape measure for your layout and use a laser instead. It will change the way you see your house. If you have questions about which tools to buy first, feel free to contact us for advice!
The Hardest Lessons I Learned While Chasing the Perfect Finish
I used to think that a mistake meant failure. If a tile chipped or a carpet rippled, I assumed I’d never get it back to its original glory. But the truth is, a house is a living thing that evolves with you. The biggest ‘lightbulb moment’ for me was realizing that most pro results aren’t about avoiding mistakes; they’re about knowing how to reverse them. For example, when you realize that shower repairs: when to fix vs. replace for longevity is a choice you make based on the subfloor integrity, not just the surface glaze, your whole perspective changes.
Another hard-won lesson: never underestimate the power of physics. Whether it’s the humidity warping your wood or the tension in your rug, you have to work with the materials, not against them. If you’re struggling with the visual flow of your rooms, remember that choosing the right style from the start—like checking out how to choose the perfect baseboards for your home’s style—can hide a multitude of uneven floor transitions. Finally, always document your process. The next time a heavy pan flies off the counter, you won’t be starting from scratch; you’ll be building on your own history of home-maintenance wins.
The Gear That Turned My DIY Fails Into Wins
If you’re serious about taking your home to the next level, you need to stop using the ‘close enough’ method. I trust these specific tools because they have saved me thousands in professional service fees over the last decade. First, invest in a 360-degree laser level. Once you try the laser level move for perfectly horizontal shower tiles, you will never trust a standard bubble level again. Second, for anyone touching carpet, the power stretcher is your only defense against ripples. Check out these carpet install secrets for achieving flawless results every time to see why mechanical tension matters more than muscle power. Lastly, high-quality ceramic repair kits and accurate moisture meters are the silent heroes of any long-lasting flooring installation.
#IMAGE_PLACEHOLDER_E#
Your Home Deserves a Second Act
There is a unique kind of satisfaction that comes from looking at a kitchen backsplash and knowing exactly where a jagged chip used to be—but seeing absolutely nothing. It’s a small victory, but it’s one that builds your confidence for the bigger projects down the road. Don’t let the fear of ‘messing it up’ keep you from maintaining the home you love. Every time you pick up a tool, you’re not just fixing a wall or a floor; you’re investing in the longevity and value of your sanctuary. You now have the strategy to handle any flooring installation or minor disaster that comes your way. It’s time to stop staring at that imperfection and start making it disappear. Have you ever tried to fix a chip and ended up with a bigger mess than you started with? Let me know your experiences in the comments below!