

I’ll never forget the sinking feeling in my gut when I finished tiling my first master bathroom. I had followed every shower renovation guide I could find, but when I looked at the niche, the ‘factory edge’ of my tile was nowhere to be found. Instead, I had these grayish, porous cut lines staring back at me. It felt like wearing a tuxedo with dirty sneakers. [image_placeholder] I spent hours perfectly aligning the subway tiles, feeling like a pro, only to step back and realize the raw, jagged edges of the perimeter looked like a shark had taken a bite out of my wall. It was heartbreaking. I tried to cover it with a thick bead of caulk, but it just made it look worse—like I was trying to hide a crime scene.
Stop Letting Raw Tile Edges Ruin Your Bathroom Vibes
If you’ve ever stared at a beautiful luxury shower design and wondered why yours looks ‘DIY’ while theirs looks ‘Designer,’ the secret is almost always in how they handled those perimeter cuts. Today, we’re going to fix that once and for all. We’re going beyond just slapping on some grout and hoping for the best. I made the mistake of thinking crumbling grout could hide my sins, but it only made things worse. I learned the hard way that a niche isn’t just a hole in the wall; it’s a precision project. When I first started, I thought I could just use a silicone bead trick to cover the gaps, but a thick line of caulk can’t fix a bad cut. I even considered if I needed major shower repairs before I’d even used the bathroom for a single week! According to the Tile Council of North America (TCNA), improper edge finishing is one of the most common points of aesthetic failure in residential tile work. Have you ever finished a project only to be haunted by one tiny, unfinished detail? Let’s talk about why those edges matter and how to hide them like a seasoned pro.
Is a professional finish actually possible for a beginner?
You might think you need a five-hundred-dollar wet saw or a degree in masonry to get those clean lines, but that’s just not true. The fear of ‘messing up the focal point’ keeps many people from even trying a niche, or worse, they buy those pre-fabricated plastic inserts that never quite match the tile. I’ve been there, staring at a box of expensive porcelain, terrified that one wrong move would leave me with a jagged mess. But here is the reality: even if your cuts aren’t 100% perfect, the way you frame that perimeter changes everything. It’s about redirection and smart materials, not just a steady hand. If you’ve been struggling with flooring installation mistakes in other parts of the house, you know that the edges are where the story is told. To get it right, I now swear by the laser level move to ensure my niche aligns perfectly with the surrounding wall rows. It’s time to stop settling for ‘good enough’ and start aiming for ‘wow.’
Ditch the Raw Edges for a Clean Profile
To get that designer look, you have to decide how you’re going to ‘cap’ the tile before you ever mix your first bucket of mortar. When I was starting out, I tried to freehand a miter on a heavy porcelain tile with a dry diamond blade. The dust was everywhere, and the resulting edge looked like it had been chewed by a lawnmower. It was a disaster. I realized then that a metal trim profile wasn’t a ‘cheat’—it was a design choice that saved my sanity. If you aren’t using a tile that comes with a matching bullnose, these L-shaped or square-edged metal strips are your best friend. They act like a protective armor for the tile’s vulnerable cut edge, and they provide a perfectly straight line that hides any slightly-off cuts you might have made with your wet saw.
Choose Between Bullnose and Metal Trim
If you prefer a softer, traditional look, bullnose tile is the way to go, but it’s becoming rarer with modern, large-format styles. For those working with large format wall tiles, a metal edge profile is often the only way to get a clean finish. These profiles come in various finishes like brushed nickel or matte black to match your fixtures. The trick is to embed the perforated flange of the trim into the thinset before you set the tile. This creates a sandwich of mortar, metal, and tile that is incredibly durable. Think of it like the baseboards in your living room; they aren’t just there for decoration; they cover the gap where the wall meets the floor and protect the bottom of the drywall from kicks and vacuums.
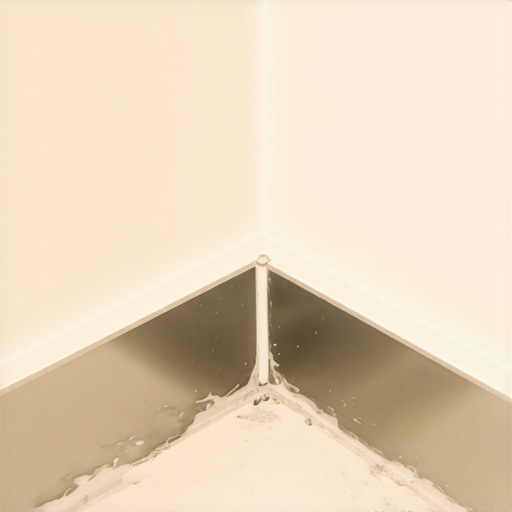
Frame Your Niche Like a Professional
Layout is where most people fail. I once saw a DIY job where the homeowner started the niche at a random height, leaving a tiny sliver of tile at the top. It looked like an afterthought. To avoid this, use the symmetry start secret to ensure your niche is centered or aligned with your grout lines. You should treat the niche like a picture frame. The horizontal tiles on the top and bottom of the niche should ideally line up with the horizontal grout lines of the main wall. If you have to make a choice, always prioritize the bottom shelf. That’s where the eye naturally lands, and it’s also where water is most likely to sit if the slope isn’t perfect.
Why Your Mortar Consistency Matters
Thinset consistency is the unsung hero of a successful niche. It should be like thick peanut butter—not so runny that it drips down the wall, but not so stiff that you can’t press the tile into it. If your mortar is too wet, your tiles will slump, and those perfectly aligned edges will shift while you’re at lunch. I learned this the hard way when I tried to install a niche shelf using the ‘glob and pray’ method. Within an hour, the bottom tile had sagged a quarter inch, ruining the slope and the aesthetic. Now, I always use the spacer block move to hold everything in place while the mortar sets.
Prevent Voids with Proper Coverage
When you are working in tight corners like a niche, it’s easy to miss spots. Use the trowel notch secret to ensure 100% coverage. Air pockets behind niche tiles are a recipe for failure, as they can collect moisture or cause the tile to crack if you accidentally bump it with a heavy shampoo bottle. After the tiles are set, don’t rush the grout. Use the bead and smooth strategy for the internal corners of the niche. This ensures that the transition between the back wall of the niche and the side walls is watertight and visually seamless. If you’ve struggled with tile lippage on larger surfaces, the small scale of a niche will actually be a great place to practice your leveling skills because every millimeter counts.
Let’s dig deeper into what actually happens behind those tiles because the stuff you can’t see is usually what causes the most heartache. A common myth I hear constantly is that grout is a waterproof barrier. It’s not. In fact, grout is naturally porous and acts more like a hard sponge than a seal. If you’ve ever wondered why your shower grout is crumbling just months after install, it is often because moisture is migrating through the grout and attacking the substrate underneath. The Tile Council of North America (TCNA) explicitly states in their handbook that grout is intended for aesthetic and structural joint filling, not as a primary water management system. This is why I always insist that any ultimate shower renovation must include a secondary liquid or sheet membrane over your backer board. If you rely solely on the board itself without sealing every single screw head and seam, you are essentially building a slow-motion leak.
Why perfectly level niche shelves are actually a mistake
One ‘oops’ factor that almost everyone misses—even some pros—is the pitch of the niche shelf. We are conditioned to make every shelf in our house perfectly level, but in a shower, a level shelf is a recipe for mold. Water needs a reason to leave. I always give my bottom niche tile a slight 1/16th to 1/8th inch pitch toward the drain. It is a tiny detail that separates a designer finish from a functional failure. This same logic of managing ‘unseen’ forces applies to other areas of the home; for instance, many flooring installation mistakes stem from ignoring subfloor moisture or minor height variances that eventually lead to floor failure. [image_placeholder_c]
Can you really trust your backer board to stay dry?
Many advanced DIYers assume that because they bought a ‘waterproof’ brand of backer board, they can skip the extra steps. This is a dangerous trap. While the core of the board might be waterproof, the penetrations you make with screws and the joints where boards meet are vulnerable. It is like wearing a high-end raincoat but leaving the front wide open. When performing shower repairs, I often find rotted studs behind expensive tile because the installer didn’t use a silicone bead secret at the transitions or failed to use a proper waterproofing tape.
We see this ‘good enough’ mentality ruin other projects too. In a high-quality carpet install, homeowners often skip the power stretcher, only to see ripples appear six months later. Similarly, when installing baseboards, if you don’t account for the way wood moves, you’ll end up with gapping miters in the winter. True expertise is found in the nuances you can’t see once the project is finished. Have you ever fallen into the ‘level shelf’ trap or discovered a leak where you thought it was waterproof? Let me know in the comments!
Stop the slow decay before it starts
Maintenance is where the DIY spirit often dies, but it is exactly where the value of your home is born. I’ve seen beautiful luxury shower designs turn into moldy nightmares within three years because the owner thought ‘waterproof’ meant ‘invincible.’ For my niches, I always use the silicone wash trick for easy grout cleanup during the installation, but the real work starts after the mortar is dry. According to the ANSI A108.10 standards for the installation of grout, the density of the joint is key to its longevity, but for residential showers, I go a step further with the deep seal tactic for porous natural stone showers. If you chose a high-end marble or travertine for your niche, skipping a high-quality penetrating sealer is essentially inviting soap scum and hard water to stay for dinner. It’s not just about the bathroom, either; whether you are finishing a step-by-step flooring installation or just refreshing a room, protection is the final, non-negotiable step.
The one tool that saves my baseboards every single time
People often ask if they really need ‘pro-grade’ tools. My answer? Only if you value your time and your sanity. For any project involving baseboard styles or intricate trim, I live and die by my oscillating multi-tool with a Japanese tooth blade. It is the only way to achieve the zero-clearance cut for flooring around stone fireplaces or to perfectly undercut a door jamb without tearing the whole house apart. 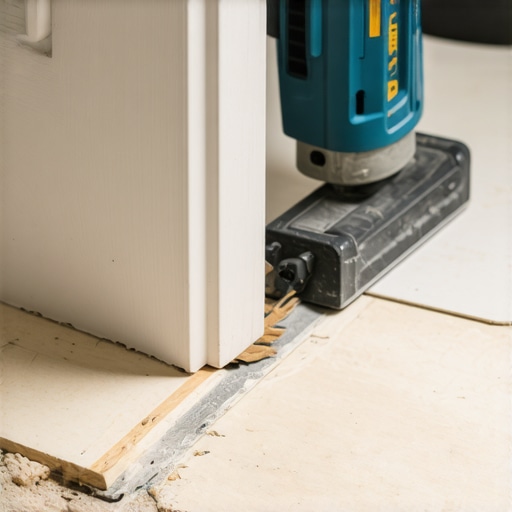 This tool allows for the kind of precision that makes a guest ask, ‘Who did your floors?’ instead of noticing a gap filled with caulk. If you are struggling with baseboard miters gapping in the winter, it is often because the initial cuts weren’t clean enough to allow for a tight wood-to-wood bond. A sharp, high-speed oscillating blade solves that instantly.
Can your custom shower really last twenty years?
The short answer is yes, but the long answer requires a shift in how we think about bathroom architecture. I predict the ‘niche’ as we know it will eventually be replaced by full-length recessed ledges. We are already seeing this trend with the linear drain setup for barrier-free showers, where the minimalism of the floor is mirrored by long, horizontal storage built into the wall. This reduces the number of grout joints—the primary fail point in any wet area. If you find yourself constantly performing shower repairs, it might be time to stop patching and start planning a more seamless system. The fewer the breaks in your tile, the fewer places water has to hide. I challenge you to try the ‘deep seal’ move this weekend on your existing grout; it is the cheapest insurance policy you will ever buy for your bathroom’s future.
Hard Truths About Tiling That Pros Keep to Themselves
After years of trial and error, I’ve realized that the difference between a ‘DIY’ look and a designer finish isn’t just talent; it’s patience. First, the ‘dry run’ is your best friend. Before you even touch the mortar, lay your tiles out to see exactly how they interact with the niche corners. If you skip this, you’ll likely end up with tiny slivers of tile that are impossible to cut. Second, don’t fear the waste. When I’m working on a project inspired by the ultimate shower renovation guide, I always order 20% extra tile. Niche cuts are delicate, and having that ‘insurance’ pile reduces the stress of a potential mistake. Finally, remember that houses move. Even if your niche is rock solid today, seasonal shifts can crack grout in the internal corners. That is why I always use the bead and smooth strategy with high-quality 100% silicone rather than rigid grout in those tight transitions.
The Toolbox That Saved My Renovation
You don’t need a warehouse full of tools, but these three are non-negotiable for me. I never start a job without a set of diamond hand polishing pads; they are like sandpaper for tile and allow you to smooth out a ‘factory edge’ on a cut piece so it looks original. For the structure, I trust the dry pack secret for any floor work to ensure the base is as stable as a mountain. I also highly recommend the TCNA (Tile Council of North America) Handbook; it might seem dry, but it’s the ultimate authority on whether you should perform shower repairs or start over. For the finishing touches, especially when transitioning to other rooms, understanding how to choose the perfect baseboards can make your entire suite feel cohesive rather than disjointed.
Take the Leap and Start Tiling
I know the fear of a permanent mistake can be paralyzing, especially when you are staring at a hole in your bathroom wall. But remember: every pro you admire started exactly where you are, probably with a few jagged cuts and a bit too much caulk. The luxury shower design you’ve been dreaming of is completely within your reach if you just take it one tile at a time. The satisfaction of stepping into a shower you built with your own hands—one that is leak-proof and perfectly aligned—is a feeling like no other. Your home is your canvas, so don’t be afraid to leave your mark on it. Have you ever had a ‘lightbulb moment’ during a renovation project where a simple tool or trick changed everything for you? Let me know in the comments below!