

I was standing in my half-finished guest bath, three cups of coffee deep, staring at a sliver of ceramic that was barely wider than a toothpick. I’d spent six hours carefully buttering tiles, only to realize that by starting at the left wall and working right, I’d painted myself into a literal corner of shame. That tiny, jagged piece of tile was a blinking neon sign of my amateur status. It didn’t matter how expensive the tiles were; the layout screamed “I didn’t plan this.” We’ve all been there, haven’t we? You buy the beautiful materials, you’ve looked at shower renovation ideas, but the actual execution feels like a math test you’re failing in real-time. My mistake was simple: I assumed the wall would just figure itself out. It never does. Today, I’m going to show you how to avoid that heartache by using the Symmetry-Start method, ensuring your layout looks intentional and high-end from the very first piece.
Stop Starting in the Corner if You Want a Pro Look
The “Symmetry-Start” isn’t just about finding the middle of the wall and drawing a line. It’s about calculating the “half-tile shift” to ensure you never end up with those embarrassing slivers. When I finally learned this, it changed everything. Most people think you just center the first tile, but if your wall width is awkward, centering a tile might actually cause small cuts at the ends. The real secret is deciding whether to center a tile or center a grout line based on what leaves the largest pieces at the edges. I used to think my walls were square. They weren’t. Nobody’s are. If you don’t use the chalk line move, your perfectly symmetrical start will eventually drift into a chaotic mess. It’s the difference between a bathroom that looks like a high-end spa and one that looks like a DIY disaster. You need that rock-solid foundation, much like how a dry pack secret ensures your floor doesn’t move under your feet.
Is This Symmetry Trick Just More Work for Nothing?
You might be thinking, “Hey, I’m just tiling a backsplash, does it really matter if the ends are perfectly even?” Yes, it does. Our eyes are naturally drawn to patterns and, more importantly, to breaks in patterns. According to the Tile Council of North America (TCNA), proper layout planning is the most critical step in avoiding lippage and aesthetic inconsistencies. If one side of your window has a full tile and the other has a two-inch cut, your brain will register it as “wrong” even if you can’t quite put your finger on why. When you follow a step-by-step flooring installation logic, you realize the prep is 90% of the beauty. I made the mistake of ignoring this early on, thinking I could “eye it.” I ended up with a kitchen backsplash pulling away because I was so focused on the edges that I botched the trowel notch secret. Trust me, taking twenty minutes to dry-lay your tiles on the floor first will save you three days of regret later. Even the pros use a laser level move to verify these center points before the mortar ever hits the wall. Have you ever finished a project only to realize the last piece didn’t fit? Tell me your most frustrating sliver story—I promise I won’t laugh, because I’ve been there too.
Find Your Real Center Before Mixing Any Mortar
The biggest mistake you can make is trusting your tape measure blindly. To avoid the heartbreak of that toothpick-sized sliver, you need to find your wall’s true center and then immediately question it. I always start by snapping a vertical line using the chalk line move. But here is the trick: once you have that center line, dry-lay a full row of tiles on the floor right in front of the wall. If your layout ends with a tiny fragment at the corner, you must shift your entire starting point by half the width of a single tile. This is the ‘half-tile shift’ that separates the pros from the weekend warriors. I remember a kitchen backsplash where I ignored this logic; I ended up with a piece of glass tile so thin it shattered every time the wet saw touched it. I wasted three hours trying to grind it down when I could have just moved my starting line a few inches to the left. By ensuring your end pieces are at least half a tile wide, the whole room feels more balanced and stable, much like using the dry pack secret for your floors.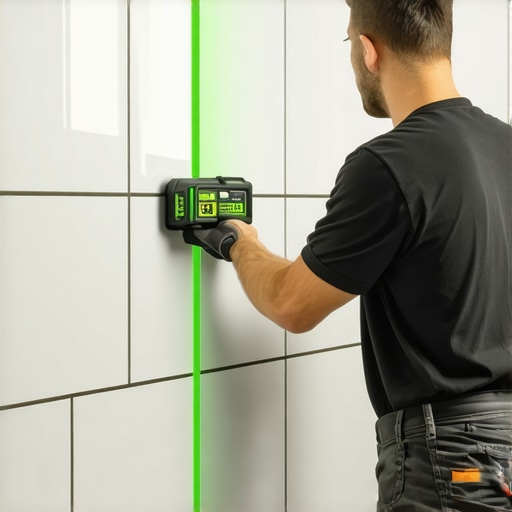
Shift Your Layout to Kill the Slivers
Once your horizontal centering is fixed, you have to apply the same logic to your vertical height. If you start with a full tile at the floor and end up with a one-inch strip at the ceiling, the room will look like it’s sinking. This is especially true in shower renovation guide projects where the eye naturally follows the grout lines up to the showerhead. I always use the laser level move to project a grid across the entire workspace. This allows you to see exactly where your cuts will land before you even open a bag of thinset. If the top cut looks too small, ‘jack up’ your starting row. You might have to cut the bottom row of tiles, but having a substantial piece of tile at both the floor and the ceiling creates a ‘framed’ look that is far more aesthetically pleasing. It prevents the visual chaos that often leads to common flooring installation mistakes to avoid.
Lock in Your Grid with More Than Just Spacers
Don’t rely on plastic spacers to do all the heavy lifting. While they help with the gaps, they won’t stop a heavy tile from sliding down a wall if your mortar is too thin. You need to master the thinset comb secret to ensure you have 100% coverage and a mechanical bond that holds the tile’s weight. For larger tiles, you must follow the full bed mortar rule to prevent hollow spots. In one of my early jobs, I used too much water in my mix, and by the time I reached the third row, the bottom row had compressed so much that my grout lines looked like wavy noodles. Now, I always use a starter ledger—a straight piece of scrap wood screwed into the wall—to support that first row of tile while it sets. Then, I use stop tile lippage with this leveling system move to ensure every tile is perfectly flush with its neighbor. This level of precision is exactly how you avoid a kitchen backsplash pulling away or looking uneven in the morning light.”,”image”:{“imagePrompt”:”A professional contractor using a green laser level to project vertical and horizontal lines onto a bathroom wall, with some subway tiles already installed symmetrically from the center line.”,”imageTitle”:”Using a Laser Level for Symmetrical Tile Layout”,”imageAlt”:”A laser level projecting a grid onto a wall for precise tile alignment.”},”categoryId”:0,”postTime”:””}Once that symmetry is locked in and your tiles are set, the next hurdle is how those tiles meet the rest of the room. Most people assume the hard part is over once the mortar dries, thinking they can just slap some trim on and call it a day. But here is where the real pros separate themselves: the transition. Everyone tells you to just miter your inside corners at 45 degrees, but in my experience, that is a recipe for gaps six months down the line. Houses breathe, wood expands, and your walls are almost certainly not 90 degrees. Instead of fighting the wall, I use the inside corner cope for perfect baseboard installs. Coping involves cutting the profile of one board into the end of another, allowing the joint to stay tight even as the house shifts or the wood shrinks.
Miters Fail Where Coping Succeeds
The common belief is that a laser-accurate miter saw is the key to great trim. It isn’t. The real secret is the back-cut. When you use the back bevel move for tight baseboard miters, you are removing material from the rear of the joint so the front faces touch first. This ensures a hair-line seam even if the wall is slightly out of square. If you are dealing with particularly stubborn outside corners, I swear by the spring miter secret for tight crown and baseboard corners, which uses tension to keep those joints from pulling apart during the winter. 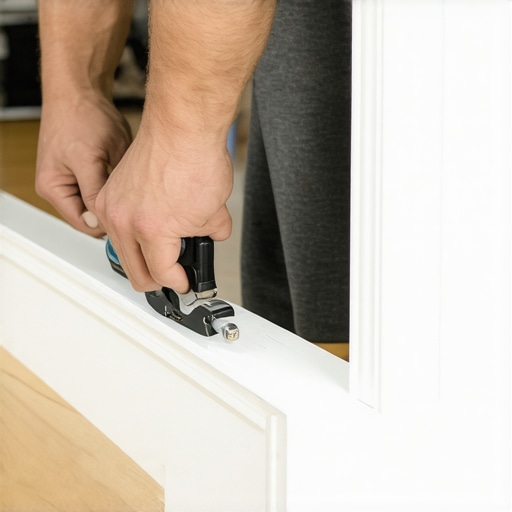
Stop Blaming Your Saw for Open Joints
One ‘oops’ factor that catches even seasoned renovators is the assumption that the floor is actually flat. If you pin your baseboard tight to a wavy floor, the top edge of the trim will look like a roller coaster against your wall. This is a primary reason why your baseboards look crooked on perfectly level floors. To fix this, you need to master the razor scribe method for baseboards on wavy drywall. By marking the floor’s contour onto the wood and trimming the bottom, the top remains a perfectly straight horizontal line. It creates a seamless look that appears grown into the wall rather than forced onto it. This is especially vital when transitioning between different heights, like when you are trying to figure out how to hide a transition strip between carpet and tile without creating a tripping hazard.
Can You Really Hide a Two-Inch Gap with Caulk?
This is the most common advanced question I get when a DIYer realizes their walls are bowed. The answer is no; caulk has its limits. The National Wood Flooring Association (NWFA) emphasizes that structural acclimation is non-negotiable for trim stability. If you haven’t performed the acclimation test for avoiding hardwood floor gaps, your baseboards will suffer the same fate as your floors—expanding and contracting until the finish cracks and the caulk pulls away. For those tricky areas where the drywall is just too far gone, I recommend the wood shim secret for baseboards on uneven slabs to provide a solid backing before you even think about reaching for the nail gun. I’ve seen beautiful shower renovation ideas ruined by a clunky transition at the door. Use the transition strip move for carpet to bathroom tile to keep the flow consistent between rooms. Have you ever fallen into the trap of thinking ‘caulk will fix it’ only to have the gap reappear a month later? Let me know in the comments—I have definitely been there.Once you’ve mastered the layout, the equipment you choose becomes your best friend or your worst enemy. I’ve seen people spend thousands on marble only to use a dull $10 blade that chips every edge. That is why I live by the stay-sharp blade rule for cutting luxury vinyl and tile alike. If the tool is struggling, you are struggling. Personally, I never step onto a job site without a green-beam laser. Red lasers are fine in a dark closet, but under the bright work lights of a shower renovation guide project, the green beam is five times more visible. It ensures that the spacer block move for perfect tile alignment stays true across thirty feet of open floor. This kind of precision prevents the ‘creep’ that happens when you’re working over long distances, a lesson I learned the hard way in a 400-square-foot kitchen where the last row ended up an inch wider than the first.
How do I stop my installation from degrading over time?
The secret isn’t just in the install; it’s in the long-term protection strategy. For natural stone, you cannot skip the deep seal tactic for porous natural stone showers. If water can penetrate the surface, it will eventually loosen the bond and cause efflorescence. The Tile Council of North America (TCNA) specifies in their handbook that waterproofing membranes must maintain a specific dry film thickness to be effective—guessing isn’t an option. I also use the pre-seal move before I even mix the grout to ensure that the pigment doesn’t get trapped in the microscopic pores of the tile. In high-moisture areas like bathrooms, I always apply the silicon bead secret for waterproofing baseboards in bathrooms. It prevents the wood from swelling when the kids inevitably splash water out of the tub. 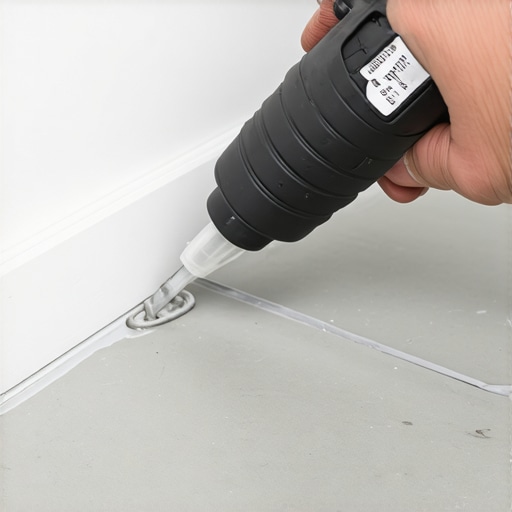 When it comes to the soft stuff, don’t let a small ripple turn into a major hazard. If you notice a bubble in your living room, you need the power stretcher move to fix loose carpet bubbles immediately. Ignoring it leads to the backing delaminating, and then you’re looking at a full replacement. I often tell people that their flooring is a living part of the home—it moves, it breathes, and it requires tuning. Looking ahead, I predict we are going to see a massive shift toward digital templating for residential projects. Instead of cardboard templates, we’ll be using LiDAR on our phones to map every out-of-square wall, sending those specs directly to CNC cutters for perfect baseboards. This will make baseboard styles that elevate your interior design accessible even to those with zero carpentry skills. But for now, the best thing you can do is get hands-on with the classics. My challenge to you: try the inside corner cope for perfect baseboard installs on a scrap piece of wood today. It’s a skill that separates the handymen from the craftsmen, and it pays dividends for a lifetime.
Hard Lessons from My Most Expensive Flooring Mistakes
After years of getting my knees dirty, I have realized that the prep work is the only part of the job that actually determines the final quality. If your subfloor isn’t flat, no amount of expensive material will save the project. I once ignored a slight dip in a living room floor, thinking the padding would soak it up; six months later, the floor was clicking like a telegraph. Always check your work with a long straightedge before the first plank goes down to avoid the most common flooring installation mistakes to avoid.
Another lightbulb moment was realizing that humidity is not a suggestion. I used to think leaving wood in the house for twenty-four hours was enough. It rarely is. Now, I never start a project without running the acclimation test for avoiding hardwood floor gaps. It is the difference between a floor that stays tight and one that develops gaps you could lose a coin in. Lastly, remember that speed is the enemy of craft. When you rush a step-by-step flooring installation, you miss the small things like checking your thinset coverage or ensuring your spacers haven’t slipped.
The Gear That Keeps My Professional Reputation Intact
You do not need a truck full of expensive gadgets, but you do need the right ones for the specific task at hand. I never start a job without a high-quality Green-Beam Laser Level. Red lasers are fine for small, dark closets, but in a bright room, you will be squinting all day. The green beam stays visible and ensures your lines stay straight across thirty-foot spans. For the final touches, I rely heavily on the TCNA Handbook for every ultimate shower renovation guide scenario. If the handbook says a certain mortar won’t work for your tile size, trust the experts. For the finish work, a hand-tuned coping saw is my most prized tool. It allows for the kind of precision that makes baseboard styles that elevate your interior design look like they were custom-carved into the wall.
#IMAGE_PLACEHOLDER_E#
Your Blueprint for a Home That Truly Lasts
At the end of the day, a successful flooring installation is not just about the boards or the tiles; it is about the peace of mind you get when you walk across a room and don’t hear a single squeak. It is about looking at your shower and knowing that the waterproofing behind those beautiful shower renovation ideas is rock solid. You have the tools, the logic, and the insider secrets now to turn a standard room into a professional masterpiece. Don’t be afraid to take your time and get it right. Your home deserves that level of care, and your future self will thank you every time you step onto that perfectly level surface. Which part of your layout are you most nervous about tackling first? Let me know in the comments below!