

I stood there, looking at my brand new hardwood floors, and I felt like a total failure. It sounds dramatic, I know, but after weeks of planning a step-by-step flooring installation, my living room looked like a cheap hotel. The culprit? Those puny, 3-inch “builder grade” baseboards. They looked like toothpicks against the beautiful new wide-plank oak. I realized then that the secret to those high-end homes isn’t just the floor—it’s the massive, layered trim that anchors the room. But here is the kicker: buying solid 8-inch baseboards is incredibly expensive. That is when I discovered the art of stacking, a trick that gives you that custom crown look for a fraction of the cost.
Why Your Wimpy Baseboards are Ruining the Room
It is all about scale and proportion. When I first started DIY-ing, I made the massive mistake of trying to hide gaps with just more caulk instead of understanding how baseboard styles elevate your interior. I once skipped the pre-drill rule for wide baseboard installations and split three expensive pieces of maple in an afternoon. It was a mess. Stacking allows you to take a simple, flat board and create a high-end look.
Build Your Custom Baseboard Sandwich
The magic happens when you stop looking for a single piece of wood and start seeing layers. To get that 8-inch profile without the high price tag, you need a 1×6 flat board and a small piece of decorative base cap molding. First, you install the 1×6 directly against the floor. But do not just slap it up there. If you have just finished a step-by-step flooring installation, you need to ensure your base is level even if the floor itself has slight dips. I remember helping my brother with his living room; we followed the floor’s slight slope, and by the time we reached the far corner, the miter joints looked like a gaping mouth. Now, I always use the laser level hack—it is usually for tiles, but it works wonders here—to strike a perfectly horizontal line for the top of that first board before a single nail is fired.
Leave a Gap for the Illusion
Here is the professional secret: you do not actually have to touch the two pieces of wood together. By leaving a 1-inch or 2-inch gap of drywall between your bottom base board and your top cap, and then painting everything (including that strip of drywall) the same semi-gloss white, the eye sees one massive, expensive piece of trim. It is the same principle as choosing baseboard styles that elevate your interior; you are playing with perception and scale. 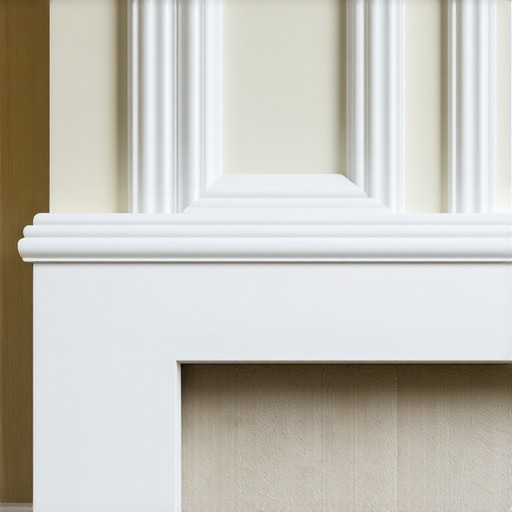
Master the Scarf Joint and the Miter
When you are running long walls, you will inevitably run out of wood and need to join two pieces. Avoid ‘butt joints’ where two flat ends just touch; they will open up as soon as your HVAC kicks on and the wood dries out. Instead, use the scarf joint rule for long baseboard runs. You cut both ends at a 45-degree angle so they overlap. I once tried to skip the overlap on a 20-foot wall, and by mid-winter, there was a visible gap that looked like a crack in the house. Overlapping those cuts allows the wood to expand and contract without revealing the wall. It is similar to how a carpet install hides seams—you want the transition to be invisible to the naked eye. For those tricky corners, I swear by the spring miter secret to keep the joint from pulling apart over time. If you are working with hardwoods like oak or maple, never forget the pre-drill rule for wide baseboard installations to prevent splitting the wood near the ends.
Seal the Deal with Proper Caulking
The difference between a DIY project and a professional finish is what happens after the nail gun is put away. You must follow the caulk and paint sequence religiously. Fill every nail hole with wood filler and caulk that ‘drywall gap’ we created. It is as critical to the final look as knowing why your shower bench is leaking is to your bathroom’s health; if you skip the sealing and finishing phase, the structural beauty is lost. Use a high-quality acrylic caulk and a damp finger to smooth it out before the final coat of paint goes on.
Don’t Fall for the Waterproof Marketing Trap
Most people assume that if they buy 100% waterproof luxury vinyl planks, the preparation doesn’t matter. This is a massive myth. While the planks themselves won’t swell, water trapped beneath them can turn your subfloor into a petri dish of mold. I have seen countless homeowners ignore the moisture meter requirement for basement flooring jobs because they felt the ‘waterproof’ label was a magic shield. If you do not address the vapor transmission from a concrete slab, that expensive flooring will eventually fail from the bottom up. Before you lay a single plank, you need to verify the subfloor’s condition to ensure a durable flooring installation for a stylish home.
Flatness is More Important than Level
Here is a professional secret: a floor can be sloped (out of level) and still look perfect, but a floor that isn’t flat will always feel like a failure. If your subfloor has humps or dips, your new boards will ‘bridge’ over the holes, leading to that annoying clicking sound or a bouncy feeling. I always use the feather edge secret for smoothing subfloor transitions to fill the low spots. In my experience, skipping this step is one of the most common flooring installation mistakes to avoid for a seamless look. A perfectly flat surface is the difference between a floor that lasts thirty years and one that breaks at the joints in three. 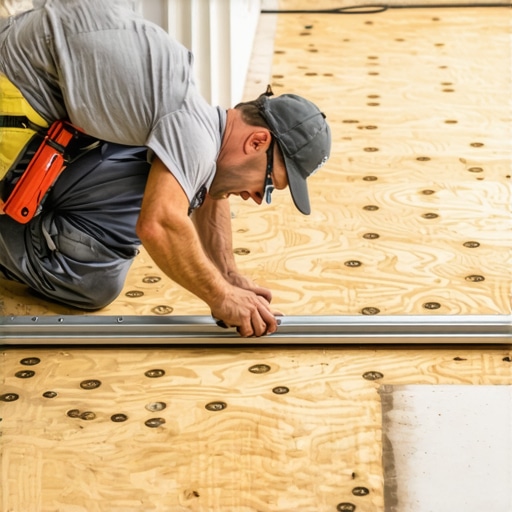
Does your subfloor actually meet the 1/8-inch flatness rule?
Advanced installers follow the National Wood Flooring Association (NWFA) standards, which generally require a floor to be flat within 1/8 of an inch over a 10-foot radius. If you haven’t checked yours with a long straightedge, you are guessing. This level of precision is just as vital in wet areas. For instance, the same attention to geometry prevents issues like why your shower bench is leaking into the wall cavity; if the slope isn’t perfect, water finds the path of least resistance.
The Invisible Tension of Expansion Gaps
Another high-level mistake is underestimating the power of wood movement. I have walked into homes where the ‘pro’ forgot the penny gap rule for hardwood expansion space, and by the end of a humid summer, the floor was buckling three inches off the joists. Even when using the best baseboard styles that elevate your interior, if you pin the floor down with the trim too tightly, you prevent the natural expansion and contraction cycle. You should also always perform the acclimation test for avoiding hardwood floor gaps to ensure the material has reached equilibrium with your home’s climate.
Stop Trusting the Kick-Test for Carpets
When it comes to soft surfaces, many beginners think they can stretch a carpet with a simple knee-kicker. That is a recipe for wrinkles in six months. Professionals use the power stretcher move to fix loose carpet bubbles from the start. A knee-kicker is for positioning; a power stretcher is for the actual install. Similarly, when doing wet work, never skip the flood test secret for guaranteed leak-proof showers. It is the only way to be 100% sure your waterproofing is sound before you cover it with beautiful tile. Have you ever fallen into the trap of skipping a ‘hidden’ step like subfloor prep or a flood test? Let me know in the comments below!
The Gear That Separates Pros from Amateurs
I used to think my eyes were good enough to judge a flat surface, but I was wrong every single time. Now, I never start a project without a high-quality moisture tester. You need to understand the moisture meter requirement for basement flooring jobs before you lay a single plank. According to the National Wood Flooring Association (NWFA) Technical Standards, moisture testing is the only way to validate a warranty. If you are doing a step-by-step flooring installation, you must know if your concrete is sweating or if your subfloor is holding onto summer humidity. For those tricky slabs where moisture is a constant threat, I swear by the urethane glue secret for hardwood on concrete because it acts as both a powerful adhesive and a vapor retarder. It is a bit more work to apply, but it is much cheaper than tearing up a buckled floor in two years.
How do I keep my new surfaces looking pristine for a decade?
The biggest threat to your hard work isn’t the installation itself; it is the daily grit and the wrong cleaning chemicals. Most people reach for a soaking wet mop, which is a death sentence for the joints of your wood or laminate. Instead, I strictly follow the microfiber mist rule for cleaning matte floors to ensure no standing water ever penetrates the seams. If you have furniture in the room, you must implement the felt pad routine immediately. I replace my felt pads every six months because they trap sand that eventually acts like sandpaper against your finish. For your wet areas, keep a close eye on the silicone joints; small cracks are the first sign you need to look into shower repairs when to fix vs replace for longevity to prevent structural rot behind the tile.
Why the Future of Home Surfaces is Circular
Looking ahead to the next decade, the industry is shifting toward materials that are easier to repair and replace. We are seeing top trends in installation for 2025 move away from permanent adhesives and toward modular, loose-lay systems that allow for ‘circular’ home maintenance. I predict we will soon see smart sensors embedded in subfloors to alert homeowners to moisture spikes before they even reach the baseboards. This focus on longevity ensures a durable flooring installation for a stylish home that can evolve with your needs. Before you start your next weekend project, I want you to try this: go rent or buy a professional-grade moisture meter and map out your subfloor. It is the single most important step for professional results.
The Painful Lessons That Saved My Sanity
If I could go back and talk to my younger self, I would tell him that the most expensive tool is the one you didn’t buy because you thought you could wing it. My biggest lightbulb moment came when I stopped viewing a flooring installation as a weekend sprint and started seeing it as a puzzle where the subfloor holds all the clues. #IMAGE_PLACEHOLDER_E# I once spent three days on a carpet install only to realize the subfloor squeaks were driving me mad; now I never skip the screw-down phase. Another realization? A $2 tube of caulk can make a $10 baseboard look like $100 millwork, but only if you use flooring installation mistakes to avoid for a seamless look as your guide to avoid sloppy corners.
My Non-Negotiable Setup for Success
You don’t need a warehouse full of tools, but you do need the right ones. My personal toolkit always includes a pinless moisture meter to prevent buckling and a self-leveling cross-line laser. For those looking for transform-your-home expert flooring installation tips for 2025, I highly recommend keeping a coping saw and a high-quality miter box handy. These aren’t just tools; they are your insurance policy against gaps. I also swear by the NWFA technical manuals for any hardwood project—they are the gold standard for industry specifications and help you avoid common pitfalls before they start.
Take That First Step Toward a Home You Love
Home improvement is about more than just resale value; it is about the feeling you get when you walk into a room that reflects your hard work and attention to detail. Whether you are planning a complete baseboards makeover to elevate your interior or just fixing a single tile in the bathroom, remember that every professional started exactly where you are now. Your flooring installation journey is a chance to build something that lasts and truly transforms your living space. You have the knowledge and the tricks—now you just need to grab the tape measure and begin. Which part of your house are you planning to tackle first—the baseboards or the floors? Let me know in the comments below!