

I’ll never forget the sound—that sharp, rhythmic ‘zip-zip-zip’ every time my office chair rolled over the center of the room. It wasn’t a squeaky wheel. It was the sound of a commercial-grade carpet slowly unravelling because of one tiny snag I’d ignored for months. I remember looking down and seeing a single loop of nylon standing tall, hooked by the caster of my chair. Like a fool, I pulled it. That one pull turned a tiny nub into a three-inch jagged line. It’s funny how we think these small things don’t matter until a client almost trips or the floor starts looking like a shaggy mess in a high-traffic zone. If you’ve been staring at a growing ‘run’ in your level-loop carpet and wondering if you’re going to have to rip the whole thing out, I’ve got some good news for you. We’re going to fix those frays today, and we’re going to do it without spending a fortune on a total replacement. It’s about saving your floor and your professional pride.
Stop the Fray Before Someone Trips
I used to think I could just ‘trim’ my way out of this problem. I grabbed my sharpest pair of scissors and went to town on the loose fibers, thinking if it was flush with the rest of the carpet, the problem was solved. Total disaster. By cutting the loops without securing the base, I actually invited the weave to keep unravelling like a cheap sweater at the first sign of friction. That’s why achieving flawless results requires a bit more than just a quick snip; you have to address the structural integrity of the weave. The real trick—the one I learned after ruining about three square feet of floor in my first apartment—is all about re-securing the ‘root’ of the loop to the backing. This matters because according to the National Safety Council, falls are the leading cause of non-fatal injuries in the workplace, and a frayed carpet is a prime candidate for a trip-and-fall accident that nobody wants on their conscience (or their insurance). When you’re choosing the best carpet types for high traffic areas, you expect them to be indestructible, but even the toughest nylon has its breaking point.
Is This DIY Fix Actually Worth the Effort?
You might be skeptical. You’re probably thinking, ‘Why not just hire a pro or buy a rug to cover it up?’ Well, covering it up just lets the damage spread underneath, and a pro is going to charge you a minimum call-out fee that’ll make your eyes water. This level-loop fix is something you can do in twenty minutes with about ten dollars in supplies. It’s the difference between a floor that looks neglected and one that looks meticulously maintained. Don’t let a tiny snag dictate the vibe of your workspace.
The One Mistake That Made My Carpet Look Like a Mess
Early on, I didn’t realize that commercial carpets have a specific backing that doesn’t like moisture. I tried to use a heavy-duty water-based glue I had in the garage, and it ended up staining the fibers a nasty yellowish-brown. It was a classic case of flooring installation mistakes to avoid even when you’re just doing a repair. If you’ve ever dealt with a visible line through the center of your floor, you know how frustrating it is when a ‘fix’ makes things look worse than the original problem. Have you ever tried to glue down a carpet snag only to have it turn into a hard, crunchy lump that you feel through your shoes? It’s the worst, right? Today, I’m going to show you how to avoid that and get back your professional-looking office without the crunchy residue or the ugly stains. We are going to use a surgical approach to carpet repair that keeps everything level, soft, and—most importantly—permanent.
Snip the Snag Without Ruining the Weave
To get this right, you need to stop thinking about your carpet as a rug and start seeing it as a series of interconnected locks. If one lock breaks, the whole chain is at risk. Your first move is to grab a pair of duckbill shears or high-tension fabric scissors. You have to resist the urge to pull the loose fiber; instead, get your blades flush with the carpet surface and snip the frayed end. I learned this the hard way back in 2012 when I was working on a small office renovation. I pulled a tiny string thinking it was just a loose thread, and before I knew it, I had unzipped a six-inch row. It looked like a zipper had been pulled out of the floor. That mistake taught me that achieving flawless results starts with patience and a very sharp blade. If you see why your new carpet has visible rows of lines, you’ll understand how these loops are lined up and why cutting them precisely at the base is the only way to stop the ‘run’ from spreading further into the room.
Precision Cutting Is Your First Defense
When you snip, make sure you aren’t catching any neighboring loops. You want a clean, flat cut. If the snag has created a small bald spot, don’t panic yet. Most commercial carpets have enough density that a small fix won’t be noticeable if you handle the adhesive part correctly. I once spent three hours trying to ‘re-weave’ a single line of nylon with a needle and thread—it was a nightmare and looked even worse than the hole. The pro way is much simpler and focuses on the backing rather than the surface.
The Adhesive Trick Professionals Use
Now for the ‘secret sauce.’ You need a dedicated carpet seam sealer. This isn’t your standard school glue or even a heavy-duty construction adhesive. Seam sealer is a thin, latex-based liquid that penetrates the backing and bonds the fibers instantly without creating a hard lump. I used to use a generic epoxy until I realized it made the carpet feel like a rock. If you apply too much, you’ll end up with flooring installation mistakes to avoid like ‘glue-tracking,’ where the repair site becomes a magnet for dirt. Instead, use a syringe or a precision tip to apply a tiny bead of sealer directly onto the primary backing where the loop was pulled out.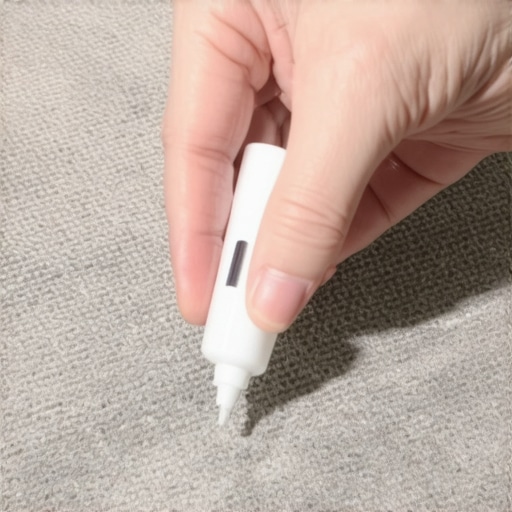
Why Seam Sealer Beats Super Glue Every Time
Super glue is too brittle. As people walk over it, the glue shatters and the repair fails. A latex sealer stays flexible. When I was fixing a high-traffic hallway in a local clinic, I used a flexible sealer and weighted it down with a heavy book (wrapped in wax paper so it wouldn’t stick!) for ten minutes. The result was a repair that survived three years of heavy medical carts rolling over it daily. If the damage is so large that a simple glue fix won’t work, you might need to learn how to blend a new carpet patch into an old room by cutting out a small ‘cookie’ of carpet from a closet and swapping it.
Seal the Root and Save the Row
Once the glue is in place, use the back of your scissors to gently ‘massage’ the surrounding loops over the repair site. This helps blend the fibers and hides the cut end of the yarn. If you’ve ever had to use the double-cut method for invisible carpet seams, you know that the goal is always to make the transition invisible to the eye. You aren’t just fixing a hole; you’re restoring the tension of the weave. Keep the area clear of foot traffic for at least an hour. The goal is to let that latex bond fully with the secondary backing so that the next time a vacuum cleaner or a rolling chair passes over it, there’s no loose end for it to grab.
The Cushion Lie That Kills Your Carpet
Everyone tells you to buy the thickest, plushiest pad available for your living room. It sounds like a dream for your feet, right? But here is the truth: a pad that is too thick actually acts like a trampoline for your carpet’s backing. Every time you step, the backing flexes too far, eventually leading to those ugly ripples you see in older homes. This is a classic case of why your carpet pad is too thick for the tack strip. According to standards set by the Carpet and Rug Institute (CRI), residential cut-pile carpet usually requires a pad no thicker than 7/16 of an inch. If you go beyond that, you aren’t adding comfort; you’re adding a countdown to a restretching bill. I’ve seen homeowners insist on an 8lb, half-inch density pad, only to find their carpet looks like a series of waves within three years. Don’t fall for the ‘more is more’ sales pitch. 
How to Avoid the Shower Trap That Costs Thousands
When it comes to showers, I’ve seen DIYers spend thousands on high-end marble only to skip the most boring part: the flood test. They assume if the waterproof membrane looks sealed, it is sealed. Wrong. The biggest trap in upgrade your bathroom projects is trusting your eyes over a bucket of water. You need to perform the flood test secret for guaranteed leak-proof showers before a single tile touches the floor. You plug the drain, fill the pan with two inches of water, and mark the level. If that level drops overnight, you have a leak. It is better to find it now than to discover it through a wet spot on your downstairs ceiling six months later. Failing to do this is one of those flooring installation mistakes to avoid that separates the amateurs from the veterans.
Can You Actually Hide Those Ugly Metal Transition Strips?
The short answer is yes, but it requires a ‘zero-threshold’ mindset. Instead of those clunky T-moldings that everyone trips over, pros use a recessed ‘L’ bead or even a scribe-to-fit method. It’s the difference between a house that feels like a series of boxes and one that flows like a high-end gallery. If you’ve been wondering about the t-molding mistake that ruins open-concept floors, it’s almost always because the installer took the easy way out with a generic transition strip rather than planning the subfloor heights to match perfectly.
The Scarf Joint Secret for Better Baseboards
Finally, let’s talk about those long runs of baseboards. Most people just butt the ends together and hope the caulk hides the gap. In my experience, that joint will open up the second the humidity changes. The pro move is the scarf joint. You cut both ends at a 45-degree angle so they overlap. It creates more surface area for glue and makes the seam nearly invisible once painted. Speaking of paint, please paint your baseboards before installing them. It saves your back and your new floors from stray drips. Have you ever fallen into the ‘thicker is better’ trap with your carpet or padding? Let me know in the comments.Beyond the snips and the glue, the real secret to a floor that lasts twenty years instead of five is the tension. I used to think a knee-kicker was enough for small rooms, but I was wrong. If you aren’t using a power stretcher, you aren’t really installing carpet; you’re just laying it down to fail later. This is why I always emphasize the power stretcher move to fix loose carpet bubbles before they even start. According to the Carpet and Rug Institute’s (CRI) 105 Standard for Residential Carpet Installation, the use of a power stretcher is a mandatory requirement to ensure the carpet stays taut and ripple-free. When I’m working on hardwood-to-concrete transitions, I don’t mess around with standard construction adhesive. I rely on the urethane glue secret for hardwood on concrete because it provides a moisture-vapor barrier that saves the wood from cupping during humid summers. 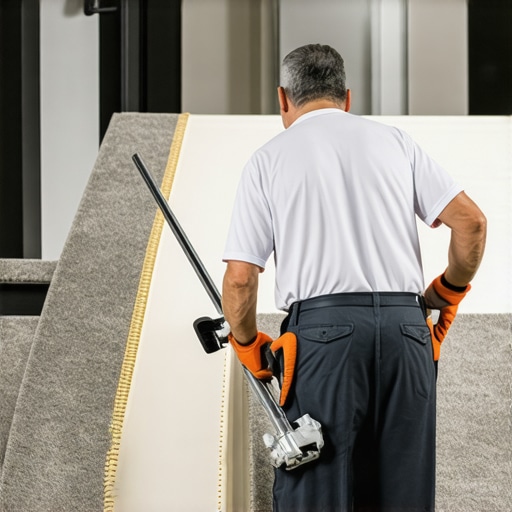
How do I keep my new floors in peak condition?
Maintaining a floor isn’t just about cleaning; it’s about preventing mechanical stress. For those of you with beautiful matte finishes, stop using heavy buckets of water. Instead, follow the microfiber mist rule for cleaning matte floors to prevent those annoying hazy streaks. In the bathroom, longevity comes down to the corners. I’ve seen beautiful renovations ruined by cracked grout in the vertical seams, which is why I always stick to the soft joint rule for shower wall corners. It allows for the natural expansion and contraction of your home without the leaks. If you are already seeing wear, you need to decide on shower repairs: when to fix vs replace for longevity to avoid wasting money on temporary patches. Looking ahead to 2025 and beyond, I see a massive shift toward sustainable, carbon-sequestering materials and ‘smart’ underlayments that can alert your phone if a pipe starts leaking under your luxury vinyl. It’s an exciting time to be in the industry, but the fundamentals never change. If you want a truly professional look, go back and master step-by-step flooring installation from planning to perfect finish. My biggest piece of advice for you today? Don’t ignore the subfloor. Try using the feather-edge tactic for smoothing subfloor seams on your next project and watch how much better your final layer lays down. You’ll thank me when you aren’t feeling every single plywood gap under your feet.
The Expensive Lessons Most Homeowners Learn Too Late
After years of fixing commercial snags and residential ripples, I’ve realized that the premium option isn’t always the best for your home’s longevity. For instance, many people assume a thick pad makes for a better carpet install, but as we’ve discussed, it often leads to premature failure. Here is the hard truth: durability is often invisible. It is the latex sealer under the fiber, the flood test under the tile, and the expansion gap under the baseboard. When you focus on your guide to durable flooring installation for a stylish home, you have to prioritize the subfloor and the chemistry of the adhesives over the initial fluffiness of the top layer. Another realization? You cannot fake a repair on loop carpet. If you do not seal the root, the run will eventually return. It is better to spend ten minutes doing a permanent fix than ten seconds doing a temporary one that ruins the entire row.
My Non-Negotiable Kit for Professional Results
If you want to move beyond basic DIY, you need to stop using multi-purpose tools and start using task-specific ones. For carpet, I never step onto a job site without a power stretcher and a high-quality latex seam sealer. For those tricky basement projects, I always look into the cushion back carpet benefit for basements to handle the balance between moisture and comfort. If you are moving into wood repairs, mastering how to match wood grain when patching old hardwood floors is the difference between a patch that sticks out and one that disappears into the grain. Lastly, for your trim, settle the butt joint vs scarf joint debate for baseboards once and for all by choosing the scarf joint for every long run; it is the only way to beat the expansion and contraction cycles of the seasons.
Your Floor Deserves a Second Chance
You do not need a sledgehammer to transform your space. Sometimes, the most satisfying flooring installation projects are the ones where you rescue what you already have. By snipping that snag, sealing the backing, and ensuring your transitions are flush, you are extending the life of your investment by years. Don’t let a few loose fibers or a squeaky board convince you that the whole floor is trash. With the right adhesive and a little bit of patience, you can restore that professional look yourself without the professional price tag. Have you ever tried to fix a carpet snag only to have it unravel even further? Let me know your biggest flooring repair challenge in the comments below!