

I remember waking up on a frigid January morning, walking barefoot to the kitchen, and feeling a sharp, distinct click-clack that wasn’t there in the humid days of August. I looked down and saw it: a gap between my floorboards wide enough to swallow a credit card. My heart sank. I’d spent thousands on that install, and in my panic, I was convinced my subfloor was failing or that I’d been sold a batch of defective timber. I actually spent the afternoon on my hands and knees with a flashlight, certain I was witnessing a slow-motion home collapse. It turns out, I wasn’t a victim of bad luck; I just didn’t understand that my floor was literally breathing. Today, I’m going to help you stop worrying and explain exactly how to manage those unsightly spaces without making the same expensive mistakes I did early on. Have you ever found yourself staring at a new gap in your floor and wondering if you should reach for the wood filler immediately?
Your Floor Is Literally Breathing With the Seasons
You have to realize that wood is a living, organic material, even after it has been milled and nailed down. When the temperature drops and your furnace starts kicking out that dry, cozy heat, it sucks the moisture right out of the air and, subsequently, your floorboards. This causes the wood cells to contract. I learned the hard way that fighting this natural process is a losing battle. Early in my DIY journey, I once made the mistake of filling those winter gaps with wood putty, only to have the filler squeezed out like toothpaste and cracked all over my floor when the humidity returned in July. It was a mess that took weeks to scrape out. Most of the time, what you are seeing is just the wood reacting to its environment, much like how some people struggle with flooring installation mistakes to avoid for a seamless look by not acclimating their materials properly. According to the National Wood Flooring Association (NWFA), wood is a hygroscopic material, meaning it is constantly gaining or losing moisture to reach a state of equilibrium with the air around it. This means gaps are often an environmental issue, not a structural one.
Is this a sign of a permanent flooring disaster?
It is easy to spiral into thinking the whole installation was botched. I’ve been there. You start wondering if the installer missed the penny gap rule for hardwood expansion space or if the door jamb saw mistake that leaves huge gaps is actually to blame for the draft you feel at your feet. Sometimes, the heat source itself is the culprit, especially if your underfloor heating is making your hardwood gap by drying the planks from the bottom up. But here is the good news: most winter gaps will close up tighter than a drum once the spring rains arrive and the humidity levels rise. We are going to look at how to monitor your home’s climate so you can keep your floors stable all year round.
Control the Air to Stop the Gaps
The secret to a gap-free floor isn’t in a tube of caulk; it’s in the climate of your living room. Think of your hardwood like a sponge. When the air is saturated, the sponge swells; when it’s parched, it shrivels. To stop this, you have to stabilize the environment before you ever pick up a tool. I learned this the hard way last February when I got aggressive with a portable humidifier. I left it on full blast right next to my hallway entrance. Within three days, the gaps were gone, but the boards near the machine started to cup—the edges curved upward because I’d local-flooded the air with moisture. It was a stressful week of running a dehumidifier to get them flat again. The lesson? Consistency across the whole house beats a quick fix in one corner.
Grab a Hygrometer and Watch the Numbers
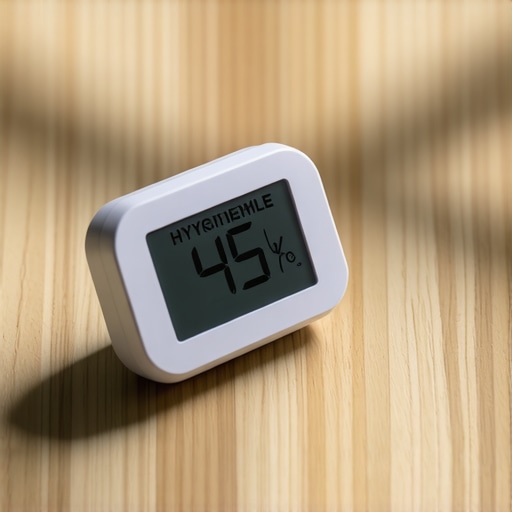
You can’t manage what you don’t measure. Buy a digital hygrometer—they are inexpensive and will tell you exactly what the relative humidity (RH) is in your home. Your goal is to keep your home between 35% and 50% humidity year-round. While the moisture meter test for concrete subfloors is vital during a new build, a hygrometer is your daily dashboard for maintenance. If you see that number dip below 30%, you know those gaps are about to appear.
Feed Your Floor Some Humidity During Winter
If you have a forced-air furnace, it is essentially a moisture-evaporating machine. To counter this, consider a whole-house humidifier integrated into your HVAC system. If that’s not in the budget, high-output portable humidifiers in main living areas can bridge the gap. By keeping the air moist, you keep the wood cells plump. This prevents the planks from pulling away from each other, ensuring you don’t have to worry about the penny gap rule for hardwood expansion space becoming a permanent eyesore.
Fix Gaps That Refuse to Close
Sometimes, despite your best efforts with humidity, a gap remains because the wood has physically shifted or was improperly installed. In these cases, you need a mechanical fix rather than a climate fix. However, you must be careful not to create a bigger problem. For instance, the wood filler mistake on pre-finished hardwood is a classic DIY fail; the filler won’t take the stain properly and will eventually crack and fall out as the floor moves.
Manage Threshold Gaps with Smarter Transitions
If you notice a massive gap between two different rooms, it might be a failure of the transition. Often, the t-molding mistake most vinyl installers make—failing to leave enough room for movement—happens with hardwood too. If a gap appears at a doorway, it’s often better to install a wider transition strip or T-molding rather than trying to fill the void. This allows the floors on either side to expand and contract independently without tearing the floor apart. For issues near the stairs, knowing how to fix a loose stair nose on hardwood can prevent a small gap from becoming a major trip hazard. If you are working near the edges of the room, you can even hide some of the movement by learning how to cut baseboards without a miter saw to create a tighter perimeter fit that allows the floor to slide underneath unseen.
Why a Level Subfloor Is Not Always a Stable One
The one thing most DIYers and even some professionals get wrong is obsessing over a level surface while completely ignoring deflection. Everyone tells you to use a self-leveler to get a flat surface, but in my experience, a floor that is perfectly level but too bouncy is a recipe for cracked grout and failed seams. If you are moving from carpet to heavy tile, the subfloor needs structural rigidity above all else. The Tile Council of North America (TCNA) emphasizes the L/360 standard for ceramic tile, which measures how much a floor bends under a specific load. If your joists are spaced too far apart, no amount of leveler will save your project; you need to know how to reinforce a subfloor for heavy stone tiles before that first thin-set scoop ever hits the wood. Even if you are sticking with hardwood, ignoring the floor prime move for porous concrete subfloors can lead to poor adhesive bonding that causes those annoying phantom clicks later on.
The Baseboard Trap Most Renovators Fall For
Then there is the baseboard trap. I have seen countless homeowners spend hours on a step-by-step flooring installation only to ruin the final look by painting their trim while it is already nailed to the wall. It sounds like a time-saver, but you will inevitably get brush marks on your new floor or a messy, jagged line at the top. This is why you should paint your baseboards before installing them. It allows for a factory-smooth finish and avoids the unsightly caulk crack that happens when paint bonds the trim to the wall too rigidly. When you do eventually install them, using the back-cutting secret for baseboard miters ensures that the visible front edge stays tight even if your walls are not perfectly square. If you skip this nuance, you will likely find yourself wondering why your caulked baseboards are cracking within weeks as the house naturally settles.
Why does my shower renovation feel damp after only six months?
One of the most sophisticated mistakes involves the shower niche. People often assume that because they have applied tile and grout, the area is waterproof. That is a dangerous myth. If you do not use the waterfall method for tiling shower niches, water can actually track backward behind the tile through the porous grout lines. I have seen gorgeous, high-end bathrooms gutted because your shower niche is growing mold behind the tile due to poor slope or a lack of a continuous waterproof membrane. Similarly, for the perimeter of your shower, always follow the soft joint rule for shower wall corners by using high-quality silicone instead of grout to allow for the house’s natural movement without breaching the seal. Have you ever fallen into this trap? Let me know in the comments.
One of the biggest mistakes I see people make after a durable flooring installation is thinking the job is done once the last nail is driven or the last tile is set. The truth is, the tools you use for the final 5% of the job—and the maintenance routine you establish immediately—determine if that floor stays beautiful or becomes a creaky, wrinkled mess in three years. For my carpet projects, I stopped relying on just a simple knee kicker a long time ago. If you want to avoid why your carpet is coming loose in the hallway, you absolutely must use a power stretcher. It is the only way to get the mechanical tension required by industry professionals. The Carpet and Rug Institute (CRI) in their 105 Standard for Residential Carpet Installation specifically mandates the use of power stretching to ensure long-term performance. Without it, you are just asking for those annoying ripples that eventually lead to premature delamination and wear. Knowing carpet install secrets like these separates a weekend DIYer from a seasoned craftsman.
How do I keep my new flooring looking pristine for years?
Maintenance isn’t just about running a vacuum; it’s about understanding the chemistry of your surfaces. For example, if you have installed matte-finish tiles or luxury vinyl, using the wrong wax-based cleaner can leave a filmy residue that traps dirt and creates a dull haze. I always follow the microfiber mist rule for cleaning matte floors to keep the surface looking fresh without degrading the protective finish. Similarly, if you are worried about the longevity of your bathroom renovation, keep a close eye on your shower base. If you start hearing strange noises when you step inside, you need to investigate why your shower base is sinking into the floor before a catastrophic leak develops behind your tiles. 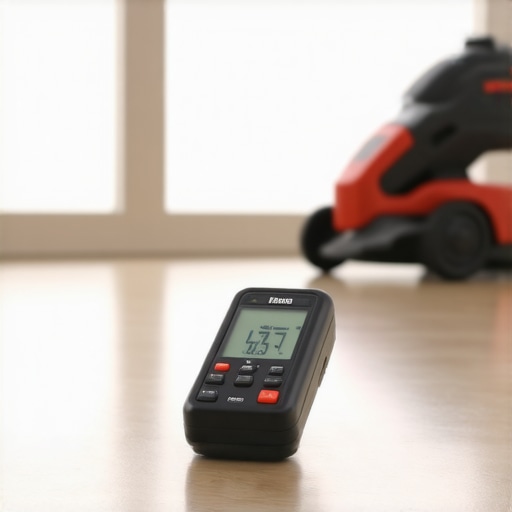
Invest in tools that see through walls
One tool I never start a renovation without anymore is a professional-grade moisture meter. While the moisture meter test for concrete subfloors is standard during the initial build, I use it periodically for yearly maintenance to check for hidden leaks near windows, exterior doors, or shower curbs. In high-end shower builds, I have even started using thermal imaging cameras to check for cold spots that might indicate a failure in the waterproof membrane before it becomes a mold factory. This level of detail is what guarantees a perfect finish that lasts for decades. Looking ahead, I expect to see ‘smart floors’ become the residential norm by 2030—think cork and wood underlayments with integrated moisture sensors that ping your phone the second a pipe starts to drip. For now, we have to rely on good technique and the right equipment. I challenge you to try the double-cut method for invisible carpet seams on your next small project; it takes more patience, but the results are so seamless you will never go back to standard overlapping techniques. If you ever feel stuck or overwhelmed by a specific layout issue, don’t hesitate to contact us for expert advice on your specific home project.
What Most Contractors Forget to Mention About Stability
After years of fixing my own blunders and helping others through theirs, I’ve realized that the most important part of any step-by-step flooring installation happens before you even open a box of material. First, acclimation is non-negotiable; wood doesn’t just need to sit in your house, it needs to reach a moisture equilibrium. Second, I’ve learned that gaps are often just a form of communication—the floor is telling you the air is too dry, not that the installer was incompetent. Third, never underestimate the power of the subfloor. If you don’t address why your floor joists need blocking before tile installation, you’re building on a shaky foundation. Finally, remember that high-quality maintenance, like using the microfiber mist rule for cleaning matte floors, is what keeps a beautiful floor from aging prematurely.
The Gear I Actually Keep in My Truck
I don’t leave my house for a job without three specific things. First is a professional-grade moisture meter; it’s the only way to perform the moisture meter test for concrete subfloors accurately. Second is a high-accuracy digital hygrometer to monitor room humidity—this is your early warning system for gaps. Third, for any bathroom work, I rely on the TCNA Handbook for ceramic tile installation standards to ensure I never miss the soft joint rule for shower wall corners. Lastly, for carpeting, a power stretcher is my secret weapon to avoid why your carpet is coming loose in the hallway later down the line.
#IMAGE_PLACEHOLDER_E#
Start Your Next Room With Confidence
Taking on a major home update can feel like a high-stakes gamble, but it doesn’t have to be. Whether you are planning a complete ultimate shower renovation or simply trying to find the perfect baseboards for your home’s style, the key is to respect the materials. By understanding the physics of wood expansion and the chemistry of adhesives, you move from guessing to knowing. Your home is a living environment, and when you treat it with the care and precision of a craftsman, your durable flooring installation will truly stand the test of time. Have you ever felt that initial panic when seeing a winter gap in your floor, or have you found a unique way to manage your home’s humidity? Let me know in the comments below!