

I stood in my newly finished master bath, admiring the marble slab I’d painstakingly installed on the built-in bench. It looked like a million bucks. But three days later, that same marble was home to a stubborn, shimmering puddle that just wouldn’t budge. I’d used my trusty 4-foot level to make sure that seat was perfectly flat. I thought I was being a pro. Instead, I’d accidentally built a very expensive birdbath inside my shower. That damp, musty smell started creeping in within a week, and I realized my “perfect” installation was a ticking time bomb for mold.
The Day I Turned My Bench Into a Birdbath
That failure taught me more about bathroom renovations than any manual ever could. You see, in the world of tile, “level” is often the enemy of “dry.” If water has even a second to sit still, it’s going to find a way to wreak havoc on your grout and eventually your subfloor. Today, I’m going to show you exactly how to calculate the ‘Shower-Seat’ slope rule so your bench stays bone-dry and your tile stays pristine for years. We aren’t just talking about a quick wipe-down; we’re talking about gravity doing the heavy lifting for you.
Does a tiny slant actually matter for comfort?
You might be worried that if you angle the seat, you’ll feel like you’re sliding off into the drain while you’re trying to shave your legs or relax. I get it; I had the same skepticism. But the reality is that a proper pitch—usually about a quarter-inch per foot—is virtually imperceptible to the human backside. However, it is life and death for your waterproofing. According to the Tile Council of North America (TCNA), all horizontal surfaces in a shower environment must be sloped toward the drain to prevent ponding. If you skip this, even the best waterproofing can eventually fail under the constant pressure of standing water. Getting this right early on is just as vital as ensuring your flooring installation starts on a flat subfloor. Have you ever stepped into a shower and noticed that one corner of the bench always seems slimy? That’s the “level bench” curse. I want to know—have you ever dealt with a shower that just won’t dry out, or are you planning a build right now and want to make sure you do it right the first time?
The Secret Math Behind the Perfect Pitch
When I first started out, I thought I could just “eye it.” I’d throw a little extra thinset on the back and hope for the best. That led to a shower niche that collected water and a bench that looked crooked against the wall tile. The key is using the right tools from the jump. You need to treat your shower seat with the same respect you’d give a dry pack shower base. It’s all about creating a consistent, predictable path for every drop of water to follow.
Build a Drainage Path That Works Every Time
I remember a guest bathroom project in 2022 where I felt overconfident. I was rushing to finish the tile work and decided to use a pre-fabricated foam seat. The problem? The framing was out of plumb. Instead of fixing the wall, I tried to force the seat level. By the time I finished, the seat looked perfect to the naked eye, but it actually leaned slightly toward the back wall. Within two months, the grout line at the wall-seat junction was black with mildew. I had to tear out three rows of tile to fix a mistake that would have taken ten minutes to prevent. That disaster cemented one rule in my mind: you must build the slope into the substructure, not the tile. Just as a flooring installation requires a flawless subfloor, your shower bench requires a calculated pitch before the first dab of thinset hits the surface.
The 1/4-Inch Secret to Bone-Dry Seats
The industry standard is a quarter-inch drop for every foot of horizontal surface. Think of it like the subtle crown on a road that pushes rain into the gutters. If your bench is 12 inches deep, the front edge—where your calves hit—should be exactly 1/4 inch lower than the back edge where it meets the wall. This is where the slope check tactic becomes your best friend. I always keep a small scrap of 1/4-inch plywood in my bucket. I set my level on the bench, slip that scrap under the ‘drain side’ of the level, and if the bubble hits center, I know I’m golden. It’s an analog solution for a digital-precision problem. 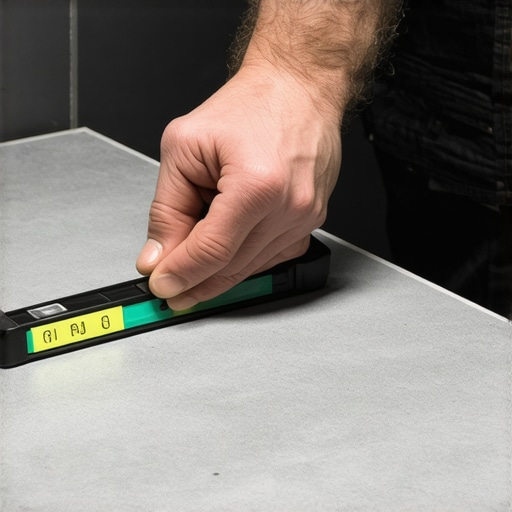
Sloping the Substructure Before Tiling
You cannot rely on thick layers of mortar to create this slope. If you try to ‘build up’ the back with thinset, you’ll end up with a ‘lippage’ nightmare where the tiles don’t sit flush. Instead, use the dry pack method to shape the bench itself. When I’m mixing my mud, I aim for a consistency that holds its shape when squeezed. I pack it onto the bench frame, intentionally carving that 1/4-inch pitch into the mud bed. While you’re at it, make sure you know how to mix thinset for the actual tile layer later; if it’s too runny, your tiles will slide down that beautiful slope you just built. It’s the same principle as ensuring carpet install secrets like proper stretching—if the foundation isn’t tight and angled right, the finish will fail.
Don’t Let Water Sneak Behind the Bench
The most dangerous spot in your shower isn’t the floor; it’s the 90-degree angle where the seat meets the wall. This is a high-stress point where the house naturally shifts. If you grout this joint solid, it will crack. I always follow the soft joint rule, using a high-quality 100% silicone sealant that matches the grout color. But before the tile goes on, you must use the overlap trick for waterproofing. I run my waterproofing membrane up the wall at least 6 inches above the seat and wrap it over the front edge of the bench. It’s like tucking in your shirt; you want the ‘water’ (the shirt) to stay on the outside of the ‘pants’ (the bench) so nothing leaks into the skin. This prevents the nightmare scenario where a shower niche collects water or a bench rots from the inside out. Handling these corners with precision is as critical as learning the back-cutting secret for baseboards to ensure every joint is water-tight and visually seamless.Most contractors will tell you that you can never have enough waterproofing, but in my twenty years of tearing out failed bathrooms, I’ve found that logic to be a dangerous myth. It’s called the ‘vapor sandwich,’ and it’s the silent killer of modern renovations. If you apply a heavy moisture barrier on the subfloor and then another sheet membrane right under the tile without a breathable layer in between, you are essentially building a petri dish. Moisture gets trapped in that middle zone, cannot evaporate through the top or bottom, and eventually rots the very studs you’re trying to protect. This is where a common flooring installation mistake turns into a structural catastrophe. It’s remarkably similar to the vapor trap mistake often seen in garage coatings—if the hydrostatic pressure from the subfloor has nowhere to go, the entire bond will eventually delaminate and peel away. 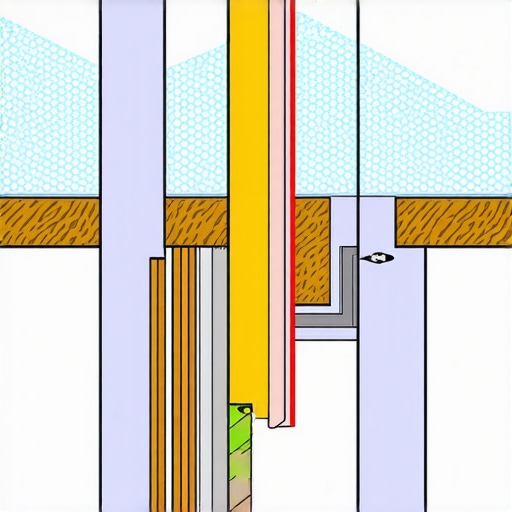
Is a power stretcher actually necessary for a small residential bedroom?
Many DIYers and weekend warriors think a knee kicker is sufficient for a standard twelve-by-twelve room. They couldn’t be more wrong. According to the Carpet and Rug Institute (CRI) Standard 104, a power stretcher is mandatory for all wall-to-wall carpet installations, regardless of the room size. If you skip this step, you are essentially guaranteeing that your carpet will develop unsightly ripples within three to five years as the latex backing relaxes. I have settled the power stretcher vs knee kicker debate on dozens of job sites; the knee kicker is a tool for positioning and stair work, while the power stretcher is the only tool capable of providing the structural tension required for longevity.
The Expansion Gap is Not Just for the Flooring
Another advanced nuance that even seasoned pros occasionally miss is the dynamic interaction between wall trim and the floor surface. When you are planning a baseboards makeover, the natural instinct is to pin the wood as tight as possible against the floor for a seamless look. However, if you are working with natural wood or certain laminates, those baseboards can act like a clamp. If the floor expands during a humid summer and the baseboard is pinned too tight, the floor has nowhere to go but up. This is a frequent reason why your rigid core floor sounds hollow when you walk; the planks are literally being squeezed and lifted off the subfloor by the trim. For larger tile projects, you must also adhere to the full bond rule for large format porcelain to ensure there are no air pockets that could harbor moisture or create weak spots. Have you ever fallen into this trap of over-waterproofing or pinning your trim too tight? Let me know in the comments.If you are tired of your projects looking like ‘good enough’ instead of ‘perfect,’ you have to stop relying on a standard handsaw for your detailed trim work. I have seen too many homeowners struggle because their door jamb undercuts are too high, leaving an ugly gap that no amount of caulk can effectively hide. My go-to tool for a flawless transition is always the Fein Multimaster oscillating tool. It is not just a cutter; it is the difference between a seamless flooring installation and one that looks like a rushed hack job. I use it to slice through jambs with zero splintering, allowing the new planks to slide right underneath for that factory-tight finish.
How do I keep my new shower and floors looking pristine?
The secret to long-term results is not a magic cleaner; it is proactive maintenance and using the right mechanical aids during the build. For showers, I recommend a monthly inspection of the silicone soft joints. If you spot a tiny tear or a bit of lifting, don’t ignore it. You can consult my guide on shower repairs: when to fix vs replace for longevity to decide if you need a simple patch or if a deeper issue is brewing. For your carpets, keep a pair of sharp duckbill snips in your junk drawer. Learning how to fix a carpet snag before it runs is the difference between a ten-second fix and a thousand-dollar replacement of the entire room. I personally check my high-traffic zones every time I vacuum, looking for the first sign of a loose loop or a fraying seam. 
Professional tension is the only path to longevity
When it comes to the long game, the National Wood Flooring Association (NWFA) Section V technical manual is very clear: you must maintain a consistent relative humidity level between 30% and 50% to prevent your planks from gapping or buckling. I tell all my clients to invest in a simple hygrometer. It is a ten-dollar tool that protects a ten-thousand-dollar investment. In the world of textiles, I always go back to the carpet install secrets that veterans use, specifically the use of a Roberts power stretcher. If you see me working in a hallway, I am using that stretcher to ensure the backing is under enough tension that it won’t develop ripples in three years. For the finishing touches, I never skip the carpet tucker move for clean baseboard edges; it is the only way to get that carpet to sit perfectly against the wood without showing the raw edge.
Why the next decade of flooring will be smart
Looking ahead, I predict we are going to see a massive shift toward ‘smart’ subfloors. Imagine a waterproofing membrane with embedded moisture-sensing wires that alerts your phone the moment it detects a leak behind the tile. While that tech is currently reserved for high-end commercial builds, it is trickling down to residential renovations quickly. Until then, your best defense is still a precise, calculated installation. My challenge to you: on your next project, don’t just ‘eye’ your miter joints. Use the miter clamp secret for professional baseboard corners to hold your joints tight while the glue sets. You will thank me in five years when your baseboards still look like a single piece of wood.
Lessons from the School of Wet Subfloors
Over two decades of working in homes, I’ve realized that the most expensive mistakes are usually the ones you can’t see once the tile is down. First, I learned that a level is a guide, but water is the ultimate judge; always do a ‘cup test’ on your sloped surfaces before thinset hits the board. Second, the expansion gap isn’t a suggestion. If you don’t leave room for your house to move, the house will make its own room by cracking your grout or buckling your planks. This is one of those flooring installation mistakes to avoid at all costs. Lastly, I’ve learned to respect the ‘soft joint.’ Using grout in a corner is asking for a leak, while a silicone bead is an insurance policy for your subfloor.
My Go-To Gear for Results That Last
To get a professional finish, you need more than just grit; you need the right mechanical advantages. For any room with a rug, the carpet install secrets start and end with a power stretcher. I never step on a job site without my Fein Multimaster for cleaning up door jamb undercuts, and a high-quality hygrometer is essential for checking if your concrete is actually ready for a new floor. These tools take the guesswork out of the equation. #IMAGE_PLACEHOLDER_E#
The Satisfaction of a Job Done Right
Taking on a shower renovation or a complete flooring overhaul is a massive investment of time and sweat, but the payoff is a home that functions as beautifully as it looks. When you stop rushing the prep and start obsessing over the physics of drainage and tension, you’re building something that will stand the test of time. Don’t be afraid to take that extra hour to check your pitch or double-stretch your carpet. Your future self—and your home’s value—will thank you. Have you ever discovered a hidden water puddle or a weird carpet ripple months after a project was supposedly finished? Let me know your biggest installation surprise in the comments below!