

I was kneeling on a half-finished floor, staring at a jagged, fraying edge on a piece of high-end luxury vinyl that cost me nearly five dollars a square foot. My heart sank. I’d been at it for six hours, and suddenly, the “easy” click-lock planks weren’t clicking. I thought I had a bad batch. It turns out, I was just committing one of the most common flooring installation mistakes: I was trying to stretch a single utility blade across the entire living room. My lightbulb moment came when I finally snapped off a fresh tip and the next cut went through like butter, leaving a factory-perfect edge. Today, I’m going to show you why stay-sharp isn’t just a marketing buzzword—it’s the difference between a floor that looks professional and one that looks like a DIY disaster.
Stop Trashing Your Planks with a Tired Knife
The reality of luxury vinyl is that while it’s durable underfoot, it’s surprisingly picky about how it’s cut. Most people treat their utility knife like a lifetime tool, but when you’re working with stone-polymer composite or even standard LVP, your blade is a consumable, just like the flooring itself. If you aren’t following the stay-sharp rule, you’re not just making your life harder; you’re compromising the structural integrity of the joints. In my early days, I wasted three whole boxes of material because the dull blade created micro-burrs that prevented the tongue-and-groove system from seating properly. If you want expert flooring installation tips for 2025, the number one rule is this: a sharp blade is cheaper than a ruined plank. According to the National Wood Flooring Association, proper tool maintenance is the single most significant factor in preventing installation-related failures.
Is a constant blade change actually worth the hassle?
You might be thinking, “Come on, those blades are five bucks a pack, and I have to stop every ten minutes?” I get it. I used to be the guy trying to sharpen my utility knife on the concrete subfloor just to save a trip to the toolbox. But here is the truth: a dull blade requires more pressure. More pressure leads to slips. Slips lead to gashed planks or, worse, gashed fingers. When you use the block and hammer move for tight vinyl floor joints, you need those edges to be crisp. Have you ever found yourself wrestling with a plank that just won’t seat, only to realize the cut end is slightly flared? That is the dull blade tax. Today, we are going to dive into the specifics of the stay-sharp rule, including exactly when to swap your steel and why the score and snap method depends entirely on that first microscopic line. I want to save you the frustration I felt on that first job. Have you ever ruined a perfectly good piece of flooring just because you were trying to get one last cut out of an old blade?
How to Master the Score and Snap Without Splintering
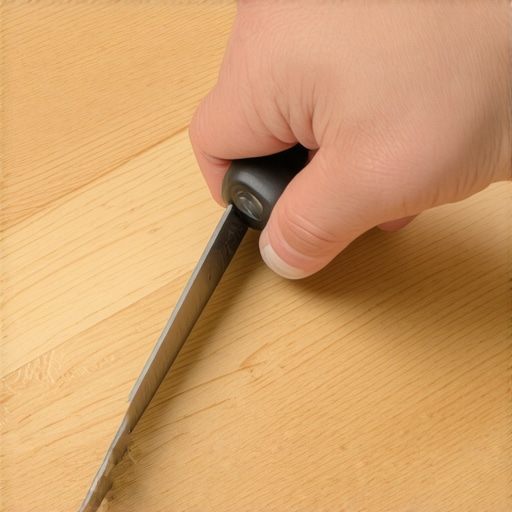
Think of scoring your vinyl like cutting glass; you aren’t trying to saw through the material in one go. You are creating a stress fracture line that the core is forced to follow. If your blade is fresh, it slices the wear layer like a laser. If it is dull, it plows through it like a rusty tractor. I remember trying to force a dull blade through a 7mm stone-core plank in a tight hallway. Instead of a clean snap, the core shattered into three jagged pieces. I had to restart the entire sequence and use the row start tactic for balanced flooring layouts in narrow hallways just to hide the fact that I had wasted my last full-length board. Now, I make three light passes with a brand-new tip: the first breaks the finish, the second settles into the groove, and the third ensures the backing is ready to give up.
Switch Blades More Often Than You Think
A good rule of thumb is to snap off a new blade tip every five to six cuts. It sounds excessive until you realize that the ceramic-bead coating on modern LVP is essentially sandpaper for steel. If you feel even a tiny bit of resistance or see fuzz on the edge of the cut, you are already too late. This is especially vital when you are preparing for the self leveler move for perfectly flat vinyl installs, because any lip or burr on the underside of the plank will telegraph through the finished surface. This creates a microscopic bump that catches the light and ruins the illusion of a solid floor. Keep a dedicated bin for used blades so you aren’t tempted to pick up a dull one in a hurry.
Stop Fighting Door Casings and Start Under-Cutting
One of the biggest mistakes DIYers make is trying to cut the vinyl to fit around the complex shapes of a door frame. It is a losing battle that always results in ugly gaps filled with globby caulk. Instead, you need to use the under-cut move for fitting flooring perfectly under door casings. You lay a scrap piece of your flooring upside down against the casing, rest your pull saw on top, and slice through the wood. This creates a pocket where the plank can slide underneath effortlessly. It is like a magic trick; the floor looks like it was grown into the wall rather than slapped next to it.
Handle the Tricky Spots with Cardboard Templates
When you get to those weird corners or plumbing pipes, do not guess with your expensive material. Use the cardboard template hack for cutting vinyl around toilets or floor vents. I once spent forty minutes trying to eyeball a curve around a pedestal sink, ruined two expensive planks, and finally gave up to grab a cereal box. I cut the cardboard to fit in thirty seconds, traced it onto the vinyl, and the fit was so tight I did not even need trim. It is these small technical pivots that separate the pros from the frustrated homeowners. Always ensure you are working on a clean surface, perhaps using the vacuum seal trick for cleaning dust out of floor grooves as you go, to prevent debris from ruining your new cuts.
While most homeowners focus on the aesthetic of the final plank or tile, the real pros are obsessed with what happens beneath the surface. Let’s dig deeper into a hard truth: tile and grout are not waterproof. It is a common misconception that once you slap some porcelain down, your subfloor is safe. In reality, grout is porous, and water will eventually migrate through it. This is why I always advocate for the liquid membrane move for fail-proof shower pans. If you rely solely on a cement board without a dedicated moisture barrier, you are essentially setting a timer for a structural failure. According to the Tile Council of North America (TCNA), moisture management within the substrate is the most critical element of any wet-area installation, regardless of how expensive the tile itself is.
The Thick Padding Trap That Ruins Modern Carpets
Everyone thinks that a thicker carpet pad equals a more luxurious feel. I used to think the same until I saw a three-thousand-dollar bedroom carpet turn into a wavy mess in six months. High-end carpets, especially those with dense weaves, actually require a thinner, high-density pad to prevent the backing from stretching out. If the pad is too soft, the carpet flexes too much underfoot, leading to delamination. This is exactly why your carpet pad feels crunchy under your feet or why you see premature wear patterns. Beyond the pad, the tool you use matters. Most DIYers reach for a knee kicker, but that is often the knee kicker mistake that ruins luxury carpets by providing uneven tension. A power stretcher is the only way to ensure the material stays flat for a decade.
Why does your high-end flooring still pop or click despite being perfectly level?
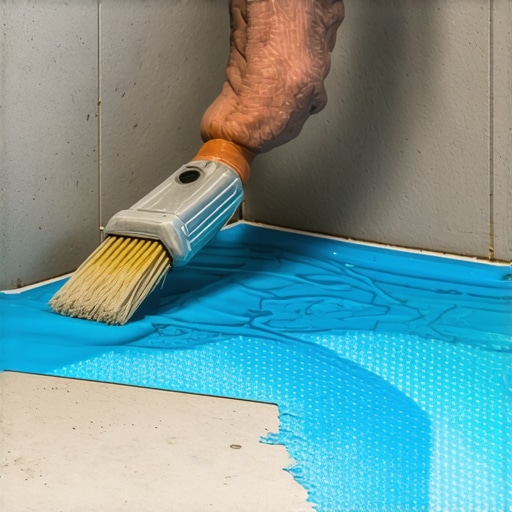
You can have a subfloor that looks flat to the eye, but if you haven’t accounted for micro-deviations, your click-lock system will eventually complain. A common “trap” is ignoring the vertical deflection of the joists. Even if the floor is level, if the joists are bouncy, the tongue-and-groove joints on your vinyl or laminate will eventually shear off. I always suggest the self leveler move for perfectly flat vinyl installs to eliminate those tiny hollow spots. If you ignore this, you’ll end up searching for how to fix a hollow sound under your vinyl plank floor after the furniture is already moved back in. Have you ever fallen into this trap where everything looked great until you actually started walking on it? Let me know in the comments.
Mastering the Invisible Details of Baseboard Transitions
Baseboards are the frame for your flooring masterpiece, yet most people treat them as an afterthought. One sophisticated nuance is the use of a back-bevel. When you are dealing with corners that aren’t a perfect 90 degrees (which is every corner ever built), a standard miter cut will always leave a gap at the front. By using the back-bevel secret for inside baseboard corners, you remove material from the rear of the wood, allowing the front edges to meet with surgical precision. It’s also vital to watch your nail placement. I’ve seen more than one homeowner have to learn how to fix a baseboard nail that hit a water pipe immediately because they were nailing blindly into the center of the plate. Always use a stud finder or the magnet hack for finding wall studs behind thick baseboards to ensure your fasteners are hitting wood, not copper. These technical pivots are what separate a ‘weekend project’ from a professional-grade renovation.
I used to think my eyes were enough to judge if a concrete slab was dry. I was wrong, and it cost me a full hardwood installation when the boards started ‘cupping’ three months later. Now, I swear by my Tramex moisture meter. It’s not just about a quick check; it’s about why we never skip the subfloor moisture test on concrete. If that reading is even a percentage point high, I wait. It’s the difference between a floor that lasts thirty years and one that fails in ninety days. According to the National Wood Flooring Association (NWFA) Technical Manual, moisture testing is ‘the single most important step in the installation process’ to avoid catastrophic bond failure. I personally prefer non-destructive impedance meters because they allow me to map out the entire subfloor for ‘hot spots’ without leaving a single mark on the surface. 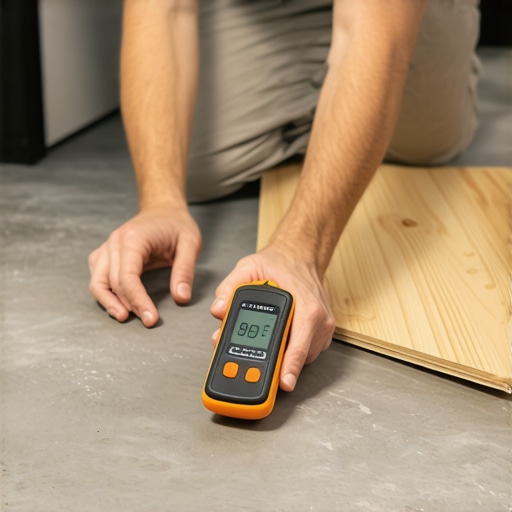
Why 10,000 pounds of tension matters for your carpet
When it comes to carpet, I’ve seen so many people rely on a knee kicker for a 20×20 living room. It’s a recipe for disaster. I only use a power stretcher because of the power stretcher rule for large living room carpets. Without that mechanical tension, your carpet will eventually look like a sea of ripples. If you’re wondering why your carpet is buckling only three years later, it’s almost always an installation tension issue, not a material defect. The power stretcher uses a long pole system to brace against the opposite wall, allowing you to literally pull the material taut until it’s ‘locked’ onto the tack strips. If you skip this, the backing will relax over time, especially in high-traffic hallways or under heavy furniture.
How do I maintain these technical installs over time?
The biggest secret to longevity is actually in what you don’t do. For instance, you should never use a steam mop on vinyl—the heat can actually delaminate the layers. If you’ve spent the time getting your bathroom perfect, you want to avoid why your shower grout looks patchy and uneven in color by using pH-neutral cleaners. Most supermarket cleaners are too acidic and will eat away at the sealer I worked so hard to apply. For the main living areas, I always tell clients that why we prefer felt pads over rubber for luxury vinyl is because certain rubber compounds can cause a permanent chemical stain. And if you do get a minor blemish on your wood, there’s always the no-sanding fix for scuffed hardwood floor finishes that can save you the cost of a full refinish. If you are dealing with an annoying noise before the furniture goes in, try the soap bottle trick for finding hidden subfloor squeaks to pinpoint the exact joist that needs a screw through the subfloor into the framing.
The future of smart flooring is already here
I predict the ‘smart floor’ era is closer than we think. We’re already seeing subfloor moisture sensors that can alert your smartphone to a pipe leak behind a shower wall or under a pan before you ever see a visible water spot. This technology is going to completely change shower repairs when to fix vs replace for longevity because we’ll be able to catch structural rot before it requires a total gut job. We are also seeing a shift in baseboard trends in 2025 toward integrated LED channels and hidden cable management, treating the trim as a piece of technology rather than just a piece of wood. For now, the best ‘smart’ move you can make is investing in the right tools or hiring a pro who has them. I challenge you: on your next project, don’t just eyeball it. Grab a moisture meter or rent a proper power stretcher. You’ll be amazed at how much more professional the final result feels when you stop guessing and start measuring.
Hard-Won Lessons from the Floor Boards
Over the years, I’ve realized that the ‘click’ isn’t always enough to guarantee a long-lasting floor. You need to feel the seating of every joint. If you suspect a gap, even a hairline one, address it immediately. Dealing with why your vinyl plank floor is gapping at the short ends months after the baseboards are on is a nightmare you can easily avoid with a little extra tapping. Another lightbulb moment for me was realizing how light interacts with materials. Always check your work at different times of the day; you might discover 5 carpet seaming errors that show up in bright daylight that were completely invisible under your LED work lamp. Finally, never treat transitions as an afterthought. I always rely on the transition strip move for carpet to bathroom tile to ensure the flow between rooms is safe and professional.
Gear That Separates Amateurs from Pros
I never walk onto a job site without a power stretcher. It’s the single most important tool for ensuring carpet install secrets for achieving flawless results are actually followed. A knee kicker is for small adjustments, but the power stretcher ensures the material stays taut for decades. I also recommend investing in a professional-grade moisture meter. Understanding why we never skip the subfloor moisture test on concrete will save you from catastrophic failures where the adhesive or wood planks cup and fail. For the finishing touches, a high-quality miter saw paired with a fine-finish blade is non-negotiable for choosing and installing the perfect baseboards that meet with surgical precision in every corner.
#IMAGE_PLACE_HOLDER_E#
Take the Leap and Transform Your Space
A truly successful flooring installation is a blend of patience, the right tools, and a refusal to settle for ‘good enough.’ You now have the insider tactics to avoid common pitfalls and the technical knowledge to handle tricky transitions like a master craftsman. Your home is a canvas, and these technical pivots are the strokes that create a masterpiece. If you ever feel overwhelmed by the process, take a breath and consult our step-by-step flooring installation guide to regain your footing. You have the vision—now go make it a reality. What’s the one part of the flooring process that always makes you nervous—is it the initial layout, the complex cuts around doorways, or the final transitions? Let me know in the comments below!