

I walked into my client’s house last January, and my heart sank. They had invested thousands in beautiful, seven-inch wide hickory. But instead of a smooth surface, it looked like a topographical map. Every single board was “cupping”—edges high, centers low. I realized then that my old-school “just nail it” mentality was a recipe for disaster. We often think that more nails equal more stability, but with today’s wider boards, you’re fighting physics. If you don’t use the ‘glue-assist’ strategy, you’re basically just waiting for the seasons to ruin your hard work.
Why standard nailing fails on wide planks
[IMAGE_PLACEHOLDER] When you’re working with anything wider than five inches, the mechanical hold of a cleat or staple just isn’t enough to fight the natural movement of the wood. Wood is a living thing; it breathes. I learned the hard way that flooring installation mistakes to avoid for a seamless look usually start with underestimating humidity. A wider board has more surface area to expand and contract, and those tiny nails act like hinges rather than anchors. I once skipped the acclimation test for avoiding hardwood floor gaps because I was in a rush to finish a bedroom. By July, the floor was crowning in the summer heat, and I had to rip out a third of the room on my own dime. That’s when I became a convert to the glue-assist method. It’s not just a ‘nice to have’ anymore; it’s a requirement for modern wide-plank aesthetics.
Is all that extra glue really worth the mess?
It’s messy, it’s a bit more expensive, and it adds time to the job. I get the skepticism. You might be wondering if you’re just overcomplicating a simple task. But the National Wood Flooring Association (NWFA) actually recommends glue-assist for any plank wider than five inches to minimize noise and movement. According to their technical manuals, the bond created by a quality urethane adhesive provides a shear strength that nails alone can’t touch. Have you ever finished a project only to hear that first ‘click’ or ‘pop’ a week later? Drop a comment below: Have you ever dealt with a floor that started squeaking the moment the seasons changed? It’s a gut-punch. Today, I’m going to walk you through exactly how to apply this adhesive correctly so your floor stays as silent as a library. We’ll cover the serpentine bead, the full-spread hybrid, and why picking the wrong glue is worse than using no glue at all.
Prep the subfloor like your reputation depends on it
Before you even crack a tube of adhesive, you have to realize that glue is only as strong as what it’s stuck to. I’ve seen installers try to glue-assist over a subfloor covered in drywall dust; the glue just bonds to the dust, and the whole floor eventually floats. You need a clean, dry surface. This is non-negotiable. I always emphasize the moisture meter requirement for basement flooring jobs or any ground-level install. If that subfloor is holding more than 12% moisture, or if the delta between the plank and the subfloor is more than 2%, your glue will fail. Use a shop vac, not a broom. You want that plywood or OSB to look like it’s ready for a surgical procedure.
Master the serpentine bead pattern
There are two ways to do this: the full-spread and the glue-assist bead. For most residential wide-plank jobs, the bead method is the sweet spot. You aren’t coating the whole floor; you’re running a 1/4-inch bead of urethane adhesive in a serpentine (S-shape) pattern on the back of every board. I remember my first time trying this on an 8-inch white oak project in a coastal home. I was so worried about the boards moving that I applied a massive, thick bead. Halfway through the second row, I realized the glue was so thick it was preventing the tongue from seating into the groove. I had to pull up four boards, scrape the subfloor clean, and start over while the adhesive was still tacky. Now, I aim for a consistent ‘S’ that covers the middle 60% of the board’s width. This gives the wood room to breathe at the edges while the center remains anchored. 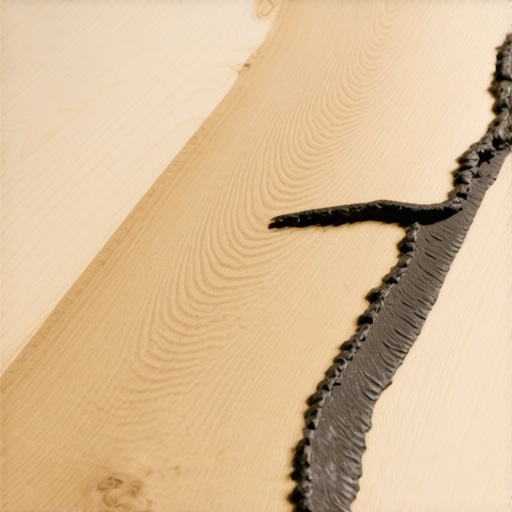
Why urethane is the only glue you should use
Don’t reach for the cheap construction adhesive at the big-box store. Those dry brittle and will eventually snap. You need a dedicated moisture-cure urethane. Because it stays slightly flexible, it moves with the wood. Wood movement is a physical certainty, and urethane acts like a shock absorber. This is a critical part of the glue-assist method for wide plank hardwood floors because it prevents the crackling sound of dried glue snapping when someone walks across the room. It’s the difference between a floor that feels solid and one that sounds like you’re walking on potato chips.
Nail it down while the bond is fresh
Once the board is set in the glue, you still need to mechanically fasten it. I usually space my cleats every 8 to 10 inches. This isn’t just about holding the board down; the nails act as the clamp that holds the plank tight against the subfloor while the glue cures. Without the nails, the board might slightly cup away from the adhesive before it sets. If you’re following a step-by-step flooring installation from planning to perfect finish, you’ll know that the combination of the two creates a monolithic structure. This dual-anchor system is what allows those massive seven or nine-inch planks to stay flat during the humid months.
Finish with precision at the walls
When you get to the perimeter, you can’t use the floor nailer anymore because the wall gets in the way. You’ll be top-nailing and relying even more heavily on the glue for those last two rows. Since these areas are the most visible near your trim, this is where you should focus on the back-bevel move for tight baseboard miters to ensure the transition from the wide planks to the wall looks seamless. If the floor isn’t perfectly flat at the edges because you skimped on the glue, your baseboards will show gaps that no amount of wood filler can truly hide.I’ve heard it a thousand times: ‘Don’t worry about that 1/4-inch dip, the underlayment will cushion it.’ This is one of the most dangerous lies in the flooring industry. In my early years, I fell for it too. I thought a high-quality pad or a bit of extra foam would bridge the gap. Instead, what I got was a floor that felt like a trampoline and eventually started making that dreaded ‘ticking’ sound every time someone walked over the low spot. If you want a floor that feels like a rock-solid part of the home, you have to tackle the flatness head-on. Most people get this wrong because they confuse ‘level’ with ‘flat.’ A floor doesn’t have to be perfectly level to be successful, but it absolutely must be flat. This is where how to level a subfloor dip without removing the old subfloor becomes your best friend. Using a high-quality leveling compound or shimming the joists is tedious, but it’s the only way to ensure your glue-assist actually makes contact with the board. I also see people using water-based levelers over plywood without a primer. That leveler will crack and turn into sand under your wide planks within months. I always recommend the self-leveler move, but you must ensure it’s rated for wood subfloors and use the manufacturer-recommended primer to create a tenacious bond. 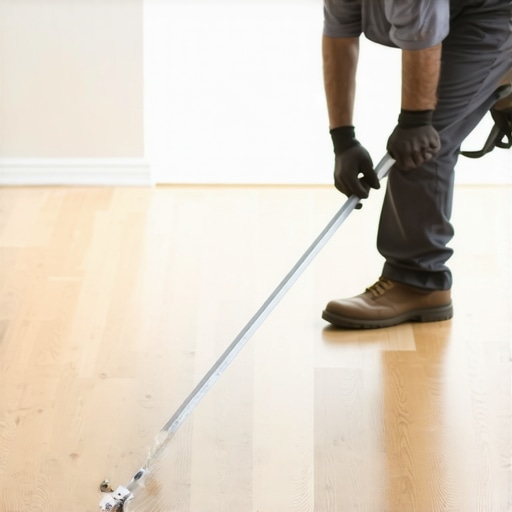
The hidden danger of over-fastening wide boards
It sounds counterintuitive, but there is such a thing as using too many nails. When you’re dealing with wide-plank hickory or oak, the wood needs room to expand. If you go overboard with the cleats while also using adhesive, you’re creating a ‘locked’ system that has no give. I once saw an installer put a cleat every four inches on 8-inch planks, thinking he was being extra thorough. By the following summer, the boards had no room to move, and the pressure actually caused the tongues to split right off the boards. This is a classic flooring installation mistake to avoid for a seamless look. You want the glue to provide the stability and the nails to provide the temporary tension while the glue sets. One specific trap I want to warn you about is ‘volcanoing.’ This happens when your air pressure is too high, and the cleat head drives too deep, pushing a small mound of wood upward. On wide planks, these tiny bumps are magnified. If you don’t catch it immediately, your next row won’t seat properly, and you’ll end up with a gap that looks like a canyon. Always test your pressure on a scrap piece of the actual subfloor you’re using. If you hit a knot in the OSB, the nail might not seat, leading to why your flooring is clicking when you walk as the board moves against the proud nail head. According to the National Wood Flooring Association (NWFA) Technical Manual, subfloor flatness—specifically 3/16 inch over a 10-foot radius—is the leading indicator of long-term floor success, not nail density. Have you ever fallen into this trap of over-engineering a floor only to have it backfire? Let me know in the comments.
Does the subfloor material change your glue strategy?
This is a question I get from advanced DIYers and junior pros alike. The short answer is yes. Gluing to plywood is straightforward, but if you’re working over an old concrete slab, you’re playing a different game. You cannot just use any urethane; you need one with a built-in moisture barrier. I’ve seen beautiful installs ruined because the installer didn’t realize why we never skip the subfloor moisture test on concrete. Even if the slab looks dry, it can act like a sponge, pulling ground moisture up into your wide planks and causing them to cup from the bottom up. In these cases, the vapor seal requirement is just as important for hardwood as it is for vinyl. If you’re worried about noise, especially in a second-story bedroom, you might even consider how to stop laminate floors from echoing in empty rooms techniques, which often apply to ensuring a tight, void-free bond between the plank and the subfloor. Making sure there are no air pockets between the board and the subfloor is what gives wide planks that expensive, solid-thud sound instead of a hollow click.
The gear that actually saves your back
I’ve spent thousands on tools that ended up gathering dust, but there are a few items I refuse to step on a job site without. For baseboards, a dedicated 23-gauge pinner is my secret weapon. Using the pin nail secret for delicate baseboard moldings allows me to secure intricate details without those ugly putty-filled holes. When it comes to the wood itself, I trust the Wagner MMC220 moisture meter. It’s non-invasive, meaning I don’t have to poke holes in the client’s expensive hickory to know if it’s stable. According to the National Wood Flooring Association’s (NWFA) ‘Hardwood Flooring Storage and Handling’ guide, neglecting to check the subfloor’s equilibrium moisture content is the number one cause of failure, and this tool is the only way to be sure. 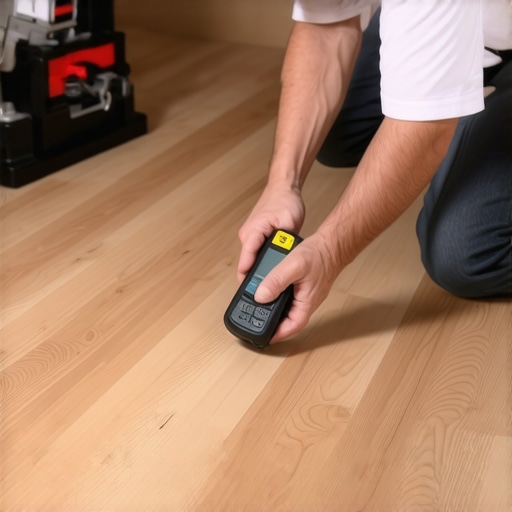
How do I keep my wide planks looking new for decades?
Maintenance isn’t just about cleaning; it’s about environment control. If you let your home’s humidity swing from 20% in the winter to 60% in the summer, no amount of glue-assist will save you. You need a whole-home humidifier to keep the wood from shrinking and growing like an accordion. For the surface, stop hardwood scratches with the felt pad routine. I tell my clients to replace those pads every six months. If a board does get a small ding from a dropped heavy object, you can sometimes use the iron and towel trick for dented hardwood planks to steam the wood fibers back up. Just be careful not to ruin the finish by using too much heat or moisture.
Why steam mops are the enemy of your warranty
I see the commercials for steam mops and I cringe every time. Forcing pressurized steam into the joints of a wide-plank floor is the fastest way to cause why your engineered hardwood is splintering at the edges. The moisture gets trapped under the finish and delaminates the wood layers. Use a pH-neutral cleaner and a barely damp microfiber mop instead. When you’re dealing with transitions, especially at the top of a flight of stairs, don’t just glue a piece of trim down and hope for the best. Use the stair nose tactic for solid hardwood steps to ensure that high-traffic transition is mechanically fastened and safe for years of use. I’ve seen too many ‘floated’ stair noses become dangerous trip hazards after just a few seasons.
The high-tech future of moisture control
Looking ahead, I suspect we’re moving toward smarter flooring systems that take the guesswork out of maintenance. We are already seeing ‘waterproof’ wood laminates, but the real game-changer will be integrated sensors built into the subfloor that monitor conditions in real-time and alert your smartphone. Until those become standard, your best defense is a meticulous install and the right professional kit. If you’re tackling your next room, I challenge you to ditch the mitered inside corners and try the inside corner cope for perfect baseboard installs. It’s a professional-level move that makes a world of difference in the final look and durability of your home.
What I Finally Learned About Fighting Wood Physics
For years, I believed that more nails meant a better floor. I was wrong. The biggest shift in my career came when I realized that wide planks aren’t just larger versions of standard strips; they are powerful physical levers that can literally pull nails out of a subfloor if the humidity isn’t controlled. This ‘lightbulb moment’ changed everything for me. I stopped viewing wood as a static product and started seeing it as a dynamic element that requires a hybrid approach. If you skip the adhesive on an eight-inch board, you aren’t just risking a squeak; you’re inviting structural failure. Another hard truth I learned is that cleanliness is next to godliness in flooring. If you don’t use a high-powered shop vac to clear the subfloor, your expensive urethane adhesive is simply bonding to drywall dust and sawdust, creating a ‘false bond’ that will fail within a year.
The Gear That Separates Pros from Amateurs
You don’t need a truckload of tools, but you do need the right ones. My absolute non-negotiable is a non-invasive moisture meter like the Wagner MMC220. It allows me to check the wood and the subfloor without leaving unsightly holes in the client’s investment. When it comes to finishing the perimeter, I always rely on the pin nail secret for delicate baseboard moldings to ensure the transition from the wide planks to the wall is flawless and invisible. I also recommend keeping a fresh supply of moisture-cure urethane adhesive on hand—never use old tubes that have been sitting in a cold garage, as the chemical properties can degrade, leading to a weaker bond. Finally, mastering the inside corner cope for perfect baseboard installs will elevate your entire project from a standard DIY job to a gallery-level finish.
Your Path to a Rock-Solid Home
Taking the extra time to implement the glue-assist method is the hallmark of a true professional. It turns a beautiful floor into a silent, monolithic surface that adds genuine value to your home. Don’t be intimidated by the extra steps or the slight mess of the adhesive. By avoiding common flooring installation mistakes to avoid for a seamless look and committing to the details, you are creating a legacy piece in your home. Whether you are following a step-by-step flooring installation from planning to perfect finish or tackling a single room, the peace of mind that comes with a glue-assisted floor is worth every penny. Have you ever experienced that sinking feeling of seeing a beautiful floor start to cup or squeak after the first season change? Tell me your story in the comments below.