

I was three hours into my first “simple” flooring project, knees aching and pride slightly bruised, when I realized I was doing everything wrong. I had a stack of beautiful luxury vinyl planks and a standard hardware store hammer that was currently doing its best to turn my investment into expensive plastic scrap. I thought I could just “tap” them into place. One heavy-handed swing later, the delicate tongue of the locking mechanism snapped off like a dry twig. It was a $50 mistake that taught me a lesson I’ll never forget: in the world of floating floors, brute force is your worst enemy.
Stop Beating Your Floor to Death
If you have ever wondered why your vinyl plank floor is clicking when you walk, the answer usually traces back to how those joints were seated during installation. We are diving into the ‘Rubber-Mallet’ Rule today because it is the secret sauce to a gap-free finish that doesn’t ruin your warranty. I used to be the guy who thought a scrap piece of 2×4 and a framing hammer was a professional setup. It isn’t. That setup leads to micro-fractures in the core material that you won’t even see until six months later when the planks start to separate. According to the experts at the National Wood Flooring Association, even “soft” materials like vinyl require specific impact distribution to maintain structural integrity.
Is a fancy mallet really necessary for a DIY job?
You might be tempted to skip the trip to the store and just use what is in your toolbox. Trust me, I have been there, and it is a shortcut to heartbreak. Using the wrong tool is one of the most common flooring installation mistakes to avoid for a seamless look. A white rubber mallet—specifically white to avoid those nasty black scuff marks—distributes force across the entire seam rather than a single point. This ensures the “click” happens without the “crack.” By following a step-by-step flooring installation process that prioritizes the right tools, you are not just laying a floor; you are building something that will actually stay together when your kids or pets go sprinting across it. Have you ever tried to force a plank into place and ended up regretting it? Let me know in the comments, because I’ve definitely been in those frustrated shoes before. Let’s get into the nitty-gritty of how to strike those joints without causing a disaster.
Flatten the Ground Before You Lay a Single Plank
If your subfloor looks like the rolling hills of a countryside, your new floor is going to fail before the year is out. One of the most frustrating things to experience is why your vinyl plank floor is telegraphing subfloor bumps. This happens because the material is flexible enough to hug every imperfection, but the locking joints are rigid. When you step on a high spot, the joint flexes downward. Do that a thousand times, and the plastic lock snaps like a toothpick. I learned this the hard way in a small kitchen remodel where I thought a 1/4-inch dip near the fridge “wasn’t that bad.” Within a month, the planks were literally popping out of the floor like a jack-in-the-box. You need to know how to level a subfloor dip without removing the old subfloor using a high-quality self-leveling compound or specialized floor patches. It is exactly like building a house on a shifting sand dune; if the foundation is not flat, the roof will never sit straight. 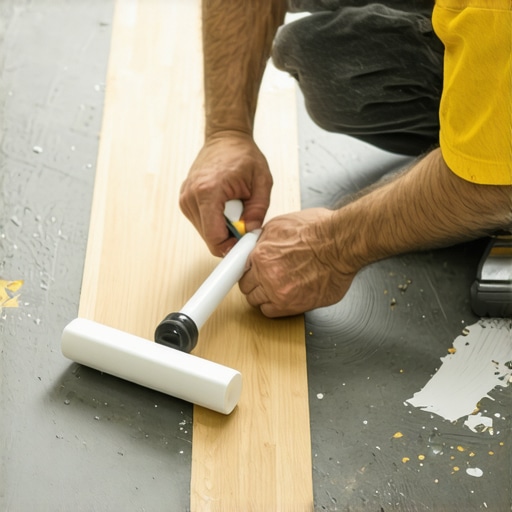
Master the Tapping Block Dance
Once your subfloor is as flat as a pool table, the real work begins. You should never be swinging that rubber mallet directly at the plank itself. Instead, you must use a tapping block—a sacrificial piece of plastic or wood designed to protect the delicate tongue-and-groove system. Think of it like a shock absorber for your flooring investment. You want to use “persuasion” rather than “impact.” I have seen many beginners get so frustrated with a stubborn seam that they start hitting the planks at a 45-degree angle, which is a one-way ticket to seeing why your laminate floor feels soft when you walk. If the joint isn’t fully seated, it creates a tiny air pocket that compresses every time you step on it. Use short, rhythmic taps and listen for the sound to change. When the joint is locked, the sound of the mallet changes from a hollow ‘thwack’ to a solid, dull ‘thud.’ That is your signal that the mission is accomplished.
Leave Room for the Floor to Breathe
Floating floors are living things; they expand and contract with the shifting humidity and temperature of your home. If you jam them tight against the drywall, they have nowhere to go but up. This creates “tenting,” where the middle of the floor rises like a mountain range in your living room. Always follow the expansion joint rule for large tile floors and floating systems alike, leaving at least a 1/4-inch to 3/8-inch gap around every single wall and door frame. This is where your trim comes into play to hide the gap. To make it look truly professional, skip the simple miter joints and learn the inside corner cope for perfect baseboard installs. Coping involves cutting the profile of one board into the end of another, ensuring that even when the house shifts during the winter, the joint stays tight and attractive. Finally, to hide any tiny imperfections where the trim meets an uneven wall, you can stop baseboard gaps with the caulk and paint sequence. This creates a seamless transition that makes the whole room look like it was handled by a master carpenter rather than a weekend warrior.Now that we have tackled the physical act of laying planks, let’s dig deeper into the nuances that separate a DIY weekend project from a professional-grade installation. One common belief I see everywhere is that once you paint your trim, the job is done. However, in high-moisture areas, a simple coat of latex paint is not a raincoat for your walls. I’ve discovered that the real key to longevity is using the silicion bead secret for waterproofing baseboards in bathrooms. Without this specific barrier, steam and splashes crawl behind the wood, leading to hidden mold growth that you won’t notice until the drywall starts to crumble. Have you ever fallen into this trap of neglecting the trim-to-floor seal? Let me know in the comments.
Stop Trusting Your Grout to Do All the Work
Most homeowners—and even some rookie contractors—believe that grout is a waterproof shield. This is a dangerous myth. Grout is actually a porous material that acts more like a hard sponge than a seal. The Tile Council of North America (TCNA) emphasizes that moisture management depends on the waterproofing membrane underneath, not the decorative layer on top. This is why you must prioritize the pre-seal move before the area ever sees a drop of water. If you ignore the chemistry of your materials, you’re just inviting mold to live behind your beautiful aesthetic.
The Dangerous Voids Under Your Feet
Another sophisticated “oops” factor involves the mortar under your tiles. If you aren’t achieving at least 95% coverage in wet areas, you are creating tiny underground caverns for stagnant water to live. This is why I always follow the full bed mortar rule for large format shower tiles. When water seeps through the grout (which it will), it needs to sit on the membrane and drain, not fester in a hollow pocket. 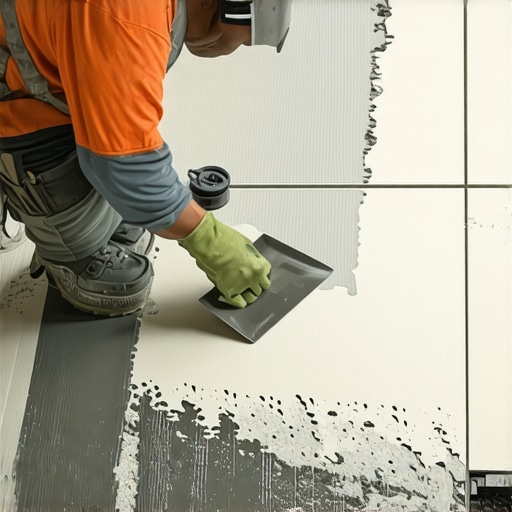
Why does my brand-new shower floor still feel slippery even when dry?
This is a question I get constantly from people who just finished a luxury remodel. Usually, it is because of why your shower floor feels slippery even when dry—often a result of sealer residue or grout haze that hasn’t been properly neutralized. It creates a micro-film that is deceptively slick. The same level of detail applies to soft surfaces, too. If you are moving into a bedroom project, don’t rely on your own strength to pull the floor tight. You need the power stretcher move to fix loose carpet bubbles. Without mechanical tension, your carpet will develop waves like the Atlantic Ocean by next summer. By combining these carpet install secrets achieving flawless results every time with a dedicated approach to a spa-like shower experience tips tricks, you ensure your home stays both beautiful and structurally sound.I once thought a standard tape measure and a level were all I needed for a flawless finish, but the truth is that the right hardware acts as your second set of eyes. For anyone tackling a basement, you absolutely cannot skip the moisture meter requirement for basement flooring jobs. I have seen ten-thousand dollar hardwood projects buckle because the installer didn’t check the slab’s relative humidity. This isn’t just about ‘feeling’ if it is dry; it is about data. I personally use a pinless moisture meter because it does not leave holes in your material while giving you a deep-scan reading of the subfloor’s health. Beyond the readings, your layout toolset needs a serious upgrade. If you are still using a chalk line for your tile, you are living in the past. The laser level hack for straight tile rows changed my life—no more smeared blue dust or crooked grout lines that scream ‘amateur.’ This is especially vital when following technical standards like the Tile Council of North America (TCNA) Handbook, which defines the EJ171 requirements for movement joints. If your laser shows you are off by even an eighth of an inch over ten feet, you are looking at a potential failure point. 
How do I maintain my floors and showers for the next decade?
The secret is not a magic cleaning solution; it is proactive inspection. Every six months, I run my finger along the baseboards and shower corners. If I see a hairline fracture in the caulk, I address it immediately using the blue tape trick for cleaning up silicone beads. This prevents water from ever finding a path to your framing. For your high-traffic areas, check your guide to durable flooring installation for a stylish home to ensure your cleaning routine matches your material’s needs. For example, never use a steam mop on luxury vinyl, as the localized heat can actually delaminate the wear layer over time. Looking ahead, I predict we are going to see a massive shift toward fully waterproofed, integrated systems where the baseboards and flooring are manufactured as a single, seamless unit. This will make transform-your-flooring-top-trends-in-installation-for-2025 look primitive in comparison. Until then, we rely on skill and the right chemicals. If you are unsure if a leak is serious, consult shower-repairs-when-to-fix-vs-replace-for-longevity before you tear out your walls. My best advice? Buy a high-quality moisture meter today and test three different spots in your home—it is the single best investment you can make to prevent a flooring catastrophe.
Lessons from the Floor That No Manual Mentions
After years of sore knees and hundreds of square feet laid, I’ve realized that the most expensive tool is the one you skip. First, never ignore the silent cues; if a plank doesn’t click effortlessly, there is likely a microscopic piece of debris caught in the groove. Second, temperature is your invisible enemy. I always run the acclimation test for avoiding hardwood floor gaps or vinyl shrinkage, because rushing the material into a room is asking for gaps six months later. Finally, the walk-off test is essential. Once you think you’re done, walk the entire perimeter and listen for squeaks; if you hear one, it is usually a sign you should have performed the subfloor screw routine for stopping floor squeaks before the first plank went down.
What I Keep in My Professional Tool Bucket
I don’t just buy tools; I invest in peace of mind. I always recommend the TCNA Handbook for anyone doing tile, as it is the industry gold standard for moisture management. For my DIY friends, I suggest a non-marring dead-blow mallet—it’s significantly more forgiving than a standard rubber one and won’t bounce back at your wrist. I also swear by a high-quality contour gauge for those tricky cuts around door casings. If you are stuck on aesthetics, checking out how to choose the perfect baseboards for your home’s style can make a ten-dollar-per-foot floor look like a custom high-end install. These resources ensure your technical skill matches your design vision.
Building a Foundation for Your Future Memories
It is easy to get overwhelmed by the dust and the math, but remember that every professional started with a single crooked plank. By following these expert flooring installation tips for 2025, you are giving your home a level of craftsmanship that off-the-shelf solutions simply can’t match. You aren’t just installing a surface; you’re creating the stage where your daily life happens. Don’t be afraid to take your time—the best floors are built with patience, not just power tools. If you hit a snag, you can always reach out to the pros to get your project back on track. Have you ever run into a subfloor surprise that nearly ruined your weekend project? Let me know in the comments below.