

I remember standing in my living room with a bruised toe and a bruised ego, looking down at a ten-dollar brown metal vent cover that was currently mocking my fifteen-thousand-dollar white oak investment. I had followed every rule in the book—I’d even performed a proper acclimation test to ensure no gaps would form—but I completely ignored the small details that actually make a floor feel truly ‘high-end.’ Those standard drop-in vents are the ultimate vibe-killer. They catch dust, they catch toes, and they break the visual plane of your beautiful wood grain. Today, I’m going to show you how to ditch the hardware store specials and embrace the flush-mount secret that custom builders use to get that seamless, integrated look. We’re talking about vents that are actually made of the same wood as your floor, sitting perfectly level with the surface. It’s a total game-changer for anyone obsessed with modern flooring trends. [image_placeholder]
Stop Letting Cheap Hardware Ruin Your Hardwood Aesthetic
If you’re like me, you probably spent hours debating the right stain color or the perfect baseboard style to complement your room. But when it comes to HVAC, most DIYers and even some ‘pro’ installers just drop a standard register into the hole and call it a day. This is one of those flooring installation mistakes that you’ll regret every time you run a vacuum or walk barefoot in the dark. A flush-mount vent isn’t just a cover; it’s an extension of the floor itself. It requires a specific frame installed during the wood-laying process, not after the finish is dry. Early in my career, I tried to retro-fit a flush mount into an existing floor without the proper frame, and let’s just say I ended up with a wobbly, splintering mess that looked far worse than the metal grate I was trying to replace. According to the National Wood Flooring Association, consistent floor height and smooth transitions are key indicators of a professional-grade installation that preserves home value. Have you ever tripped over a vent or felt like those metal grates just didn’t fit your room’s style?
Do These Vents Really Make That Big of a Difference?
Some might argue that it’s a lot of extra work for a small detail, especially when you’re already dealing with the stress of choosing durable flooring. But think about it: your floor is the largest piece of ‘furniture’ in your home. Every time a line is broken by a raised metal edge, your eye stops. Flush-mount vents allow the wood to flow uninterrupted from wall to wall. It’s the difference between a house that looks ‘renovated’ and a home that looks ‘designed.’ If you’re worried about the cost or the complexity, trust me—once you see the difference, you can’t unsee it. You’ll start noticing those clunky metal registers in everyone else’s house, and you’ll be so glad you took the extra step to get the high-end hardwood look you actually paid for. Setting the stage correctly now means your floor will look intentional for decades to come.
Buy Your Vents Before You Ever Cut a Plank
Installing flush-mount vents is a lot like tailoring a custom suit; you cannot build the garment and then guess where the buttons go. One of the most common flooring installation mistakes is waiting until the floor is half-laid to shop for your registers. Flush-mount systems consist of two parts: the frame and the removable insert. The frame must be the exact thickness of your hardwood—whether it is 1/2-inch, 5/8-inch, or 3/4-inch. If you buy a 3/4-inch vent for a 1/2-inch engineered floor, you will be stuck with a permanent tripping hazard that no amount of sanding can fix. I learned this the hard way on a remodel in a cramped hallway where I assumed standard sizes would suffice, only to realize the engineered planks were slightly thinner than the ‘standard’ frame. I spent three hours chiseling into the subfloor just to get the frame to sit level. Get your vents on-site during your step-by-step flooring installation planning phase so you can use the actual frame as a template. 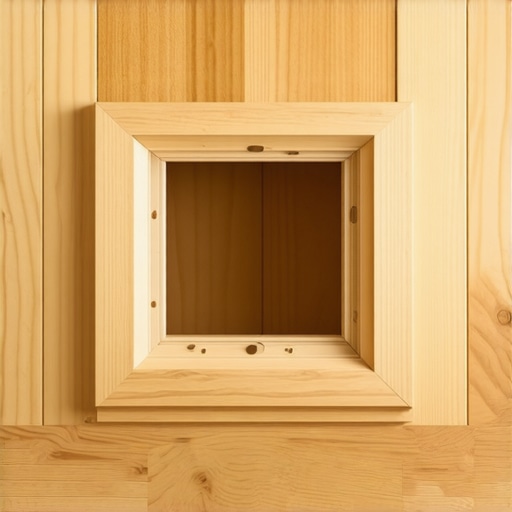
Lock Down the Subfloor to Prevent Vent Squeaks
A vent is a structural interruption in your floor. Because you are cutting out a section of the wood’s interlocking strength, the area around the duct is prone to movement. Before you even think about the wood, perform the subfloor screw routine for stopping floor squeaks around the perimeter of the duct opening. If that subfloor flexes even a millimeter, your flush-mount frame will eventually rub against the planks, creating a localized chirp every time someone walks near it. Think of the subfloor as the foundation of a bridge; if the bridge piers move, the road deck cracks. Ensure the subfloor is perfectly flat around the opening. If you encounter a dip, you may need to learn how to level a subfloor dip without removing the old subfloor to ensure the vent frame sits on a plane that matches the rest of the room.
Integrate the Frame with the Layout
You don’t just drop the frame in; you weave it in. When your row of flooring reaches the duct, dry-fit the vent frame to see where the seams land. You want to avoid having a tiny ‘sliver’ of wood next to the frame, as these thin pieces are prone to cracking or splintering at the edges. Instead, adjust your row slightly or notch the surrounding boards to wrap around the frame. This creates a locked-in look that makes the vent appear as if it grew out of the floor.
The Secret to Perfect Expansion Gaps
Even though it’s an ‘integrated’ look, wood still needs to breathe. When installing the planks around the vent frame, you must still respect the penny gap rule for hardwood expansion space on the long runs. I once tight-fitted a frame in a sunroom, and by mid-August, the expanding boards had crushed the vent frame so tightly I couldn’t pull the grate out to clean the dust. Leave just enough room for seasonal movement, and use a high-quality wood glue on the frame-to-subfloor bond to keep the unit centered. This ensures that while the floor moves, the vent stays put, maintaining that high-end, designer aesthetic you’re aiming for.
If you think the floor vent is the only detail that DIYers overlook, wait until you see the nuances of a high-end bathroom or living room renovation. Most people assume that ‘standard’ installation practices are enough to achieve a magazine-ready look, but the reality is that the pros are playing a completely different game. It’s not just about getting the wood down or the tile set; it’s about anticipating how light, moisture, and seasonal shifts will affect those materials two years from now. Let’s dig deeper into the traps that even seasoned ‘pros’ fall into when trying to deliver a luxury finish.
Stop Trusting the Factory Finish for Vents
Everyone says you should buy a pre-finished vent to match your pre-finished floor, but in my experience, that is a shortcut to mediocrity. Even if the stain is a ‘match,’ the sheen level or the grain density of the vent insert rarely aligns perfectly with your planks. For a truly invisible look, I advocate for ordering unfinished inserts and hand-matching them on-site. This allows you to blend the edges with the surrounding wood, ensuring the transition is felt but not seen. This is a level of detail often missed in a standard step-by-step flooring installation, where speed usually trumps the finer points of wood matching.
Why Do Most Shower Curbs Eventually Fail?
Moving from the living room to the bathroom, the mistakes become even more expensive. A common belief among DIYers is that a shower curb should be perfectly level. This is a dangerous myth. According to the Tile Council of North America (TCNA) Handbook, all horizontal surfaces in a shower, including curbs and benches, must have a minimum slope of 1/4 inch per foot toward the drain. If your curb is ‘level,’ water will eventually sit under the bottom track of your glass door, leading to mold and eventual rot. This is why understanding the curb slope requirement for waterproof shower pans is non-negotiable for longevity. 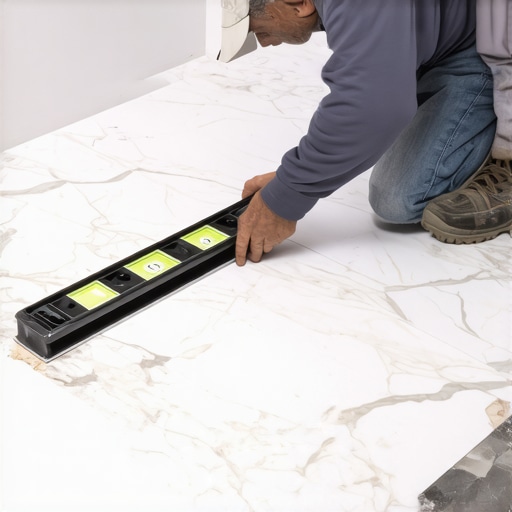
The Hidden Flaw in ‘Seamless’ Carpet Layouts
When it comes to carpet, most homeowners think the quality of the seam depends solely on the installer’s iron. The ‘oops’ factor here is actually the orientation of the room’s windows. You can have the tightest seam in the world, but if that seam runs perpendicular to a large window, you will see a shadow line every single morning. I’ve seen homeowners spend thousands on best carpet types for high-traffic areas in 2025, only to be heartbroken because why your carpet seams are visible in morning light wasn’t considered during the layout phase. Always plan your seams to run parallel to the primary light source to mask the transition. It’s these tiny, invisible decisions that define a luxury home.
Baseboard Miters vs. The Real World
Finally, let’s talk about those ‘perfect’ corners. Many people struggle with baseboards because they trust their miter saw’s 45-degree setting. But walls are never 90 degrees. Instead of fighting the drywall, I use the back-bevel move for tight baseboard miters. By shaving just a bit of the ‘meat’ off the back of the joint, you allow the front edges to touch first, creating a crisp, gap-free corner even on wonky walls. This is far more effective for shower renovation ideas where you might be transitioning from tile to wood trim. Have you ever fallen into this trap? Let me know in the comments.
I used to think that a skilled pair of hands could overcome any cheap tool, but I was dead wrong. In the world of high-end renovation, your output is capped by the precision of your equipment. For years, I relied on a simple knee kicker for carpet, only to find myself returning to jobsites six months later to fix ripples. That stopped the day I invested in a professional power stretcher. I don’t just use it because it’s ‘better’; I use it because the power stretcher move to fix loose carpet bubbles is the only way to meet the Carpet and Rug Institute’s (CRI) 105 Standard for residential installation, which requires a carpet to be stretched 1% to 1.5% in both width and length. Without that mechanical leverage, you’re just guessing, and your ‘tight’ carpet will eventually look like a desert dune.
Why I Never Start a Wood Job Without a Moisture Meter
If you want to avoid the heartbreak of a failing floor, you need to stop guessing if the subfloor is ready. I personally use a pinless moisture meter on every single project. This tool allows me to check the equilibrium between the subfloor and the new planks without marring the wood. This is critical for the moisture meter requirement for basement flooring jobs, where concrete slabs can hold onto moisture long after they look ‘dry.’ If the delta between your subfloor and your hardwood is more than 4%, you’re asking for cupping or gaps. I’ve seen $20,000 floors ruined because an installer ‘felt’ the air was dry enough. Don’t be that person. Using a meter ensures you are following a step-by-step flooring installation that is backed by science, not intuition.
How do I maintain these high-end finishes over time?
Maintenance is where most homeowners lose the battle. You’ve spent the money on a durable flooring installation, but then you clean it with a generic steam mop that forces moisture into the joints. For matte finishes, I live by the microfiber mist rule for cleaning matte floors—never saturate the surface. In the bathroom, longevity comes down to protecting the porous elements. Even the best tile job can fail if you ignore the sealant. I always recommend the deep seal tactic for porous natural stone showers to prevent water from migrating into the mud bed. And for the love of your floors, implement the felt pad routine on every piece of furniture. A single grain of sand under a chair leg can undo weeks of hard work in seconds.

The Future of Flooring and Shower Tech
Looking ahead, I predict we are moving toward ‘Smart Subfloors.’ We are already seeing the emergence of embedded sensors that can alert your phone if a leak starts under your shower pan or if your humidity levels are spiking near your hardwood. This will revolutionize shower repairs, turning them from reactive disasters into proactive maintenance. We’re also seeing a massive shift in top trends in installation for 2025 toward sustainable, waterproof composites that look identical to white oak but handle moisture like porcelain. If you want to stay ahead of the curve, I challenge you to try just one of these advanced techniques on your next project: buy a moisture meter or switch to a power stretcher. It’s the single best way to ensure your home doesn’t just look good today, but stays perfect for the next twenty years.
Hard Truths I Learned from Years on the Jobsite
[image_placeholder]
Over the years, I have realized that the real difference between a DIY look and a professional finish lies in the details that most people simply skip because they take an extra thirty minutes. For instance, never underestimate the power of patience; running a proper acclimation test isn’t just a suggestion, it is the only way to ensure your floor doesn’t move after the first season. I also learned that if you hear a squeak, you must stop everything immediately. I have saved dozens of jobs by performing a quick subfloor screw routine before the first plank is ever nailed down. Finally, remember that every error is an opportunity to improve; understanding how to fix a loose floor tile without tearing out the whole room gave me the confidence to tackle luxury projects without fear.
The Essential Gear for a Professional Grade Result
I did not start with a truck full of high-end tools, but these three items completely changed the quality of my output and the speed of my work. If you are serious about carpet, stop using a knee kicker for anything other than tight corners and learn the power stretcher move to ensure your seams stay flat and ripple-free for the life of the carpet. For any flooring project in a humid area or on a concrete slab, a moisture meter is your best friend—I never skip the moisture meter requirement for any basement or kitchen job. And if you want a perfect layout in the bathroom, a laser level is the only way to achieve perfectly horizontal shower tiles. These tools provide the precision that human hands simply cannot match on their own.
Final Steps Toward Your Dream Home Finish
Creating a luxury home is not about how much you spend on the materials; it is about the care you put into the integration of those materials. Whether you are researching expert flooring installation tips or just trying to get one baseboard miter joint tight, know that the extra effort is what creates that high-end feel. You are building the foundation of your home’s aesthetic, and by following these advanced techniques, you ensure it remains beautiful for decades. Have you ever struggled with getting a flush-mount vent to sit perfectly level with your new planks? Let me know in the comments below!