

I remember the precise moment I heard it—a sharp, sickening pop echoing from my freshly renovated sunroom. I had spent three days meticulously clicking planks together, feeling like a DIY master. It looked flawless. But as the July humidity rolled in, my perfect floor started to protest. Within a week, a literal ridge had formed right down the center of the room, turning my sleek floor into a miniature mountain range. I had made one of the most common flooring installation mistakes in the book: I skimped on the perimeter expansion gap. I thought I knew better than the manufacturer’s manual. I was wrong. Today, I am going to save you from that same soul-crushing realization by explaining why that annoying little space at the wall is actually the most important part of your entire project.
Your Vinyl Floor Needs Room to Breathe
Every single house is a living, breathing thing. It shifts, it settles, and most importantly, it reacts to the air around it. When you are using a rubber mallet to lock your vinyl planks into place, it feels solid and immovable. But vinyl is essentially a high-tech plastic, and like all materials, it expands when it gets warm or humid and contracts when the heater kicks on in the winter. Without a gap at the edges, those expanding planks have nowhere to go but up.
Is a tiny hidden gap really worth the extra trim work?
I get it. You want to run your flooring tight against the wall to make your baseboard makeover easier. It feels counterintuitive to leave a 1/4 inch or 3/8 inch hole all the way around the room. You might be thinking, “Won’t that look unfinished?” or “Is it really going to move that much?” The short answer is yes. According to technical data from the North American Laminate Flooring Association (NALFA), floating floors can expand significantly across large spans, and failing to provide that space is the leading cause of joint failure and peaking. By leaving that gap, you are not being sloppy; you are being smart. We will cover how to hide it perfectly later using modern baseboard styles, but first, have you ever noticed your floor clicking or feeling bouncy in certain spots? That is often the first sign of a floor that is gasping for a little more room.
Keep Your Planks in Line with Proper Spacing
Setting up for success starts with the right tools, and for a floating floor, that means more than just a saw. I used to think I could eye-ball a quarter-inch gap by using random scraps of wood. I was wrong. On a guest bedroom remodel last spring, I used pieces of 1/4-inch plywood as makeshift spacers. By the third row, the vibration of my rubber mallet had knocked half of them loose, and I didn’t notice until the floor had drifted nearly an inch off-center. Today, I use dedicated plastic spacers every twelve inches. They don’t slip, and they ensure that when the temperature fluctuates, your floor doesn’t turn into a trampoline. Before you click that first plank into place, check your subfloor for dips. If you find a low spot, you need to know how to level a subfloor dip before the planks go down, or you will be hearing clicks and pops for the next decade.
Stagger Those Joints to Prevent Structural Weakness
The strength of a vinyl floor isn’t in the material itself, but in the way the planks support one another. If your end joints are too close together, the floor becomes unstable. You want to aim for a ‘staircase’ pattern where each end joint is at least six to eight inches away from the joint in the previous row. This is a core part of any step-by-step flooring installation. I personally like to start my second row with a plank cut to two-thirds the length of a full piece, and the third row with a one-third cut. Learning how to stagger vinyl plank ends correctly is the difference between a floor that lasts twenty years and one that separates within six months.
Mastering the Tricky Edges and Transitions
Once you reach the other side of the room, the ‘easy’ part is over. Now you have to deal with the perimeter and the inevitable wonky walls. Most houses aren’t perfectly square, which is why I swear by the razor scribe method for getting a tight fit against a wavy wall. If you are installing over a slab, do not skip the vapor seal requirement; moisture rising through concrete is a silent floor killer.
Hide Your Gaps with Professional Trim Techniques
When it comes time to put the room back together, your expansion gap will be exposed. This is where your baseboard makeover does the heavy lifting. Instead of just nailing them flat, I recommend using the inside corner cope rather than a simple miter. It allows the wood to move slightly without showing a gap. For those difficult outside corners that never seem to stay shut, the back bevel move is a life-saver, creating a sharp, crisp edge that looks like it was installed by a master carpenter.Most people assume that once the planks are locked, the job is done. But let me tell you a secret: your flooring is actually a giant sail responding to the invisible winds of humidity. A common myth is that heavy furniture will hold the floor in place, but in reality, pinning a floor with a heavy armoire or a kitchen island is one of the most common flooring installation mistakes. If you pin it in one spot, the expansion forces move to the weakest joint, usually causing a blowout in the center of the room. This is why I always recommend the perimeter glue move for stable vinyl plank in sunrooms where temperature swings are extreme.
Why does my waterproof shower floor still feel spongy?
The biggest oops factor in bathroom remodels is assuming that tile and grout are waterproof. They aren’t; they are merely water-resistant. The real magic happens underneath. If you skip the flood test secret for guaranteed leak-proof showers, you are gambling with your subfloor. Professional standards from the Tile Council of North America (TCNA) emphasize that moisture management starts at the framing level, not the decorative surface. One tiny pinhole in your membrane can lead to rot that remains hidden for years. Let’s talk about the plush trap in carpet installation. Everyone thinks a thicker pad equals a better feel, but understanding why your carpet pad is too thick for the tack strip is critical for longevity. The Carpet and Rug Institute (CRI) notes that using a pad that is too thick or too soft can actually cause the carpet backing to stretch and fail prematurely. It is better to choose a high-density, thinner pad that provides support without letting the carpet hammock between the tack strips. Even when you move to the finish work, do not get lazy. You might be tempted to fire nails straight down into the floor to keep that trim tight. Do not do it. Use the pin nail secret for delicate baseboard moldings and always aim for the wall studs, never the floor itself. If you nail the baseboard to the floor, you have just created a permanent anchor that defeats the entire purpose of your expansion gap. Have you ever fallen into this trap or noticed your floor bucking after a humid week? Let me know in the comments.I spent years relying on my ‘gut feeling’ until I realized my gut wasn’t calibrated for relative humidity. If you are working on a basement or a ground-level room, the moisture meter requirement isn’t just a suggestion—it is a survival tactic for your materials. I personally use a pinless meter from Wagner because I don’t want to poke holes in my expensive new planks. According to the National Wood Flooring Association (NWFA) Technical Publication A100, the moisture content of the wood subfloor and the flooring must be within 4% of each other for planks less than 3 inches wide, and within 2% for wider planks. If you skip this check, no amount of glue or nails will stop the inevitable cupping or crowning that follows when the seasons change. 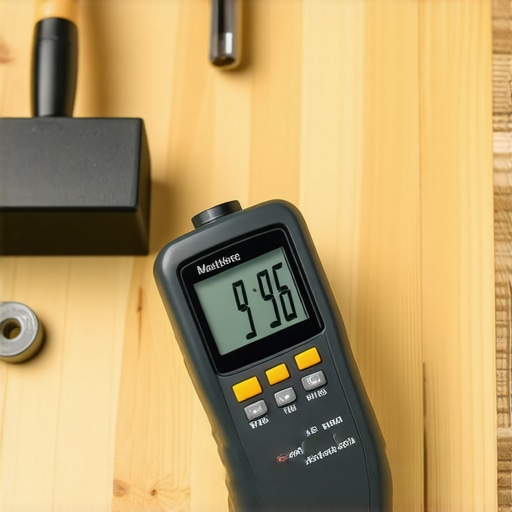
The Gear That Separates Pros from Frustrated DIYers
Accuracy is the enemy of the ‘close enough’ mentality. For my tile projects, I no longer rely on plastic crosses that get buried in the thinset. I’ve transitioned entirely to the spacer block move for perfect tile alignment, using a leveling system that pulls the tiles into a perfectly flat plane. This eliminates ‘lippage’—that annoying height difference between tiles that catches your toe. When I’m laying out a long hallway or a multi-room floor, I ditch the chalk line for the laser level hack. A 360-degree green beam ensures that my rows stay dead-straight even if I’m working through three different doorways.
How do I keep my new floors looking fresh for a decade?
Maintaining that ‘day one’ look requires more than just a broom; it requires a strategy. I’ve seen beautiful matte finishes ruined by harsh chemical cleaners that leave a waxy buildup. I swear by the microfiber mist rule for everyday cleaning because it avoids the pooling water that seeps into joints and causes swelling. For those high-traffic zones, the felt pad routine on every piece of furniture is non-negotiable. Even a small dining chair can act like sandpaper over time if the feet are bare. If you do happen to find a spot that feels a bit loose after a year of settling, don’t panic. Knowing how to fix a loose floor tile without a full demolition can save you thousands in repair costs and keeps the aesthetic intact without a major construction headache.
Smart Sensors and the Next Wave of High-Tech Planks
Looking toward the horizon, I see a massive shift in expert flooring installation tips for 2025. We are moving away from simple petroleum-based plastics and toward bio-based polymers that are actually more durable than the luxury vinyl of five years ago. We are also seeing the rise of ‘smart’ subfloor systems equipped with moisture sensors, particularly under high-risk areas like kitchen islands and luxury shower renovations. These sensors alert your smartphone the second a leak is detected, potentially preventing a small plumbing issue from rotting your entire investment. Before you lay your next plank, stop what you are doing and order a set of high-quality mechanical spacers and a reliable moisture meter. It is the single best investment you will make in your home’s value this year.
The Hardest Lesson My Sunroom Taught Me About Expansion
Looking back at that buckled sunroom floor, I realize my biggest mistake wasn’t just the gap—it was my impatience. I treated the material like it was inert plastic when it was actually a dynamic system reacting to the air. Professional results aren’t about speed; they are about respecting the physics of the room. I now never start a step-by-step flooring installation without a 48-hour acclimation period. It feels like wasted time until you see the stability it provides. Also, understanding why your baseboard miters keep gapping in the winter helps you realize that the house is always moving, and your installation must accommodate that reality. #IMAGE_PLACEHOLDER_E#
My Field-Tested Toolkit for Flawless Floors
For anyone looking to level up their craft, I highly recommend investing in a pinless moisture meter. It is the only way to truly meet the moisture meter requirement and avoid disaster. For tile work, I’ve moved away from standard spacers in favor of mechanical leveling systems that guarantee the spacer block move for perfect tile alignment without the lippage. I also keep a copy of the TCNA Handbook nearby for any upgrade your bathroom project to ensure my waterproofing is up to code.
Go Build a Floor That Lasts a Lifetime
You now have the blueprint to avoid the most painful flooring installation mistakes and the specialized knowledge to execute a stunning baseboard makeover. Flooring isn’t just about the surface; it is about the preparation and the patience you put into the foundation. Don’t be afraid to take your time—the results will speak for themselves for years to come. Have you ever noticed a mysterious buckle or a clicking sound in your floor after the seasons changed? Let me know your experiences in the comments below!