

I remember the day my uncle first visited my newly renovated home in his wheelchair. I had spent weeks obsessing over the finish, but I had completely ignored the one-inch ‘lip’ between the hardwood hallway and the bathroom tile. Watching him struggle to pop a wheelie over that tiny mountain—and nearly tipping backward—felt like a punch to the gut. I felt like a failure. I was supposed to be the flooring expert, yet I had made one of those classic flooring installation mistakes to avoid for a seamless look that actually hurts people. That moment changed how I look at every floor I lay. We often prioritize the ‘wow’ factor of the material and forget that a floor is meant to be walked on—or rolled over—without a thought. If you are tired of watching loved ones struggle with clunky thresholds or if you are wondering why your hardwood transitions are tripping guests, you are in the right place. Today, I am sharing the low-profile transition trick that turns a dangerous bump into a smooth, invisible path. We are going to fix those tripping hazards once and for all. Have you ever tripped over a threshold in your own home and thought, ‘There has to be a better way than this ugly T-molding?’
The Real Cost of a Standard T-Molding
Early in my career, I leaned on standard T-moldings because they were easy. They hide a multitude of sins, covering up messy cuts and gaps with a bulky piece of wood. But for anyone using a wheelchair, a walker, or even a stroller, those moldings are speed bumps that never stop being annoying. In fact, according to the ADA (Americans with Disabilities Act), any vertical change in level over a quarter-inch can be a significant barrier; they actually require a beveled slope for anything higher to ensure safety. My big mistake back then was thinking that ‘standard’ meant ‘correct.’ It doesn’t. A standard transition is often just the easiest thing for the installer to grab off the shelf. Real accessibility requires a bit more finesse, often involving the feather-edge secret for smoothing subfloor transitions before the final flooring even goes down. By planning for a low-profile finish, you aren’t just helping a wheelchair user; you are creating a home that feels more open and looks significantly more high-end.
Is a flush transition actually worth the extra effort?
I get it—you might be worried that modifying your subfloor or custom-cutting transitions is going to be a nightmare. You might fear that without that big T-molding, your floors will eventually gap or buckle. I used to think the same thing until I realized that a low-profile transition is actually more stable because it doesn’t have that high ‘lever’ point that gets kicked and loosened over time. We are talking about a permanent solution that blends into the architecture rather than a band-aid that sticks out like a sore thumb. Whether you are working on step-by-step flooring installation from planning to perfect finish or just trying to retro-fit a single doorway, the ‘low-profile trick’ is the difference between a DIY-looking job and a professional, inclusive home design. It is about dignity and safety, and honestly, it just looks better.
Stop the Bump Before You Lay a Single Tile
The secret to a floor that feels like a single, continuous plane starts long before the finish material arrives. You have to look at your subfloor like a topographical map. Most people think they can just slap down some hardwood and tile and fix the difference later with a piece of wood. That is exactly how you end up with a ‘toe-stubber’ transition. On a job last winter in an old Victorian, I faced a massive height gap between the new kitchen porcelain and the original pine floors. Instead of reaching for a thick reducer, I used the feather-edge secret for smoothing subfloor transitions. I essentially built a ‘mini-ramp’ using layers of 1/8-inch plywood and high-quality patching compound, extending the transition over three feet rather than three inches. It took half a day longer, but the result was a slope so gentle you couldn’t feel it underfoot. If you are aiming for your guide to durable flooring installation for a stylish home, you must commit to this prep work. Most installers skip this because it is messy and requires patience, but it is the only way to avoid the ‘speed bump’ effect. 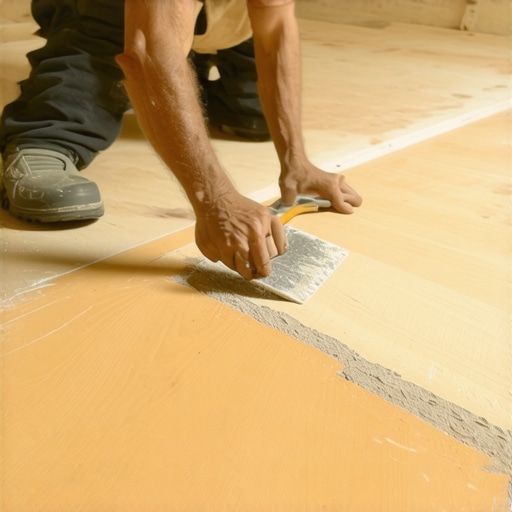
Why You Should Toss the Factory T-Molding
Standard T-moldings are the industry’s way of saying, ‘We give up.’ They are designed to cover gaps, not to create accessibility. When you are working on a step-by-step flooring installation from planning to perfect finish, try using a low-profile metal L-bead or a custom-milled hardwood transition instead. These sit much lower and provide a crisp, modern edge. I remember a client who insisted on matching their floor to their baseboard styles that elevate your interior design. We ended up taking a standard oak reducer and running it through a table saw to thin out the ‘nose.’ By reducing the vertical profile by just 3/16 of an inch, we transformed a trip hazard into a smooth glide-over point for their child’s stroller. This is the level of detail that avoids the T-molding mistake that ruins open concept floors.
Leveling the Playing Field Between Materials
Different materials have different ‘height personalities.’ Carpet is squishy and forgiving, while tile is rigid and demanding. If you are transitioning from a hard surface to a soft one, you have more room to hide height differences, but you still need to be careful. In a recent carpet install secrets achieving flawless results every time scenario, I found that many people use a thick transition strip when they could actually just ‘tuck’ the carpet. By using a z-bar or a hidden tack strip, you can bring the carpet right up to the tile edge for a completely flush look. This eliminates the need for any protruding hardware. If you are dealing with a significant height difference, avoid the self-leveler mistake that creates new high spots; instead, use a gradual shim system under your underlayment to bring the lower floor up to meet the higher one. It is all about the math of the cross-section. When the subfloors are level, the transitions become invisible.Let’s dig deeper into the nuances that even seasoned DIYers often overlook when chasing that magazine-perfect finish. One of the most persistent myths I hear is that a thicker carpet pad is always better—that it’s the ultimate way to add a ‘luxury’ feel. In my experience, this is a total trap. If your padding is too thick, the carpet won’t properly engage with the pins on the tack strip, leading to those unsightly ripples that appear six months later. If you’ve wondered why your carpet pad is too thick for the tack strip, you’ve likely felt the frustration of a ‘spongy’ floor that feels unstable. 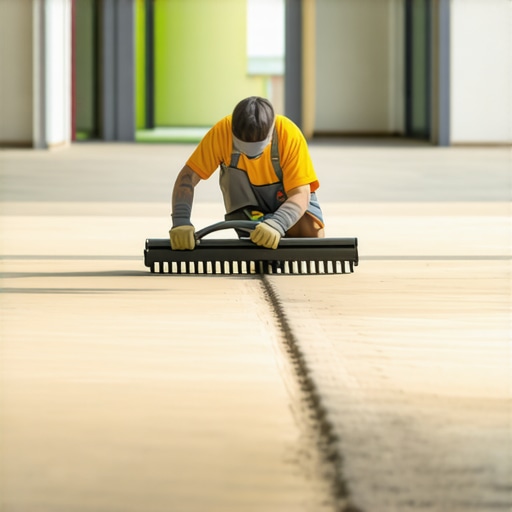
Why does the thickest carpet padding often lead to the shortest floor life?
According to research by the Carpet and Rug Institute (CRI), using a residential pad that exceeds 7/16 of an inch can actually void your manufacturer warranty because it allows too much vertical movement, which breaks down the carpet backing. It is a classic ‘oops’ factor: you spend more money for what you think is an upgrade, and you end up destroying the material from the inside out. When you are mastering carpet install secrets achieving flawless results every time, remember that density matters more than thickness.
The Self-Leveler Trap That Ruins Your Baseline
Another advanced mistake involves the ‘magic’ of self-leveling underlayment. People treat it like water, assuming it will naturally find a perfect level. However, if you don’t prime the subfloor or if you mix it too thin, it creates ‘islands’ and high spots that are harder to fix than the original dip. I’ve seen many homeowners fall victim to the self-leveler mistake that creates new high spots, which then makes laying large-format tile a nightmare. For a truly professional look, you have to use a gauge rake and stop trusting ‘gravity’ to do the work for you. This is especially vital when you are planning for the linear drain setup for barrier-free showers, where the pitch must be precise to the millimeter to ensure proper drainage without a curb.
Stop Fighting Your Baseboard Miters Every Winter
Finally, let’s talk about the ‘seasonal gap’ in trim work. Most people think their miters are perfect because they look good in July, only to see them pull apart in January. This happens because wood shrinks across its width, not its length. Instead of relying on a standard miter, I always recommend the inside cope method for beginners and pros alike. A coped joint allows the wood to move slightly without opening a visible gap. If you find why your baseboard miters keep gapping in the winter is a recurring nightmare, switching to coping is your permanent fix. It takes a few extra minutes with a coping saw, but it saves years of re-caulking. Have you ever fallen into the ‘thicker is better’ trap with your padding or struggled with shrinking miters? Let me know in the comments!
The Gear That Separates Pros from Weekend Warriors
Over the years, I’ve learned that the difference between a floor that lasts ten years and one that lasts fifty often comes down to the tools used in the final hour. While everyone focuses on the miter saw, I never walk onto a job site without a high-quality moisture meter and an oscillating multi-tool. I use the moisture meter because the National Wood Flooring Association (NWFA) states that most flooring failures are moisture-related; if your subfloor and your hardwood aren’t within 2-4% of each other, you are inviting disaster. This is the only way to truly understand why your underfloor heating is making your hardwood gap. As for the multi-tool, it is my secret weapon for those surgical cuts when I need to figure out how to hide the cut edge on a niche perimeter without pulling the whole wall apart. These aren’t just gadgets; they are insurance policies for your hard work. 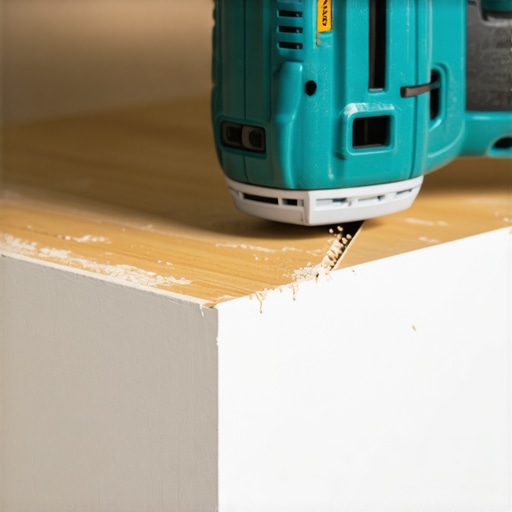
How do I maintain my flooring and trim over the long haul?
Maintenance isn’t just about cleaning; it’s about prevention. For hardwood and LVP, I swear by the microfiber mist rule for cleaning matte floors. Flooding your floor with water is the fastest way to ruin the core, even if it claims to be waterproof. In bathrooms, longevity is all about the integrity of the seals. I always perform the flood test secret for guaranteed leak proof showers before the final tile goes down, but even then, you must inspect your silicone beads annually. If you notice a squeak developing in a high-traffic hallway, don’t wait for it to get worse. Implement the subfloor screw routine for stopping floor squeaks before the movement causes your floor joints to fail. For those with carpet, accidents happen, but you don’t always need a professional van in the driveway; sometimes the iron burn repair for small carpet scars can save a room from a full replacement.
What the Future of Home Installation Looks Like
I predict that by the end of the decade, we will see a massive shift toward ‘modular repairability.’ We are already seeing this with baseboard trends in 2025, where magnetic or clip-on systems allow homeowners to swap out trim without damaging the drywall. The industry is moving away from permanent adhesives and toward systems that can be easily ‘unzipped.’ This means your investment today needs to be adaptable. If you are starting a project now, I strongly encourage you to try one advanced technique we discussed: skip the standard T-molding and commit to a custom-milled low-profile transition. It is a small detail that fundamentally changes how your home feels and functions for a lifetime.
Lessons the Subfloor Taught Me the Hard Way
One of the most profound shifts in my perspective came when I realized that a floor isn’t just a surface; it’s the foundation of a home’s mobility. After years of fixing flooring installation mistakes to avoid for a seamless look, I’ve learned that the smallest details—like a 1/8-inch height difference—can be the difference between a house feeling like a sanctuary or an obstacle course. I no longer view a transition as a gap-filler; I see it as a bridge that must be crossed thousands of times. If you are struggling with a specific transition, remember that you can always custom-sand or mill a piece of wood to fit your specific needs rather than settling for a store-bought strip. Also, never underestimate the power of a subfloor screw; taking the time to perform the subfloor screw routine for stopping floor squeaks before you lay your finish material ensures your home stays quiet for decades. Finally, always buy 10-15% more material than you think you need, especially when dealing with how to match wood grain when patching old hardwood floors in the future.
#IMAGE_PLACEHOLDER_E#
My Personal Toolkit for a Lifetime Finish
You don’t need a warehouse of equipment, but these four items changed everything for me. First, a reliable moisture meter is non-negotiable to prevent why your underfloor heating is making your hardwood gap. Second, I recommend the ‘Coping Saw’ for anyone doing their own trim; mastering the inside cope method for beginners is the only way to beat seasonal gaps. Third, keep a high-quality silicone on hand for bathrooms, but always check the painter caulk vs silicone guide for baseboards to ensure your paint actually sticks to your trim. Lastly, I always keep a scrap piece of carpet for how to fix a burnt carpet spot without a pro kit—you never know when a stray spark or iron will save you a thousand-dollar replacement.
Building a Home That Welcomes Everyone Without Exception
At the end of the day, your flooring installation should reflect the care you have for the people living within those walls. Whether you are tackling a upgrade your bathroom the ultimate shower renovation guide or simply replacing the LVP in your living room, focus on the flow. A truly professional floor is one you never have to think about while you’re walking on it. Take your time, prep your subfloor properly, and don’t be afraid to innovate where the standard methods fall short.
Have you ever had a transition strip turn into a family trip hazard? Let me know your ‘speed bump’ stories below!