

I sat on my dusty subfloor, staring at a corner where two pieces of expensive, crown-style baseboard met—or rather, failed to meet. There was a gap so wide I could have parked a truck in it. I had my miter saw dialed to a perfect 45 degrees, but my house was built in the 70s, and there isn’t a single square corner in the entire place. I used to think the answer was more caulk and a prayer. I was wrong. That’s when an old carpenter friend handed me a coping saw and told me to stop fighting the house and start working with it. [image-placeholder]
Mastering the Art of the Perfect Corner
If you’ve ever tried a baseboards makeover to elevate your home’s interior, you know the frustration. You spend hours picking out the perfect baseboards for your home, only to have the installation look amateur because the corners don’t line up. Today, I’m going to show you why the ‘coped-join’ tactic is the only way to get that high-end look without losing your mind. We are going to fix those gaps, handle the ‘out-of-square’ reality of your walls, and make those transitions seamless.
Is Coping Actually Worth the Extra Effort?
You might be thinking, ‘Can’t I just use a miter clamp secret and call it a day?’ I used to think so too. My biggest mistake early on was trying to force a mitered joint to close on an inside corner that was actually 92 degrees. I ended up with a mess of wood filler that cracked within six months because of seasonal movement. According to researchers at the Forest Products Laboratory, wood movement is inevitable, and a mitered joint is the most vulnerable to showing gaps. Coping solves this because one board ‘nests’ into the other, hiding the expansion and contraction. Have you ever spent an entire Saturday fighting a single corner only to give up and fill it with caulk?
The Reason Your House Hates Your Miter Saw
The truth is, houses breathe and settle. If you’ve noticed why your baseboards are pulling away from the wall, it’s usually because the framing wasn’t perfect to begin with. Miters rely on the wall being exactly 90 degrees, but in the real world, that almost never happens. When you use the ‘coped-join’ tactic, you’re fitting the wood to the wood, not the wood to the wall. This makes those intricate crown-style profiles look like they were carved out of a single piece of timber, even if your walls are as wavy as the ocean. We’re going to walk through the exact steps to get that tight fit every single time.
Stop Fighting the Wall and Start the Butt Joint
The secret to a coped joint isn’t in the saw; it’s in how you start. You always install the first piece of baseboard with a square cut directly into the corner. Think of this piece as the ‘host.’ It sits flat against the wall and runs right into the adjacent corner. I used to try to miter both pieces simultaneously, but that’s a recipe for disaster. By using a square butt joint for the first piece, you eliminate half the variables. This is especially crucial when you’re dealing with baseboard styles that elevate your interior design, as complex profiles are more forgiving when one side is perfectly flat. This anchor piece allows the second board to nestle in, regardless of how far the corner drifts from a perfect 90 degrees.
The Sacrifice Cut That Reveals the Path
Now, take your second piece of wood. You aren’t going to cut it to length yet. First, you cut a 45-degree miter on the end that will meet the corner. This isn’t the final cut; it’s a guide. This miter exposes the inner profile of the wood, showing you exactly where the coping saw needs to follow. It’s like a ‘paint-by-numbers’ for carpentry. I remember doing this in a hallway once where I was also managing a carpet install. I accidentally cut the miter in the wrong direction and ended up with a scrap piece that was two inches too short. The lesson? Always double-check which side of the wood is facing the wall before you drop the blade. Once that white wood is exposed against the grain, you have your roadmap.
#IMAGE_PLACE_HOLDER_B#
Work the Saw from the Back Side
Here is where the magic happens. Grab your coping saw and start cutting along the edge of the profile you just exposed with the miter. The trick is to perform a ‘back-cut.’ This means you angle the saw blade away from the face of the wood at a steep 45-degree angle. You want the front edge to be the only thing touching the first board. It’s better to remove too much from the back than too little. If you leave too much wood behind, the piece won’t sit flush against the ‘host’ board. Use the back-cutting secret for baseboard miters to ensure that even if the corner is slightly off-square, the face of the joint stays tight. I’ve used this trick on everything from standard MDF to expensive oak, and it’s the only way to get a seamless look without a miter clamp secret.
Testing the Fit Before You Nail
Before you reach for the nail gun, dry-fit the piece. If there’s a small gap, don’t panic. A quick pass with a piece of sandpaper or a fine file on the back-cut usually solves it. I once spent forty minutes filing a single corner in a bathroom remodel because the wall had a massive hump from the backer board behind the tile. It felt tedious, but once I pushed it into place, the joint was invisible. If you find the board is still pulling away, check out why your baseboards are pulling away from the wall to see if the issue is the subfloor or the framing itself. Precision here prevents the need for excessive caulk later and ensures that your new floors, whether they are hardwood or part of a professional carpet install, look perfectly framed by the trim.
Once you have mastered the cope, you are already ahead of 90% of DIYers, but there is a trap that even seasoned pros fall into: the over-reliance on the caulk gun. We have all heard the phrase ‘caulk and paint make a carpenter what he ain’t,’ but in the world of high-end finishes, that philosophy eventually fails. The biggest nuance most people miss is that baseboards are not just decorative; they are functional components that must coexist with your floor’s natural physics. If you have ever wondered the painter caulk vs silicone guide for baseboards, you are asking the right questions, but the real secret lies in how you manage the gap before the tube even comes out of the bag.
Why Too Much Caulk Ruins Your Hard Work
The common belief is that a thick bead of caulk will hide any sin. However, caulk is not a structural filler. In my experience, over-caulking creates a ‘bridge’ that is too rigid. When your house shifts during the winter, that massive bead of caulk will pull away from the wall or the wood, leaving a jagged, ugly crack that is impossible to clean. Instead of filling a half-inch gap with goop, you should be using a shim or a small ‘sliver’ of wood to fill the space. This ensures that the caulk only has to perform a cosmetic seal, rather than trying to hold the joint together. Have you ever fallen into this trap? Let me know in the comments.
Give Your Floors Some Room to Breathe
Here is a contrarian view: Your baseboards should almost never be jammed tight against the flooring. Many installers think a ‘seamless’ look means the trim is pressed firmly into the floorboards, but this is a major ‘oops’ factor. If you are working with hardwood or laminate, you must respect the expansion gap secret for summer flooring swell. According to the National Wood Flooring Association (NWFA), wood flooring requires a specific expansion space—often a minimum of 1/4 inch—to prevent buckling. If you pin the floor down with your baseboards, the floor has nowhere to go when humidity hits, leading to peaks and valleys in your beautiful new hallway.
Does Your Baseboard Need to Touch the Floor?
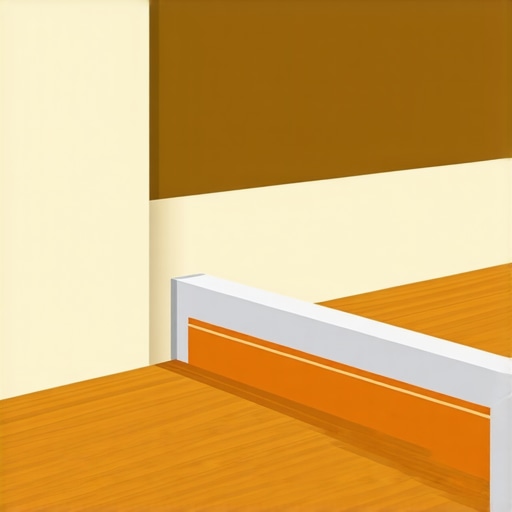
The short answer is no, especially if you plan on installing carpet or if your subfloor is uneven. A common advanced mistake is trying to force a long piece of baseboard to follow a dip in the floor. This creates tension in the wood and leads to the nails popping out later. If you’ve noticed why your hardwood floor sounds like a drum, it might be because the trim is creating a mechanical bridge that amplifies vibration. The pro move is to keep the baseboard perfectly level and ‘scribe’ the bottom to match the floor’s contours, or use a shoe molding to cover the variance. This prevents you from making the most common flooring installation mistakes to avoid for a seamless look, where the trim looks wavy because it followed a crooked floor. Using the miter clamp secret for professional baseboard corners on the outside edges while maintaining this level line will give you a result that looks like it was installed by a master craftsman, not just a weekend warrior.
The Gear That Actually Makes a Difference
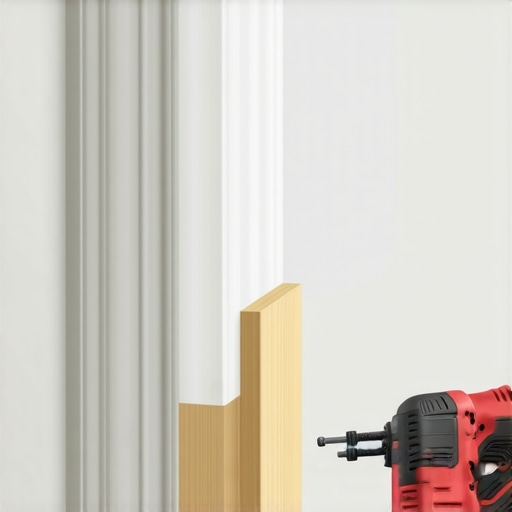
Choosing the right gear isn’t about buying the most expensive tool; it’s about finding the ones that solve specific problems. For me, that meant ditching the heavy 15-gauge nailer for a 23-gauge pin nailer. The holes are so tiny you barely need wood filler. When you are wrapping up a step-by-step flooring installation, the last thing you want is a series of massive craters to patch. If you are struggling with outside corners that keep slipping, I highly recommend the hot glue hack for holding baseboard miters while nailing. A tiny dab of hot glue acts as a temporary clamp, holding the pieces perfectly still while you fire the pins. It sounds unconventional, but it’s a trick I learned from high-end cabinet makers who can’t afford a single millimeter of drift.
For the carpeted areas, your best friend is the carpet tucker move for clean baseboard edges. It ensures the transition between the trim and the fibers is sharp and professional. According to technical documentation from Fine Homebuilding, maintaining consistent indoor humidity levels between 30% and 50% is the single most important factor for protecting your trim work and flooring over the long haul. Large swings in moisture cause the wood to fight against the fasteners, leading to the squeaks and gaps we all hate.
How do I keep my baseboards and floors looking new for years?
Maintenance isn’t just about cleaning; it’s about proactive inspections. Every six months, I walk my hallways and check the perimeter. If you spot a loose thread, knowing how to fix a carpet snag before it runs can save you from replacing the entire room. In wet areas, like the bathroom, I keep a close eye on the corners of the trim. If you see signs of swelling, it’s a red flag for shower repairs that might be needed nearby. For the flooring itself, especially in 2025, we are seeing a massive shift toward high-performance finishes. If you want to stay ahead, look into top trends in installation for 2025, which emphasize durability and ease of maintenance.
The Future of Your Floors is Smart and Modular
Looking toward the future, I predict we’ll see more ‘smart’ baseboards equipped with hidden moisture sensors that can alert you to a leak behind the wall before you ever see a stain. Until then, the best defense is a great offense: use quality tools, respect the expansion gaps, and don’t be afraid to try the advanced techniques I’ve shared. My challenge to you? On your next project, skip the simple miter and try that first coped joint. It’ll feel clunky at first, but once you see that seamless fit, you’ll never go back to the caulk-and-pray method.
The Hardest Lessons Learned in the Corners of My Own Home
Over the years, I have realized that the difference between a ‘good enough’ job and a master-class finish comes down to how you handle the unexpected. One of my biggest lightbulb moments was realizing that lighting is your worst enemy and best friend. When you think a joint is tight, hold a flashlight against the wall to cast a side-shadow; it reveals gaps you can’t see from the front. Also, never underestimate the power of acclimation. I once rushed a project in a humid July, only to find out why your hardwood floor is gapping in the winter the hard way—the trim shrunk right along with the floorboards.
Another hard-won truth? Precision beats speed every single time. If you are working with pre-finished wood, avoid the wood filler mistake on pre-finished hardwood by spending an extra five minutes on your back-cut. A perfectly coped joint requires no filler at all. Finally, always keep a ‘test block’ of your baseboard profile in your pocket. Using a 6-inch scrap to check your fits before you commit to a 16-foot length will save you hundreds of dollars in wasted material and hours of frustration.
The Tools That Never Leave My Side
You don’t need a massive workshop to get professional results, but a few specific items are non-negotiable for me. First, a dedicated coping saw with a high-tension frame; the cheap ones flex too much and ruin your line. I also swear by half-round needle files for cleaning up the ‘tight’ parts of a profile where a saw blade is too clumsy. For those tricky spots where a baseboard ends mid-wall, I always use the hidden miter secret for baseboard returns to give it a finished, furniture-quality look.
When it comes to the final touches, I’ve moved away from standard putty. Instead, I use the painters point hack for baseboard nail holes which makes the fasteners virtually invisible. These tools and techniques are what I rely on to ensure every project stands the test of time, especially when integrating new trim into a transform-your-home-expert-flooring-installation-tips-for-2025 plan.
Go Ahead and Make That First Cut
Your home deserves more than just ‘good enough’ corners. While the coping method takes a bit more patience than a standard miter, the pride you’ll feel looking at a seamless joint is worth every second of effort. Don’t let the fear of a wavy wall or an out-of-square corner stop you from starting your baseboards makeover. You now have the roadmap, the tool list, and the ‘insider’ secrets to handle whatever your house throws at you. The transition from DIYer to craftsman starts with the very next piece of wood you pick up. Have you ever tried to cope a corner and ended up with a gap? Let me know what happened in the comments below!