

I was standing in my hallway, staring at a three-inch gap where the baseboard met the door casing, and I felt like a total failure. I’d just spent three days on a flooring installation that looked million-dollar… until you looked at the corners. The dust was still settling on my clothes, and my knees were screaming, but all I could see was that raw, porous inside of the MDF baseboard sticking out like a sore thumb. I had simply cut the trim flush. It screamed amateur hour and ruined the entire vibe of the renovation. I thought a little bit of painter’s caulk would hide the sin. It didn’t. It just made a sticky, grey mess that eventually cracked and fell out, leaving an even uglier void. Most homeowners ignore these ends, but once you see a proper return, you can never go back to raw edges again. It’s the ultimate hidden-miter secret that makes your baseboard makeover look like it was done by a high-end contractor.
Stop Leaving Your Baseboards Looking Unfinished
We spend so much time choosing the perfect baseboards for our home only to trip at the finish line because we are tired. A return is that tiny little mitered cap that turns the profile back into the wall, terminating the run elegantly rather than abruptly. It’s the difference between a room that feels truly finished and a room that looks like a construction site waiting for a professional to arrive. Today, I’m going to show you how to pull off the hidden-miter return so cleanly that your neighbors will think you hired an expensive trim crew. We’re going to fix those awkward transitions where the trim just stops dead, especially near those tricky modern bathroom makeovers where tile meets wood. Have you ever finished a room only to realize the trim ends looked like someone just chopped them off with a dull axe?
Is This Small Detail Actually Worth the Trouble?
You might be thinking that it is just a quarter-inch of wood and wondering who actually cares. But details drive the overall perception of your home. According to research from the National Association of Home Builders (NAHB), high-quality interior finishes like detailed trim are among the top features that influence a buyer’s immediate impression of home maintenance quality. If the trim looks sloppy, they naturally wonder if the plumbing and electrical work are sloppy too. Trust me, I learned this the hard way when I tried to sell my first flip. The inspector actually pointed out my lack of returns in the master bath during the walkthrough. It was embarrassing and made me look like I was cutting corners. Whether you are dealing with a fresh carpet install or a whole-house floor swap, the return is your best friend for a polished look.
The Mistake That Cost Me a Whole Weekend
Early on, I thought I could just back-cut everything and call it a day. I didn’t use a miter clamp secret, and the tiny return pieces—which are literally the size of a fingernail—would fly across the room at Mach 1 every time the saw blade hit them. It was dangerous, frustrating, and I wasted about twenty feet of expensive molding. I even tried using wood filler on pre-finished hardwood, which never matches correctly and just looks like a smudge. The secret isn’t just about the cut; it’s about the sequence, the glue, and knowing when to walk away from the saw. Let’s look at how to get these results without losing a finger or your mind.
Cut Your Main Run for a Hidden Joint
To start, you need to think of your baseboard like a puzzle piece that refuses to end. When your trim reaches a doorway or a point where it can no longer continue—like the edge of a vanity in a modern bathroom makeover—don’t just cut it flat. Instead, set your miter saw to a 45-degree angle, just as if you were turning a corner into another wall. You are essentially cutting an ‘outside miter’ on the very end of your long board. This leaves the face of the molding longer than the back, creating a pocket that will receive your return piece. I once made the mistake of cutting these too short, thinking I needed to leave room for the cap. I ended up with a massive gap that even the best flooring installation mistakes to avoid list couldn’t fix. The key is to measure to the exact point where you want the trim to stop, and that becomes the ‘short’ point of your miter.
Harvest the Tiny Return Cap Safely
This is the part that scares most DIYers and for good reason. You need a tiny triangle of wood that matches your profile perfectly. Instead of using a small scrap—which usually turns into a wooden projectile—take a longer piece of trim, say about twelve inches. Cut a 45-degree miter on the end, then switch your saw back to a 0-degree straight cut. Line up the blade to cut exactly where the miter meets the back of the board. This ‘slices’ off the mitered face, leaving you with a small, wedge-shaped cap. During a step-by-step flooring installation last summer, I spent twenty minutes looking for a return cap that flew into a pile of sawdust because I didn’t hold the ‘handle’ of the long board firmly. Now, I keep the vacuum off for these cuts so I can hear exactly where the piece lands if it does go for a ride.
Stick It Together without Losing Your Mind
Forget about using a trim nailer for this tiny piece; the force of the air will shatter the wood or send it flying. You need a chemical bond. I highly recommend using a Cyanoacrylate (CA) glue with an activator spray. It is like a super-powered version of what you might use for the flex glue fix on larger sections. Apply a small bead of glue to the miter on the long wall-mounted board, spray the activator on your tiny return cap, and press them together. It sets in about five seconds. 
Why This Beats Caulk Every Single Time
If you are working near carpet, you might be tempted to just shove the end into the fibers. Don’t do it. Use the carpet tucker move to create space, then install your returned end. When you use a return, you are showing the finished, painted, or stained face of the wood from every angle. If you just leave a raw end and try to hide it with caulk, that caulk will eventually shrink and yellow. I remember a specific job where the client had chosen beautiful, intricate baseboard styles that had a deep cove. Without a return, the cove looked like a dark, hollow hole. Adding that half-inch piece of wood closed the loop and made the entire wall look like a custom architectural feature. It’s about creating a continuous line that the eye can follow without interruption. Using the miter clamp secret can help hold these together if you aren’t using instant glue, but for these ‘dead-end’ returns, your hands and a bit of patience are your best tools. Once that piece is glued, a quick hit with 220-grit sandpaper makes the seam disappear completely.
Caulk Won’t Save a Sloppy Joint
Most people think a straight line and a tube of white goop can hide any sin, but that’s where the pro-level finish falls apart. I used to believe that if I could just bridge the gap with painter’s caulk, no one would notice. But here’s the contrarian truth: the best trim jobs use the least amount of caulk possible. If you’re relying on a thick bead of silicone to hide a poor joint, you’re just creating a maintenance nightmare that will peel and attract dust within two seasons. Professionals focus on ‘tight to the eye’ wood-to-wood contact through precision back-cutting and tensioning.
Stop Chasing Level and Start Chasing Flat
One of the biggest traps I see in a flooring installation is the obsession with a ‘level’ floor. You’ll see guys pouring bags of compound to make a floor perfectly level with the horizon, but LVP and hardwood don’t care about the horizon; they care about flatness. You can have a floor that is pitched three inches over twenty feet, and as long as it is flat, the planks won’t click or separate. However, a ‘level’ floor with a 1/8-inch hump will cause a t-molding mistake to look like a mountain range. I’ve seen people make the self-leveler mistake that creates new high spots simply because they were chasing a bubble on a spirit level instead of using a ten-foot straight edge to find dips.
Why Does Your High-End Floor Still Sound Cheap Underfoot?
You’ve spent five figures on premium rigid core, but it sounds like you’re walking on a drum. This usually boils down to the ‘hollow spot’ phenomenon. According to the National Wood Flooring Association (NWFA), moisture is the primary culprit for subfloor movement that creates these air pockets. If you skip the moisture meter test for concrete subfloors, you’re basically gambling with your investment.  Moisture trapped under the planks creates hydrostatic pressure that can lift sections just enough to create that annoying ‘clack-clack’ sound. This is also why your rigid core floor sounds hollow when you walk even if the pad is pre-attached. The same logic applies to the bathroom. Many DIYers stop their water barrier at the top of the tile, but understanding why your shower waterproofing needs to go higher is a lesson usually learned through expensive mold remediation. Capillary action can pull moisture up behind the drywall even if the tile itself is sealed. Think about the subfloor as the foundation of your home; if that slab is exhaling moisture, even a the vapor trap mistake could occur under your luxury vinyl. In every step-by-step flooring installation, the prep is 90% of the work. Have you ever fallen into this trap of over-caulking or ignoring the subfloor? Let me know in the comments.
The Gear That Separates Pros from Weekend Warriors
I used to think my hands were my best tools, but twenty years in this game taught me that the right mechanical advantage is the difference between a floor that lasts and one that fails in six months. When I’m tackling a carpet install, I no longer rely on my own joints. I’ve completely abandoned the knee kicker for everything except the smallest closets because it’s a recipe for a meniscus tear. Instead, I dive deep into the power stretcher vs knee kicker debate by siding firmly with the stretcher. It provides uniform tension that a human knee simply cannot replicate, preventing those annoying ripples that usually appear two years later. If you want your carpet to stay tight, rent the power stretcher. Your future self will thank you when you aren’t tripping over a loose seam in the hallway. 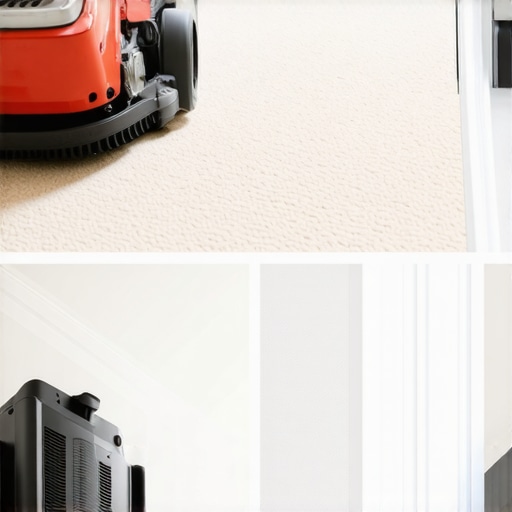
How do I maintain my flooring and shower over time?
Maintaining these high-end finishes isn’t about scrubbing harder; it’s about scrubbing smarter and knowing when to intervene. For showers, I recommend a ‘dry-off’ policy. After every use, squeegee the walls to prevent mineral buildup. If you start seeing hairline cracks in the grout, don’t wait for a leak. Check out shower repairs when to fix vs replace for longevity to see if a simple reseal will save you thousands in water damage. For your baseboards, avoid the ‘wet mop’ mistake. Water sitting at the base of MDF trim causes swelling that no amount of wood filler can fix. Use a microfiber cloth with a dedicated wood cleaner to keep those baseboard trends in 2025 looking sharp without the water damage.
Why Your Bathroom Needs a Slope Intervention
In my experience, the number one reason for premature shower failure isn’t the tile choice—it’s the drainage. I always refer back to the Tile Council of North America (TCNA) Handbook, which specifically dictates a minimum slope of 1/4 inch per foot toward the drain. If you ignore the shower seat slope rule for proper drainage, you’re basically inviting mold to live in your grout lines. This is also why your shower niche is collecting water; if it isn’t pitched slightly forward, it becomes a stagnant pond for soap scum. Precision tools like a digital level are non-negotiable for these checks.
What the Future of Flooring Looks Like
We are heading toward an era where subfloors do more than just hold weight. I predict that within the next decade, moisture-sensing underlayments will be standard in every flooring installation, sending alerts to your phone before a leak ruins your baseboards. For now, stop guessing about your cuts. Avoid the door jamb saw mistake that leaves huge gaps by using a scrap piece of your actual flooring as a height guide. My challenge to you: before you nail down your next piece of trim, try the ‘hidden-miter’ return on just one doorway. Once you see that seamless finish, you’ll never go back to raw edges again.
The Hardest Lessons Learned from Decades on My Knees
After finishing hundreds of rooms, I’ve realized that the ‘return’ isn’t just a carpentry trick; it’s a mindset. It represents the transition from getting the job done to mastering the craft. One lightbulb moment for me was realizing that shadow lines never lie. If your trim ends abruptly, the shadow highlights the raw edge. A return creates a continuous surface that catches light exactly like the rest of the board. Another major realization was about carpet; I stopped thinking of it as a rug and started treating it like a drumhead. Using a power stretcher ensures that tension stays even, preventing those ripples that usually surface three years later. Finally, in the bathroom, I learned that water is a patient enemy. If you don’t follow the slope check tactic for shower floors, you aren’t just making a mess; you’re building a future demolition project.
#IMAGE_PLACEHOLDER_E#
The Toolkit That Makes the Magic Happen
You don’t need a warehouse full of gear, but there are a few non-negotiables for a pro-level baseboard makeover. First, Cyanoacrylate (CA) glue with an activator is the only way to handle those tiny return miters safely. Second, a digital angle finder beats a standard square every time when walls aren’t a perfect 90 degrees. For flooring, I never trust my eyes alone; I always use a ten-foot straight edge to check flatness. For anyone doing their own carpet, checking out the power stretcher vs knee kicker debate will convince you to rent the heavy machinery. Lastly, the TCNA Handbook is my bible for any shower work. It’s worth every penny to know you’re meeting industry standards for waterproofing and drainage.
Taking the Leap Toward a Flawless Home
It is easy to get overwhelmed by the details, but remember that every expert was once staring at a gap in their hallway feeling frustrated. The difference between a DIY look and a professional finish is simply the willingness to take ten extra minutes on the corners. Whether you are performing shower repairs or laying down fresh LVP, focus on the prep and the terminations. You have the tools and the knowledge now to avoid the mistakes that cost me thousands early in my career. Your home deserves that extra level of care, and your knees—well, they’ll forgive you once you see the final result. Have you ever tried the hidden-miter return, or did you stick with the ‘caulk-and-pray’ method on your last project? Let me know in the comments below!