

I remember standing in my master bathroom last spring, scrubbing like my life depended on it. I had just finished a beautiful modern shower renovation, and I was determined to keep those white grout lines pristine. I grabbed a bottle of “industrial strength” cleaner, thinking more power meant a better clean. Ten minutes later, I didn’t just have clean grout; I had grout that was literally shedding. I had stripped the sealer right off, leaving the porous cement wide open to mold and stains. It was a heart-sinking moment where I realized my deep clean had actually caused more damage than the soap scum ever could. We spend a lot of money and effort on upgrading our bathrooms, yet we often sabotage the longevity of the work by using the wrong tools for maintenance. Today, I am going to show you how to get that sparkling finish without undoing the protective barrier you worked so hard to apply. We are going for a method that preserves the integrity of your tile work so you do not end up wondering why your tile grout is cracking sooner than it should.
Ditch the Acidic Cleaners Before They Do Permanent Damage
Most people reach for vinegar or lemon-based solutions because they sound natural and safe. In reality, these acidic substances are the natural enemies of grout sealer. I learned this the hard way when I noticed my grout started looking chalky and dull just weeks after a deep cleaning session. According to the Tile Council of North America (TCNA), using cleaners with a pH that is not neutral can gradually break down the chemical bonds in most sealers. This leaves your grout vulnerable to moisture, which is exactly how you end up with those nasty dark spots you can never seem to scrub away. You want a solution that lifts the dirt but leaves the sealer alone. It is a delicate balance, but it is totally doable with common household items and a little bit of patience. Have you ever tried a guaranteed cleaner only to find it left your floors looking worse than when you started?
Can a Gentle Cleaner Actually Beat Tough Mildew?
It is the biggest worry I hear from my neighbors: if I am not using bleach, am I really getting it clean? The answer is a resounding yes, but you have to change your technique. We are not just blasting the surface; we are emulsifying the oils and dirt. When I first switched from harsh chemicals to a pH-neutral approach, I was skeptical too. I thought I needed that stinging chemical smell to know the job was done. But once I saw the water beading on my grout lines months later—a sign the sealer was still fully intact—I was a convert. Using a soft-bristled brush instead of a wire one also saved me from the tiny scratches that eventually trap more dirt.
Let Steam Soften the Grime First
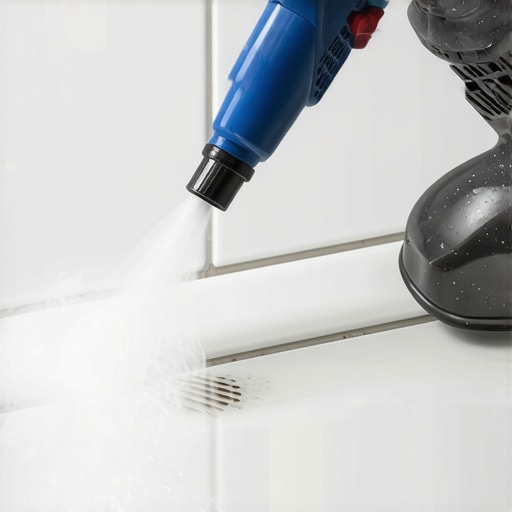
One of the most effective ways to clean without chemicals is using high-heat steam. Steam works like a key in a lock; it expands the pores of the grout just enough to release the trapped oils and soap scum without needing to dissolve the sealant. I once spent four hours on my hands and knees in a guest bathroom using a “miracle” paste I found online. It was basically abrasive sand that stripped everything down to the raw cement. Had I used a steamer, I would have saved my back and my grout. When you use steam, you aren’t fighting the dirt; you’re making it let go on its own. High-pressure steam penetrates deeper than any surface wipe ever could, reaching the microscopic valleys where mold starts to take root. This is especially vital if your shower niche is collecting water, as these recessed areas often lack the airflow needed to dry out properly.
The Soft Brush Strategy for Long-Lasting Tile
Forget those stiff wire brushes you see in the hardware store’s cleaning aisle. Those are for cleaning grill grates, not your shower renovation. Scrubbing your grout with a wire brush is like brushing your teeth with a metal file; it gets the job done, but you won’t have any enamel left. I prefer a medium-firm nylon brush. It is flexible enough to get into the micro-textures of the grout without scratching the glazed surface of your tiles. I remember trying a DIY “miracle” paste of baking soda and a stiff wire brush in my first apartment. I scrubbed so hard I didn’t just remove the stain; I actually hollowed out the grout line until it looked like a tiny canyon. By the end of the week, those gaps were holding more water than the tiles themselves. If you notice your corners are looking rough, remember the silicone only rule for shower corner joints—scrubbing hard in those 90-degree angles can tear the caulk.
Use Two Buckets to Stop Recycling Dirt
The biggest mistake people make is cleaning with dirty water. If you are using one bucket, you are just moving liquid dirt from the floor back into the porous grout. This is why floors often look “hazy” after a mop. I use a two-bucket system: one for my pH-neutral cleaning solution and one for clean rinse water. This ensures that when you wipe the surface, you are actually removing the suspension of dirt. It is a simple tactic that prevents the need for more aggressive cleaning later. If you are dealing with a sloped floor, always clean from the highest point down to the drain to keep the wastewater moving. You can check the efficiency of your layout using the slope check tactic for shower floors. Proper drainage is key to a low-maintenance bathroom, often starting with the dry pack method for a level shower base during the initial build.
Test Your Sealant Regularly to Avoid Deep Stains
Cleaning is only half the battle. If you drop a bead of water on your dry grout and it soaks in immediately, your sealer is gone. No amount of cleaning will keep it white if the “pores” are open to the world. You want the water to bead up like rain on a freshly waxed car. If your cleaning reveals damaged areas that scrubbing won’t fix, you might need to know how to replace a single broken tile without total demo rather than just applying more pressure. Once the grout is clean and bone-dry, applying a high-quality penetrating sealer will buy you another year of easy maintenance. It is much easier to re-seal a clean surface than it is to grind out stained grout because you waited too long to protect it.
But beyond just keeping things clean, there is a whole world of installation nuances that most homeowners—and even some ‘pros’—completely overlook. I have seen beautiful modern shower renovations ruined because the installer did not understand how moisture moves through a home. It is not just about the surface; it is about the structural integrity you cannot see.
The Dangerous Myth of the Super-Soft Carpet Pad
Most people think that if they want a cozy living space, they should buy the thickest, squishiest carpet pad available. It sounds logical: more foam equals more comfort. However, this is one of the most common flooring installation mistakes to avoid. In my years of consulting on residential projects, I have seen five-thousand-dollar carpet jobs ruined by a luxury pad that was simply too soft. The Carpet and Rug Institute (CRI) actually warns in their standards that residential padding over 7/16 of an inch can cause excessive flexing in the carpet backing. This constant bending eventually snaps the latex bond that holds the fibers in place, leading to permanent wrinkles and ripples that no mechanical tool can fix. You want density, not just thickness, to ensure you are achieving flawless results every time. 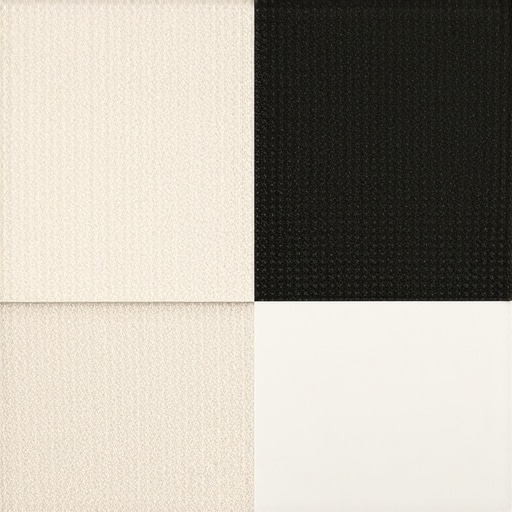
Can your subfloor be too dry for an installation?
While we usually worry about moisture, the real danger is often a lack of testing. Many DIYers assume a concrete floor that looks dry is ready for vinyl or hardwood. But the ‘oops’ factor here is the vapor trap. If you do not perform a calcium chloride test, you might trap moisture that is still migrating out of the slab. This is precisely why your luxury vinyl is peeling up at the seams. The moisture has nowhere to go, so it turns into a gas, creates pressure, and destroys your adhesive bond from the bottom up.
Stop cutting your baseboard corners at forty-five degrees
If you are still using a standard miter cut for your inside corners, you are making your life much harder than it needs to be. Homes are rarely perfectly square. When you use a standard 45-degree cut, the seasonal expansion of your home will almost certainly cause those gaps to open up. Instead, professionals use the coped join tactic. By cutting one piece square and ‘coping’ the profile of the other with a handsaw, you create a joint that stays tight even when the walls shift. This is the difference between a project that looks like a weekend DIY and one that looks like a professional flooring transformation. Without it, you will likely find your baseboards are pulling away from the wall by next winter.
The expansion gap is not a suggestion
I recently walked into a home where the laminate was literally tenting in the middle of the room. The owner had installed it perfectly tight against the walls, thinking it looked cleaner. But wood and laminate are living materials; they breathe. If you do not respect the expansion gap secret, your floor will have no choice but to push upward when the humidity hits. It is a heart-breaking mistake because once the locking mechanisms are bent from the pressure, the floor is usually garbage. Have you ever fallen into this trap? Let me know in the comments.
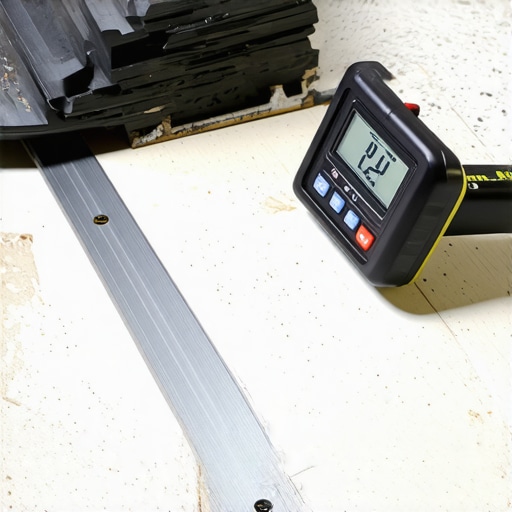
I used to think that ‘pro-grade’ tools were just a marketing gimmick designed to separate DIYers from their hard-earned cash. That changed the moment I saw a veteran installer pull out a 6-foot aluminum straight edge. He didn’t just glance at the floor; he spent forty minutes sliding that tool across every square inch of the subfloor. It was a lesson in humility. If you want to avoid the ‘clacking’ sound of floating floors, you absolutely must perform the straight edge test for vinyl plank subfloors. I now keep a dedicated 6-foot level in my truck specifically for this purpose because a standard tape measure simply can’t tell you if you have a 1/8-inch dip that will eventually cause a locking joint to fail. This meticulous prep is the only way to avoid the self-leveler mistake that creates new high spots, which is a nightmare to sand down once it cures.
The Pro Toolset You Actually Need
Beyond the basics, there are a few technical items I won’t start a project without. First is a high-quality pinless moisture meter. According to the National Wood Flooring Association (NWFA) technical manual R300, moisture is the leading cause of floor failure, and guessing is never an option. Before I even think about laying padding, I use the moisture meter test for concrete subfloors to ensure the slab isn’t exhaling water vapor that will rot my carpet from the inside out. For carpets specifically, I’ve stopped relying on my knee kicker for everything. The physical toll is too high, and the results aren’t as permanent. If you’re serious about a tight fit, you need to understand the power stretcher vs knee kicker debate—a power stretcher is the only way to guarantee your carpet won’t look like a topography map in three years.
How do I maintain my floors and showers long-term?
Maintenance isn’t just about cleaning; it is about inspection. Once a year, I take a plastic putty knife and gently poke at the silicone in the corners of my shower. If it feels hard or brittle, it is time for a refresh. Don’t wait for a leak in the ceiling downstairs to realize your waterproofing has failed. You should regularly consult a guide on shower repairs—when to fix vs replace for longevity to stay ahead of structural issues. For your carpets, the biggest long-term win is the way you handle seams. I’ve seen seams pull apart because the installer rushed the iron. I personally spend extra time on the iron temperature secret for flat carpet seams, ensuring the adhesive melts into the primary backing without scorching the fibers. It’s a slow process, but it’s the difference between a seam that lasts twenty years and one that fails in twenty months.
Looking Toward the Future of Home Installation
I predict that in the next few years, we are going to see a massive shift toward ‘smart’ underlayments and moisture-sensing adhesives. We are already seeing high-performance products like polyaspartic garage floor coatings replacing traditional epoxies because they handle temperature swings so much better. The trend is moving toward materials that move *with* the home rather than fighting against it. Whether you are dealing with baseboards or high-end tile, the goal is always flexibility. Go grab a 6-foot straight edge today and check your subfloor—even if you aren’t ready to install yet, it is the best $40 you will ever spend to understand the ‘bones’ of your home and ensure a professional flooring transformation that actually lasts.
The Expensive Lessons That Changed My Home Projects Forever
Looking back at my first few attempts at home improvement, I realize I was focused on the wrong things. I thought speed meant skill. I’ve learned that a project’s success is determined weeks before the first tile is laid or the first nail is driven. Here are the three pillars I live by now to ensure every bathroom upgrade lasts for decades:
- Stop Fighting Physics: Materials expand and contract. Whether it is a laminate floor or a run of baseboards, if you do not leave room for movement, the house will make that room for itself by cracking or buckling.
- Preparation is 90% of the Work: I once spent three days fixing a “clacking” vinyl floor that could have been avoided with twenty minutes of floor leveling compound.
- The Gentle Approach Wins: Harsh chemicals are the enemy of longevity. A well-maintained surface lasts; a “deep-cleaned” surface with the wrong acids will strip your sealer in months.
#IMAGE_PLACEHOLDER_E#
Tools I Use to Get a Finish That Actually Lasts
If you are planning to choose the right carpet for a cozy living space, do not stop at the aesthetics. My toolkit always includes a high-density moisture meter and a reliable pH-neutral cleaner. For any DIYer, I highly recommend checking out the 2025 guide on the best carpet types for high traffic areas to ensure you are not setting yourself up for premature wear. Also, follow a step-by-step flooring installation plan; skipping a phase like subfloor testing is the most common reason for post-install regret and structural failures.
Take the First Step Toward Your Own Professional Result
The transition from a “home project” to a professional-grade masterpiece is not about natural talent; it is about patience and using the right methods. You do not need a massive budget to achieve a durable flooring installation for a stylish home—you just need to respect the materials you are working with. Whether you are tackling a shower renovation or freshening up your trim with a baseboards makeover, remember that the small details define the final look. The goal is a home that feels solid and stays beautiful through the seasons. Have you ever had a moment where a “simple” cleaning job or a quick floor repair turned into a major learning experience? Let me know about your DIY wins or “oops” moments in the comments below!