

I remember standing in my guest bathroom three years ago, staring at a wall of half-set subway tiles that looked less like a modern masterpiece and more like a melting cake. I had used a high-quality bubble level, a sharp pencil, and a lot of caffeine. Yet, somehow, by the time I reached the fifth row, my grout lines were drifting upward like a balloon in a breeze. I spent six hours that night scraping thinset off the drywall, defeated by the simple fact that my eyes—and my tools—had lied to me. It was a messy, expensive lesson in how a house is never truly square, and gravity is a cruel mistress when you are trying to achieve a luxury shower renovation on your own.
The Day My Subway Tile Taught Me a Lesson in Humility
That failure led me to the single best investment I ever made for my tool kit: a self-leveling cross-line laser. I used to think these were just for professional contractors or people with way too much money to spend at the big-box stores. I was wrong. The moment I clicked that red beam on and saw it paint a perfectly steady, glowing line across three walls at once, I realized I had been doing flooring installation the hard way for a decade. Today, I want to walk you through how this one little hack can turn a stressful weekend project into a professional-grade finish that won’t have you cringing every time you step into the shower.
Is Dropping Cash on a Laser Level Truly Necessary for Beginners?
You might be skeptical. I get it. We’ve been told for generations that a spirit level is all you need. But here is the reality: according to the Tile Council of North America (TCNA), even a 1/16-inch deviation in your first row can compound into massive “lippage” or alignment issues as you move up the wall. If you are working with large-format tiles, the margin for error is practically zero. A laser level removes the guesswork and the constant recalibrating. Have you ever reached the end of a long wall only to realize your “straight” line was actually a slow-motion curve? It’s a gut-punch that I’ve felt more times than I’d like to admit, especially when I was first learning mistakes to avoid for a seamless look.
Set It and Forget It for a Flawless Layout
The beauty of this hack isn’t just about the straight lines; it’s about the speed. When I finally embraced the laser level move for horizontal tiles, my setup time dropped by 70%. Instead of constantly pausing to check my bubble, I could focus on my thinset comb technique and ensuring every tile was tucked tightly against its neighbor. I once tried to “eyeball” the last row of a backsplash because I was in a rush, and I ended up having to use a spacer block move just to hide the gaps near the cabinets. Don’t be like younger me. Let the light guide you, and let’s get into the nitty-gritty of how to actually set this thing up for success.
Find the Lowest Point Before Your First Row
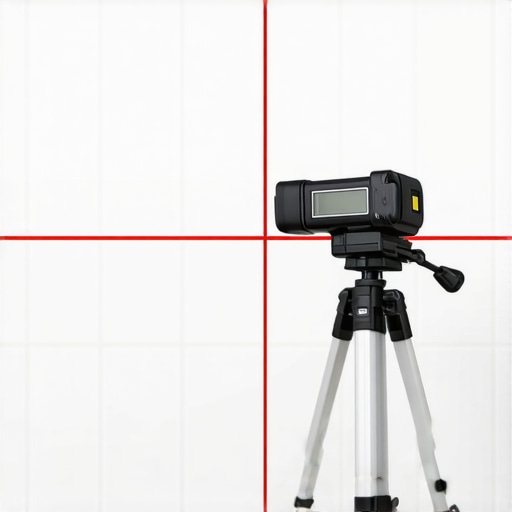
The biggest mistake DIYers make is starting their first row of tiles right on the floor or the tub rim. Houses settle, and I can almost guarantee your shower pan or floor isn’t perfectly level. If you start crooked at the bottom, every tile above it will be a nightmare. I use the laser level move for perfectly horizontal shower tiles to find the ‘lowest high point’ of the floor. Set your laser to project a line around the entire room. Measure down to the floor at various spots; wherever the distance is the smallest, that is your benchmark. If you simply start at the floor, by the time you reach the shower head, your tiles might be slanted like the Leaning Tower of Pisa. I once ignored this during a guest bath remodel and had to cut ‘wedges’ of tile for my top row that looked absolutely amateur. Instead, strike a line exactly one tile-height up from that low point and screw a temporary ledger board to the wall. This gives you a rock-solid, level base to stack your tiles upon.
The Vertical Line That Saves Your Corners
Once your horizontal baseline is locked in, you need to worry about the vertical. A laser level allows you to project a plumb line right into the corner. I learned this the hard way during a laundry room project where I realized—four rows in—that my tiles were slowly ‘stepping’ away from the corner bead. By using the symmetry start secret for subway tile layouts, you can center your vertical laser line in the middle of the wall. This ensures that the cut tiles on both the left and right corners are exactly the same size. It creates a balanced, professional look that separates a ‘weekend warrior’ job from a master craftsman’s work. It’s like having an invisible guide that never gets tired or misreads a bubble, allowing you to focus on the proper application of mortar without second-guessing your placement.
How a Red Beam Fixes Wavy Baseboards
You might think lasers are overkill for wood, but have you ever tried to install five-inch baseboards against a wall that looks like a bag of potatoes? This is where the razor scribe method for baseboards on wavy drywall becomes your best friend. By projecting a level line slightly above where the top of the baseboard should be, you can see exactly where the wall bows out or dips in. I remember a living room job where the floor dipped nearly half an inch near the fireplace. Instead of just nailing the board down and leaving a massive gap, I used the laser to mark my ‘true level’ and then scribed the bottom of the wood to follow the floor’s contour. This same precision is vital when you are navigating carpet install secrets to ensure your transitions are flush and even. A laser beam doesn’t bend, which forces you to address the imperfections of your home rather than just hiding them.
Mastering the Subfloor Before the Finish
Before you even think about the pretty stuff, use that laser to check your subfloor for flatnes. During a kitchen remodel last summer, I fired up my cross-line laser and saw a dip in the plywood that looked like a small crater. If I had ignored it, my vinyl planks would have clicked and popped every time someone walked to the fridge. Knowing how to level a subfloor dip without removing the old subfloor is easier when the laser shows you exactly how much self-leveler you need to pour. Pair that with the trowel notch secret for better tile adhesion, and you are building a foundation that won’t fail. This level of preparation is the secret ‘meat’ of any high-end flooring installation. It turns a job that looks ‘okay’ into a renovation that feels solid underfoot for decades.
While the laser level is a game-changer, achieving a true masterpiece requires understanding the chemistry and physics happening beneath the surface. I often see DIYers obsess over the visible tile pattern while completely ignoring the ‘transfer’ of the adhesive. Everyone tells you that a thick bed of mortar is the solution to an uneven wall, but in reality, excessive thinset shrinks as it cures, pulling the tile and creating the very lippage you were trying to avoid. To prevent this, you must follow the full bed mortar rule for large format shower tiles. According to the Tile Council of North America (TCNA), you need at least 95% coverage in wet areas to prevent water from pooling in air pockets behind the tile, which is the leading cause of mold growth and bond failure. I learned this when I pulled up a ‘loose’ tile six months after a job and found a stagnant, smelly swamp living underneath it.
Why is Your Shower Grout Crumbling After Only Six Months?
It’s easy to blame the product, but the culprit is usually the ‘too much water’ trap. We all want the grout to be easy to spread, so we mix it like a milkshake. This creates microscopic air bubbles that collapse once the water evaporates, leaving you with brittle joints. If you find yourself in this situation, you’ll need to know why your shower grout is crumbling just months after install before you try to patch it. The secret is the ‘slake’—letting the grout sit for ten minutes after mixing so the chemicals can fully react. It’s a test of patience I failed many times before I realized that ‘fast’ is the enemy of ‘forever.’ Have you ever fallen into this trap and had to regrout a shower far sooner than expected? Let me know in the comments.
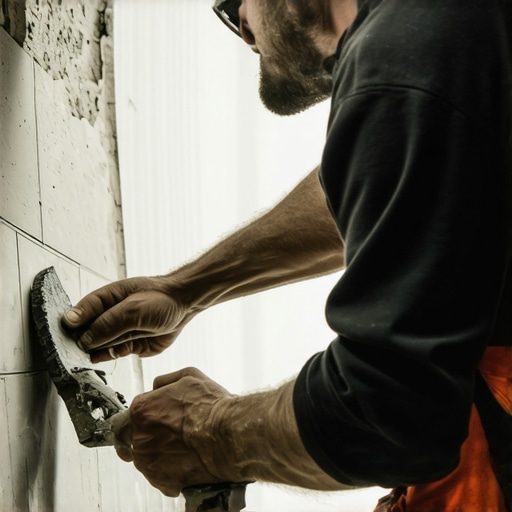
When we move from the shower to the living areas, the challenges shift from moisture to movement. A common myth in expert flooring installation tips for 2025 is that you can simply run your flooring tight against the walls for a ‘clean’ look. This is a recipe for disaster. Every house breathes, and without the expansion joint rule for large tile floors, your beautiful new surface will eventually buckle or ‘tent.’ I’ve seen thousand-dollar floors ruined because the installer didn’t leave a 1/4-inch gap behind the baseboards. Speaking of trim, if you want that high-end finish, stop miter-cutting your inside corners. Instead, use the inside corner cope for perfect baseboard installs. Coping allows one board to nest inside the other, meaning when the house settles or the wood shrinks in winter, you won’t see those ugly black gaps at the corners.
The Invisible Tension in Your Carpet Installation
Finally, let’s talk about the ‘crunch’ factor. Most homeowners think a carpet ripple is just a sign of age, but it’s actually a sign of a lazy install. If your installer didn’t use a power stretcher, they did it wrong. Knee kickers are for positioning, not for stretching. Without the power stretcher move to fix loose carpet bubbles, the backing will never be under the proper tension required by the Carpet and Rug Institute (CRI). I once watched a ‘pro’ finish a room in 20 minutes with just a kicker, and three years later, the floor looked like the rolling waves of the Atlantic. It’s these small, hidden nuances—the moisture in the mortar, the gap behind the trim, and the tension in the fiber—that separate a basic flooring installation from a professional renovation that lasts a lifetime. Even in the bathroom, don’t forget the silicon bead secret for waterproofing baseboards in bathroons to keep your trim from rotting from the bottom up.
I’ve learned over the years that the most expensive tool you’ll ever buy is the one you didn’t use when you should have. We spend so much time picking out the perfect tile or the right wood grain, but we rarely talk about the invisible forces—moisture and movement—that try to tear it all down the moment we pack up our bags. If you want your hard work to survive, you have to move beyond the basics and start thinking like a forensic engineer for your own home. It’s not just about getting the job done; it’s about ensuring you aren’t looking for shower repairs in three years because of a shortcut you took today.
The Tool That Tells You What Your Eyes Can’t See
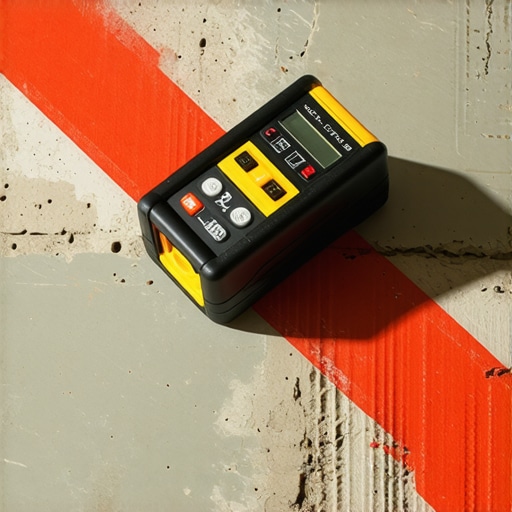
When I’m tackling a basement project, my most trusted companion isn’t my saw—it’s my moisture meter. You can’t look at a concrete slab and know if it’s dry enough for luxury vinyl or hardwood. According to the National Wood Flooring Association (NWFA) technical guidelines, failing to perform an ASTM F2170 relative humidity test is the number one cause of adhesive failure in below-grade installs. I’ve seen beautiful planks peel up like old stickers because the installer skipped the moisture meter requirement for basement flooring jobs. Investing in a high-quality pinless meter saves you from the heartbreak of watching your investment buckle. It’s about building a foundation that respects the science of your home, ensuring a durable flooring installation that actually stays put.
How do I keep my floors and shower looking new for years?
Maintenance isn’t just about cleaning; it’s about preventative protection. For showers, I always tell people that the grout isn’t finished until it’s sealed. Use the pre-seal move for shower grout to stop stains before they even have a chance to soak in. If you want that professional, clean look that lasts, I highly recommend mastering the silicone wash trick for easy grout cleanup. It prevents that hazy residue that makes new tile look old after just a few weeks. When it comes to your living areas, be mindful of the sun. I’ve seen homeowners devastated by vinyl floor fading in front of patio doors. Using UV-rated window films or simply rotating your area rugs can prevent your floor from developing ‘tan lines’ that are impossible to fix without a full replacement.
Future Trends in Home Longevity
Looking ahead to the next decade, I predict we will see a massive shift toward ‘smart’ subfloors and bio-based, carbon-sequestering adhesives that are far more flexible than the rigid glues we use today. We are already seeing baseboard trends in 2025 focusing on moisture-resistant composites that won’t swell in high-humidity environments. This evolution means our homes will be better equipped to handle the natural expansion and contraction that used to cause cracks and gaps. If you want to elevate your craftsmanship right now, I challenge you to try the silicone wash trick on your next backsplash or shower floor. It’s an advanced move that drastically reduces your cleanup time and results in the sharpest joints you’ve ever seen. Don’t just build for the weekend; build for the next generation.
The Expensive Lessons That Taught Me to Respect the Process
If there is one thing a decade of dust and debris has taught me, it’s that patience is a physical tool just as much as a hammer is. I used to rush the small stuff, thinking I could hide my mistakes with a bit of extra caulk or a cleverly placed rug. I was wrong every single time. One of my biggest lightbulb moments was realizing the importance of environmental prep; failing to run the acclimation test for avoiding hardwood floor gaps is the fastest way to turn a premium floor into a noisy, gapped mess. Another hard truth? Subfloors are never as flat as they look. I now swear by the double glue method for vinyl on plywood to ensure total stability in high-traffic areas. These aren’t just extra steps; they are the insurance policy for your hard work.
The Arsenal of Tools That Make a Pro-Grade Finish Possible
You don’t need a warehouse full of equipment, but you do need a few specific items that never lie to you. First, get a high-quality moisture meter—it is non-negotiable for anyone tackling a basement or kitchen remodel. Second, if you are doing trim work, ditch the miter saw for inside corners and master the coping saw technique for flawless inside baseboard corners. It is the difference between a gap that opens every winter and a joint that stays tight forever. I also highly recommend keeping the TCNA Handbook nearby if you are diving into a shower project; it is the industry bible for a reason. Finally, always have a fresh supply of painters tape for the blue tape trick for cleaning up silicone beads—it is the easiest way to get that crisp, clean line that looks like it was done by a seasoned craftsman.
Take the Leap and Build Something Beautiful
Renovating your home is intimidating, but there is an incredible sense of pride that comes from walking across a floor you laid yourself or stepping into a shower you tiled with your own hands. Don’t let the fear of a ‘mistake’ stop you from starting. Most errors are fixable if you catch them early and respect the physics of the materials you are using. By following expert flooring installation tips for 2025, you are already miles ahead of the average DIYer. Your home is your sanctuary, and the care you put into these hidden details will pay off in comfort and value for years to come. So, get your laser level out, trust your measurements, and start building.
Have you ever reached the end of a project only to realize you skipped a small prep step that caused a major headache later? Let me know in the comments below!