

Every time I crept down the stairs at 2 AM for a glass of water, that third tread barked like a territorial dog. It wasn’t just a noise; it was a physical dip that made my heart skip a beat. For years, I assumed the only fix was a full-blown demolition—the kind that leaves your home caked in fine dust and your bank account significantly lighter. I’ve seen enough flooring installation mistakes to avoid to know that once you start ripping wood off, you usually find a dozen more expensive problems lurking underneath. But I’m here to tell you that you don’t need a sledgehammer to get a silent, sturdy staircase. We’re going to fix this from the surface, keeping your sanity and your trim intact.
Stop the Squeak without Demolishing Your Stairs
Early in my DIY journey, I made a classic rookie move. I thought more nails equaled more stability, so I hammered about twenty finish nails into a loose tread. A month later, those nails started creeping back up like little jagged needles, and the squeak was louder than ever. I felt like a total failure. I’d spent hours perfecting carpet install secrets in the bedrooms, yet I couldn’t handle a simple piece of oak. The reality is that nails have no clamping power. To fix a loose tread, you need to pull the wood tight against the stringer and keep it there. It’s a very similar logic to the subfloor screw routine for stopping floor squeaks that we use in hallways. Friction is the enemy, and a loose tread is essentially a giant wooden instrument playing a song you never want to hear. Have you ever felt that terrifying thunk where the step actually shifts under your weight? Tell me I’m not the only one who has nearly spilled a full cup of coffee because of a wobbly tread!
Is This Fix Actually Strong Enough to Last?
I get the skepticism—it feels like a shortcut. But sometimes the shortcut is actually the superior engineering choice. According to the National Safety Council, falls are the leading cause of injury-related death for adults age 65 and older, and poorly maintained stairs are a significant risk factor. By using specialized trim-head screws or the plug and bore method, we can create a permanent mechanical bond that nails simply can’t match. It’s the same level of precision I recommend when discussing the stair nose secret for durable vinyl staircases. We aren’t just hiding the problem; we are reinforcing the structure from the outside in. Even if your stairs are finished with fabric, you can often use the same techniques found in our guide on how to fix a squeaky subfloor through the carpet to reach the wood without leaving a trace. Today, I’m going to show you exactly how to drill, drive, and disappear those fasteners so your stairs feel as solid as a concrete slab.
Locate the Support Before You Drill
Before you start putting holes in your beautiful hardwood, you have to find the stringer. The stringer is the backbone of your staircase, the heavy timber that actually carries the weight. If you miss it, you’re just spinning your wheels and creating more work for yourself later. I remember a humid July afternoon spent on a client’s Victorian staircase where I missed the stringer three times in a row because I was eyeballing it. By the third hole, I realized the original builder had spaced them irregularly. It was a mess that required far too much wood filler. Now, I always use a stud finder or the old-school tap-and-listen method to be certain. Identifying the support structure is just as critical as why your floor joists need blocking before tile installation. You need a solid foundation to bite into, or the repair won’t last a week.
The Pre-Drill Rule to Save Your Wood
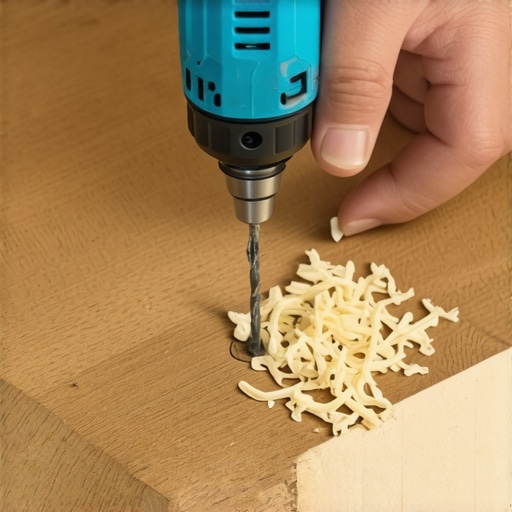
Never, under any circumstances, drive a screw directly into a stair tread without a pilot hole. Stair treads are often made of dense hardwoods like oak or maple, which are prone to splitting under pressure. Think of it like trying to force a wedge into a block of ice; eventually, it’s going to crack. By pre-drilling, you remove the material to make room for the screw, allowing the threads to grip the wood without blowing out the grain. This is essentially the same logic we apply in the pre-drill rule for wide baseboard installations. Use a bit that is slightly smaller than the shank of your screw. If you’re worried about depth, wrap a piece of blue painter’s tape around the drill bit to mark exactly how deep you need to go so you don’t punch through the stringer entirely.
Drive Your Fasteners with Precision
Once your pilot holes are ready, it’s time for the heavy lifting. I highly recommend using specialized trim-head screws. These have tiny heads that sink below the surface of the wood, leaving a hole no bigger than a finishing nail but providing ten times the holding power. As you drive the screw, you’ll likely hear a satisfying ‘crunch’—that’s the tread being pulled tight against the stringer. It’s the exact same mechanical bond used in the subfloor screw routine for stopping floor squeaks. If the tread still feels a bit spongy, you might need to add a second screw about an inch away from the first to distribute the load. This prevents the wood from pivoting, which is one of the most common flooring installation mistakes to avoid when dealing with vertical transitions.
Make the Repair Disappear
The goal is to make it look like you were never there. After the screws are countersunk about an 1/8th of an inch, use a high-quality wood putty that matches your stair finish. Don’t just smear it on; pack it in tight with a putty knife. I’ve found that mixing a little bit of the actual sanding dust from your stairs into the putty creates a near-perfect color match. This attention to detail is what separates a DIY hack from a professional-grade fix, similar to how we handle how to fix a loose floor tile without a full demolition. Once it’s dry, a light hand-sanding with 220-grit sandpaper will flush it up perfectly. If you are working with newer materials, you can even find baseboard trends in 2025 fresh styles for every room that offer matching trim kits to hide larger structural reinforcements if your stairs are particularly far gone.
The Myth of the ‘Magic’ Caulk Line
Most DIYers think a thick bead of caulk can hide any sin. I’ve been there, thinking a little extra white goo would mask a sloppy miter cut. But here’s the contrarian truth: if you rely on caulk to bridge a gap larger than an eighth of an inch, you’re setting yourself up for a mess. Within one change of season, that caulk will pull away from the wall or the wood. This is exactly why your caulked baseboards are cracking within weeks. The wood expands and contracts while the caulk, though flexible, eventually loses its bond. Instead of reaching for the tube, you should be focusing on the structural fit. This is where the back-bevel move for tight baseboard miters comes into play. It’s an advanced technique that ensures the front edges of your trim touch perfectly, even if the wall behind them isn’t square.
Should You Really Glue and Screw Your Treads for Maximum Silence?
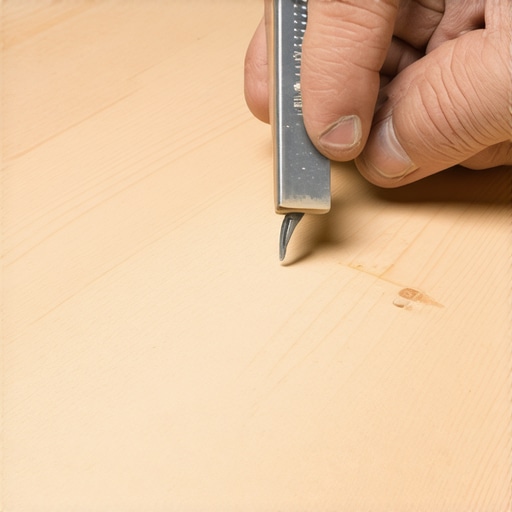
I often get asked if using both adhesive and mechanical fasteners is overkill. The answer is a resounding no, but only if you use the right materials. A common ‘trap’ I see is people using standard construction adhesive that dries rock-hard. When the wood inevitably shifts due to humidity, that rigid glue line snaps, creating a new, even louder clicking sound. To avoid this, I always use a ‘glue-assist’ method with a moisture-cure urethane. According to the National Wood Flooring Association (NWFA), wood can expand up to 1/8 inch across a 12-inch span depending on the species and relative humidity. By using a flexible adhesive, you allow the wood to breathe without breaking the bond. This is a higher-level version of the glue-assist strategy for wide plank hardwood installs that pros use to prevent gaps in the floor. Have you ever fallen into the trap of using the wrong glue and hearing that dreaded snap later? Let me know in the comments.
Avoid the Deadly Trap of the Missing Expansion Gap
One of the biggest mistakes I see—even among experienced renovators—is installing everything too tight. It feels intuitive to butt your flooring right up against the drywall, but that is a recipe for disaster. Without a proper perimeter, your floor has nowhere to go when the humidity rises. This leads to ‘tenting,’ where the planks literally lift off the subfloor. It’s vital to understand why you need a perimeter expansion gap for vinyl planks and hardwood alike. If you’re worried about the gap being visible, that’s exactly what your baseboards and shoe moldings are for. You are essentially building a floating system that needs room to dance. It’s a nuanced balance: you want the treads of your stairs to be rock-solid, but the flooring at the top and bottom needs its space. If you ignore this, you’ll find yourself looking at flooring installation mistakes to avoid after the damage is already done. Even when working with adhesives, such as the pressure-sensitive glue rule for vinyl tile, the principle of movement remains king. Stick to the ‘penny gap’ rule, and your floors will stay flat for decades.
Maintaining that silence in your stairs or the tight fit of your baseboards isn’t just about the first week; it’s about the next decade. If you’re tackling a basement project, I cannot stress enough that you need a professional-grade moisture meter. I personally use a Wagner Meters Orion series because it doesn’t leave pinholes in my expensive oak treads. This is non-negotiable, especially when following the moisture meter requirement for basement flooring jobs. If your subfloor is even slightly too damp, that urethane glue won’t cure correctly, and you’ll be back to square one with a ‘crunchy’ floor. In the bathroom, your baseboards face a different enemy: standing water. Even the best install will rot if you don’t use the silicon bead for waterproofing baseboards in bathrooms. It’s a tiny detail that saves you from a massive headache three years down the road when you realize the MDF has swollen like a sponge. 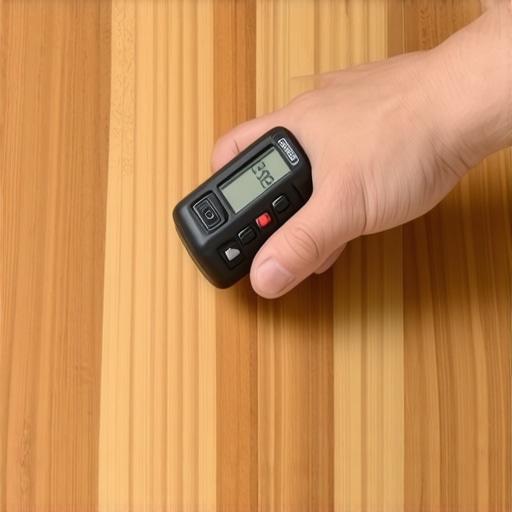
How do I keep my new flooring and trim looking professional for years?
The secret to longevity is environmental control. According to the NWFA’s Technical Publication C100, wood flooring performs best when the interior environment is controlled to stay within a relative humidity range of 30-50 percent. If you let your house dry out to 10% in the winter, you will see why your baseboard miters keep gapping in the winter. I always recommend homeowners invest in a whole-house humidifier to protect their investment. For daily cleaning, forget the heavy wet mops. Stick to the microfiber mist rule for cleaning matte floors to avoid dulling the finish or saturating the wood fibers. Looking ahead, I expect we will see more ‘smart’ subflooring components. We are already seeing prototypes of underlayments with built-in moisture sensors that alert your phone if a pipe leaks under your luxury vinyl. It sounds like sci-fi, but preventing a $10,000 floor replacement with a $50 sensor is the future of home maintenance. If you’re feeling bold, I want you to try the blue tape trick for cleaning up silicone beads on your next bathroom project. It’s the single best way to get that professional, factory-perfect line without making a sticky mess of your new baseboards.
Hard-Earned Truths from a Decade of Creaky Treads
Over the years, I’ve realized that a squeaky stair is rarely just a nuisance; it’s a symptom of a house that is constantly shifting. One of my biggest lightbulb moments was discovering stop hardwood squeaks with the powder lubricant trick, which works wonders for those tiny, high-pitched chirps that happen even after you’ve tightened the treads. I also learned the hard way that seasonal changes are brutal on joinery. If you don’t account for the environment, you’ll eventually find yourself asking why your baseboard miters are opening at the top every winter. My best advice? Never rush the ‘set’ time of your adhesives. Patience is the difference between a one-year fix and a lifetime solution.
#IMAGE_PLACEHOLDER_E#
The Trusted Kit for a Professional Finish
I don’t go into any repair without my ‘Big Four.’ First is a high-quality trim-head screw that disappears under the grain. Second is a reliable wood glue; I often use the urethane glue secret for hardwood on concrete logic even on stairs because it stays flexible. Third, for delicate trim work, I rely on the pin nail secret for delicate baseboard moldings to avoid splitting expensive wood. Finally, a set of grain-matched fillers is essential. If you ever have to patch a section, knowing how to match wood grain when patching old hardwood floors will make your repairs completely invisible to the naked eye.
Your Journey Toward a Solid Foundation Starts Now
Fixing your stairs and trim is about reclaiming the quiet and comfort of your home. It might feel intimidating to drill into your flooring installation, but remember that every pro started with a single pilot hole. By using these techniques, you aren’t just repairing wood; you’re preserving the integrity of your sanctuary. For more comprehensive advice, check out your guide to durable flooring installation for a stylish home. Have you ever successfully silenced a squeak only for it to return a month later? Let me know in the comments below.