

I walked into my living room on a sweltering Tuesday in July, and the floor literally groaned under my feet. The humidity was 90%, and my beautiful new laminate was bowing upward like a wave in the mid-Atlantic. I thought I’d done everything right, but I’d committed the ultimate flooring sin: I let my ego get in the way of physics. I wanted those planks to sit perfectly flush against the drywall because I thought it looked ‘pro.’ I didn’t realize that without a proper gap, my house was acting as a vice grip for my flooring materials. I spent days on that install, feeling like a DIY king, only to watch it buckle and ‘peak’ right where my guests were supposed to sit. It was visceral, frustrating, and honestly, a bit embarrassing. If you’re planning a weekend project, I’m here to make sure you don’t repeat my mistakes. Today, we are uncovering the ‘Expansion-Gap’ secret—the one thing that will keep your floors flat when the summer heat tries to ruin them.
The Day My Floor Decided to Become a Mountain Range
That ‘pop’ sound still haunts my dreams. It was the sound of a flooring installation mistake that could have been avoided with $5 worth of plastic spacers. When the summer humidity hits, materials like wood, laminate, and even some vinyls naturally expand as they absorb moisture from the air. If there is no room for that expansion to go, the energy builds up until the floor has no choice but to lift off the subfloor. I learned the hard way that a floor isn’t a static object; it’s a living, breathing thing that needs room to stretch its legs. I had to rip up my newly chosen baseboard styles just to get in there with a multi-tool and cut back the edges I’d spent hours making ‘perfect.’ It was a mess, but it taught me a lesson I’ll never forget: physics always wins.
Is That Ugly Gap Actually Necessary?
I get it. You look at that 1/4-inch or 1/2-inch gap at the edge of the room and think it looks unfinished or sloppy. You might even be worried about pests or dust bunnies hiding in there. But that gap is the insurance policy for your entire home’s aesthetic. According to the National Wood Flooring Association, wood can exert over 500 pounds of pressure per square inch when expanding against a restricted space—that is more than enough to snap a locking joint. If you ignore this, you’ll soon be wondering why your vinyl floor is bubbling in one specific spot despite you following the ‘click-lock’ instructions to a T. The gap isn’t a mistake; it’s a requirement.
Why Your House is Secretly a Vice Grip
Think of your home as a living container. In the winter, your heater runs, the air dries out, and your floorboards shrink, sometimes leaving small gaps. But in the summer, the opposite happens. Your floor is trying to grow, but your walls aren’t moving an inch. This creates a massive amount of pressure. If you have a large room, this pressure compounds. This is often where people make the t-molding mistake most vinyl installers make, which is running the floor through a doorway without a transition break. Without that break and the perimeter gaps, the floor eventually hits a wall and ‘peaks’ at the seams. It’s a heart-sinker to see your hard work literally rise up against you. Have you ever noticed your floor feeling ‘spongy’ or ‘bouncy’ during a particularly humid week? Tell me, have you faced that mysterious hump appearing under your rug overnight? That’s your floor telling you it’s out of room. We’re going to fix that today by walking through the exact measurements and tools you need to ensure your floor has the ‘breathing room’ it deserves.
Get Your Spacers Right from the First Row
Precision starts at the perimeter. You need a consistent 1/4-inch to 1/2-inch gap depending on the material manufacturer’s specs. When I was doing that living room job mentioned earlier, I thought I could eyeball it or use scraps of cardboard. I ended up with a gap that was too wide in some spots—where the baseboard couldn’t cover it—and non-existent in others. Now, I always use dedicated plastic spacers. If you are aiming for a step-by-step flooring installation from planning to perfect finish, do not compromise here. Spacers act like the bumpers on a bowling lane; they keep everything aligned and prevent the floor from drifting as you hammer planks together.
The Trick to Hiding the Gap with Style
Once your floor is down and those spacers are removed, you’re left with a moat around your room. This is where your trim choices save the day. You cannot nail the baseboards into the floor—that pins the material down and defeats the purpose of the gap. You must nail them into the wall studs. I prefer looking at baseboard styles that elevate your interior design to find something thick enough to cover the expansion space comfortably. If you find your gap is a bit too wide, or if you had to learn how to cut baseboards without a miter saw and ended up with slightly uneven lines, a piece of shoe molding is your best friend. It bridges the distance without restricting movement.
Why You Must Undercut Your Door Jambs
One of the hardest lessons I learned was trying to cut a complex shape in a plank to fit around a door frame. It looked terrible and left zero room for expansion. The professional move is to undercut the jamb. You lay a scrap piece of your flooring against the jamb and use a pull saw to cut the trim. This allows the floor to slide underneath the wall, hiding the expansion gap completely. However, be careful not to cut too high, as the door jamb saw mistake that leaves huge gaps is a nightmare to patch later. Sliding the plank under the jamb gives that built-in look while letting the floor breathe.
Break Up Huge Rooms with Transitions
If your room is longer than 30 feet, a single expansion gap at the walls might not be enough. The cumulative expansion of thirty feet of laminate is massive. You need to create breaks in the floor, usually at doorways or natural narrowings. Avoiding the t-molding mistake that ruins open-concept floors means accepting that a transition strip is a functional necessity. These strips allow two different sections of flooring to move independently. I once skipped a transition in a long hallway, and within six months, the floor had pulled itself apart in the center because the friction was too high for the perimeter gaps to handle.
Leveling the Field for a Quiet Floor
You can have the perfect gap, but if your subfloor is wavy, your floor will still fail. I’ve seen beautiful installs ruined because the homeowner ignored a minor dip in the plywood. When the floor expands into that dip, it creates a hollow sound or causes the locking joints to snap. Use a straight edge test for vinyl plank subfloors before you lay a single plank. If you find low spots, fill them with a self-leveling compound or use the feather edge tactic for smoothing subfloor seams. A flat subfloor ensures that when the material expands, it moves horizontally toward your gaps rather than buckling vertically.
The 48-Hour Acclimation Myth That Ruins Floors
Let’s dig deeper into why so many “pro” installs fail within the first year. Most DIYers—and honestly, some questionable contractors—believe that leaving unopened boxes of flooring in a room for 48 hours is enough. That is a dangerous half-truth. Acclimation isn’t a timer on a microwave; it’s a biological and chemical equilibrium. If you leave those planks wrapped in plastic, they aren’t acclimating to anything. I’ve seen entire levels of homes ruined because the material was ‘acclimated’ in a garage or a basement with different humidity than the living room. You need to use the moisture meter test for concrete subfloors and the wood itself to ensure the levels are within 2-4% of each other. According to the ASTM F2170 standard, ignoring the relative humidity inside a concrete slab is the leading cause of floor failure, regardless of how long the boxes sat in the room.
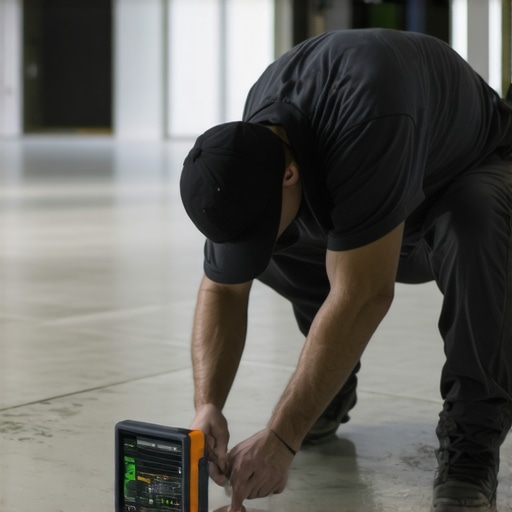
If you are working on a step-by-step flooring installation from planning to perfect finish, you must also consider what’s happening underneath. A common ‘trap’ is ignoring moisture migration from a crawlspace. You might have the perfect expansion gap, but if you didn’t use the underlayment tape move for moisture barriers, your floor is slowly drinking up ground water. This leads to cupping—where the edges of the planks sit higher than the center—a problem no amount of spacers can fix.
Why does my rigid core floor sound hollow even when it’s flat?
This is a question I get from homeowners who spent a fortune on high-end SPC or WPC vinyl. You did the straight edge test for vinyl plank subfloors and everything looked level, yet it still clicks and clacks like a tap-dance floor. The nuance here is often ‘micro-deflection.’ Even a 1/8-inch dip over ten feet can cause why your rigid core floor sounds hollow when you walk because the material is so stiff it can’t contour to the subfloor. Unlike flexible glue-down vinyl, rigid core needs an almost surgical level of flatness. If you miss this, you’ll be chasing ‘ghost noises’ for the life of the floor. Have you ever fallen into this trap? Let me know in the comments.
Stop Using Grout in the Corners of Your Shower
Moving into the bathroom, there’s a common belief that grout is the universal filler for all tile gaps. This is the fastest way to end up with leaks. Grout is rigid; houses move. When the wall of your shower expands at a different rate than the floor, that corner grout will crack. It’s the primary reason why your tile grout is cracking in the corners and eventually why why your shower niche is growing mold behind the tile. The pro secret is the silicone-only rule for shower corner joints. A high-quality 100% silicone sealant allows for movement while maintaining a waterproof seal. It’s a small detail that separates a ‘handyman’ job from a master installation.
The Invisible Danger of Baseboard Tension
When you’re finishing up, you might think slamming the baseboard tight against the floor creates a cleaner look. Don’t do it. If you pin the floor down with the trim, you’ve essentially created a ‘pinch point.’ This is often why your baseboards are pulling away from the wall or why the floor starts to buckle. I always leave a ‘nickel-thickness’ gap between the bottom of the baseboard and the flooring, then hide it with shoe molding if necessary. This ensures the floor can move freely. If you’re struggling with gaps in your trim, look into the miter clamp secret for professional baseboard corners rather than over-nailing the boards into the floor. Precision in the finishing stages is what keeps the physics of the expansion gap working in your favor.
Keep Your Investment from Falling Apart
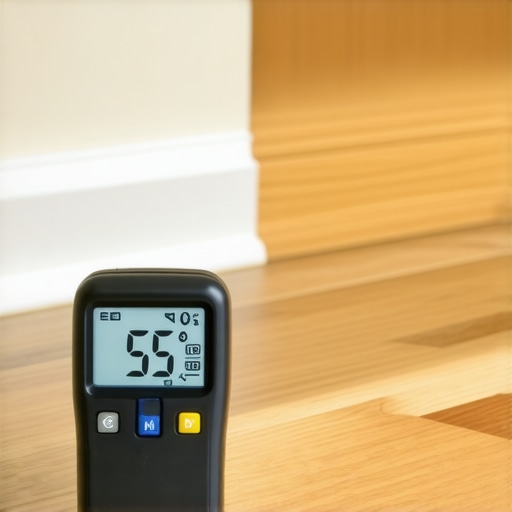
I’ve seen too many people spend five figures on a transformative flooring installation only to treat it like a sidewalk. Maintenance isn’t just about a mop and a bucket; it’s about understanding the mechanics of your home. For my own house, I keep a digital moisture meter in my toolbox. Why? Because your HVAC system is the real guardian of your floor. If your humidity spikes above 55%, your expansion gaps vanish and buckling begins. I personally use the Wagner Meters Orion series because it is non-destructive and doesn’t leave pinholes in my expensive planks. It’s the difference between guessing and knowing exactly why a board might be acting up in the middle of a humid July.
How do I maintain my flooring and showers for the next decade?
Long-term success is a game of prevention and specialized care. For carpets, everyone thinks a vacuum is enough, but according to the IICRC S100 standard (the gold standard for professional textile cleaning), professional hot water extraction every 12 to 18 months is mandatory to keep most manufacturer warranties alive. If you notice a ripple forming in a high-traffic area, don’t wait. You need to revisit the power stretcher vs knee kicker debate and get that carpet re-tensioned before the primary backing breaks down. In the shower, maintenance means inspecting your silicone corner joints weekly. If you see a tiny black speck, that’s the start of a moisture trap. Catching it early and knowing when to fix vs replace for longevity will save you from a full-scale mold remediation later.
The Smart Tech That Will Change How We Build
Looking ahead, I predict we’re moving toward ‘smart subfloors.’ We are already seeing prototype sensors that can be embedded under the underlayment to alert your smartphone if a pipe leaks or if subfloor humidity levels hit a danger zone. This is going to be massive for carpet install secrets, where padding often hides moisture until it’s far too late to save the floor. While we wait for that to become standard in every home, you can stay ahead by staying updated on baseboard trends in 2025, which are moving toward moisture-resistant composites that won’t swell or rot even in traditionally ‘wet’ rooms.
Make Your Next Move Count
Don’t just walk away once the last nail is in. I challenge you to grab a moisture meter today and check three different spots in your home: near the front door, the center of the kitchen, and your master bedroom. Understanding your home’s baseline humidity is the most powerful tool in your arsenal to ensure those expansion gaps stay exactly where they need to be. If you’re about to start a new project, make sure you’ve mastered the step-by-step flooring installation from planning to perfect finish to set yourself up for this level of long-term care and professional results.
What the Pro Handbooks Never Tell You About Living with Your Floor
After years of fixing my own messes, I’ve realized that a floor is more like a musical instrument than a static piece of furniture. It needs to be tuned to your environment. One lightbulb moment for me was realizing that expansion isn’t just about the heat of summer; it is also about the micro-climates in your home. For instance, the area near your dishwasher will expand differently than the area by your front door. I also learned that if you hear a floor ‘creak’ only in the afternoons, it is usually because sun-loading is hitting a specific spot and causing localized expansion. Another realization? Never trust a ‘pre-acclimated’ label on a box. Always assume the material needs to breathe in its final environment. Lastly, I stopped viewing the expansion gap as a ‘gap’ and started seeing it as the lungs of the room—it is what keeps the whole system alive and flat.
The Toolbelt Additions That Saved My Sanity
If you want to move beyond basic DIY, there are three things I never start a job without. First is a high-quality non-destructive moisture meter; it is the only way to truly know if your subfloor is ready for a durable flooring installation for a stylish home. Second, I always keep a tube of 100% silicone in my bag. Using it in corners instead of grout is why I no longer have to worry about why your tile grout is cracking in the corners. Finally, I recommend a set of professional-grade weighted spacers. Unlike the cheap plastic ones that slip out when you tap a board, these stay put and ensure your expansion gap remains consistent throughout the entire room. These tools turn a stressful weekend into a controlled, professional process.
Step Boldly Into Your Next Big Project
Starting a renovation can feel overwhelming, but remember that every master installer started with a single, slightly crooked plank. The secret to a professional finish isn’t perfection on the first try; it’s the patience to prep correctly and the wisdom to respect the physics of your materials. By prioritizing the expansion gap and following a step-by-step flooring installation from planning to perfect finish, you are building a floor that will stand the test of time and temperature. You have the knowledge now to avoid the buckles and the breaks—so go ahead and peel back that old carpet. Your dream home is waiting just beneath the surface. Have you ever encountered a mysterious floor buckle that seemed to appear out of nowhere? Let me know your flooring horror stories in the comments below!