

I stood there in my half-finished kitchen, sweat stinging my eyes, staring at a $400 sheet of high-end vinyl that was currently stuck to my forearm and the subfloor in all the wrong places. It was supposed to be a simple weekend project, but the full-spread adhesive I’d obsessively troweled down was curing faster than I could move. I ended up with a permanent wrinkle right in front of the fridge that mocked me every time I went for a snack. It was a classic case of flooring installation mistakes to avoid for a seamless look, and it’s why I finally switched to the perimeter-glue method for large vinyl sheets. It’s easier, cleaner, and much more forgiving for us mere mortals.
Stop Fighting with Your Flooring and Start Perimeter Gluing
The beauty of the perimeter-glue method—often called loose-lay with a twist—is that it recognizes a simple truth: large sheets of vinyl want to move. When you try to lock down every square inch of a massive sheet, you’re basically inviting air pockets to take up residence. If you’ve ever wondered why your vinyl floor is bubbling in one spot, it is often because the subfloor expanded or the adhesive wasn’t perfectly even. By only bonding the edges, you allow the center to settle naturally over the subfloor. It’s a lifesaver when you’re working alone or in a room where you can’t easily remove every single heavy appliance. I found that this approach works wonders even when I’m trying to step-by-step flooring installation from planning to perfect finish without the stress of a ticking adhesive clock. Have you ever tried to wrestle a 12-foot roll of vinyl into a tiny bathroom and felt like you were losing the fight? It’s not a fun afternoon.
Won’t the Middle Just Bubble Up and Move?
I get it. It sounds counterintuitive. How can a floor stay put if it’s only glued at the walls? The secret lies in the weight of the sheet and the precision of your perimeter cuts. In fact, many professional installers prefer this for residential spaces because it avoids the gas off bubbles that occur when full-spread adhesive isn’t flashed properly. According to the Resilient Floor Covering Institute (RFCI), the physical weight and stability of modern vinyl often negate the need for total adhesion in smaller residential footprints. However, I learned the hard way that you still have to worry about how to hide a plywood-seam under thin vinyl. Just because you aren’t gluing the middle doesn’t mean you can skip the feather edge tactic for smoothing subfloor seams. If you leave a ridge, it will show through like a sore thumb. Once the vinyl is flat, finishing the edges with a baseboards makeover will lock everything into place. Let’s look at how to prep that floor so the glue actually sticks where it matters.
Get Your Subfloor Ready for Primetime
I learned the hard way that vinyl sheet is basically a magnifying glass for mistakes. One time, I was rushing through a laundry room project and missed a tiny glob of dried joint compound near the corner. I thought the thick vinyl would mask it. Nope. Within a week, that little bump looked like a mountain. This is why the self-leveler tactic for basement flooring fixes is non-negotiable if your concrete looks like the moon’s surface. You need to scrape, sweep, and vacuum until you could eat off the floor. If you’re dealing with plywood, remember the feather edge tactic for smoothing subfloor seams. Any ridge or gap will eventually ghost through the surface as the material settles over time.
Rough Cut and Relax the Material
Don’t try to be a hero and cut the vinyl to the exact wall dimension on the first try. I always cut the sheet about 2-3 inches long on every side. Drag it into the room and let it sit for at least 24 hours. This is the ‘acclimation’ phase, and skipping it is one of those flooring installation mistakes to avoid for a seamless look. Vinyl expands and contracts with temperature changes. If you glue it down while it is still stiff from the warehouse or the truck, you are almost guaranteed to see ripples by next Tuesday.
#IMAGE_PLACE_HOLDER_B#
How to Scribe and Trim Like a Pro
Once the floor has relaxed, it’s time for the surgical part. I use a sharp utility knife and a heavy straight edge. For complex corners or around cabinets, I use a technique similar to how to scribe vinyl planks to a round stone hearth. You want to press the vinyl firmly into the wall-floor junction and make ‘relief cuts’ at every corner. These are small vertical snips that allow the material to lay flat without bunching. If the vinyl is bunching up at a corner, it won’t sit right when you apply the adhesive. Take your time here; once you cut too much off, you can’t exactly grow it back. I always leave about an eighth of an inch gap at the wall, which the trim will cover later.
Apply Adhesive to the Perimeter Only
Fold back the edges of the vinyl—usually about a foot or two toward the center. Apply a 3-to-4-inch band of pressure-sensitive adhesive around the entire perimeter of the room. This is the magic of the method. You aren’t fighting the whole floor; you’re just securing the frame. Wait for the glue to become ‘tacky’ (it should look clear and feel sticky but not transfer to your finger). This prevents the bubbles that happen when wet glue gets trapped under a non-porous sheet. If you’re working in a space that transitions to other rooms, check the t-bar tactic for transitions between flooring types to ensure the edge is protected. Once it’s tacky, roll the vinyl back into place and use a damp cloth or a small hand roller to press the edges firmly into the glue.
Finish the Look with the Right Trim
The glue holds the vinyl down, but your trim holds the whole room together. I used to just slap old boards back on, but choosing baseboard styles that elevate your interior design makes a massive difference in the final perceived value of the work. When installing them, be careful not to pin the vinyl too tightly against the floor. It needs just a hair of breathing room to avoid buckling during seasonal shifts. If you are working in a bathroom, ensuring a tight seal at the floor level is as critical as the drain flange rule for leak-proof showers—you don’t want water seeping under your new floor from the tub edge because of a gap in the caulk line.
While we’re talking about getting things flat, I need to address a common myth: the idea that a self-leveling compound is a cure-all for every bad floor. I’ve seen homeowners pour buckets of it without checking for porosity. Everyone says level is everything, but in my experience, bond is the real king. If your concrete is thirsty, it will suck the moisture out of the leveler before it can actually settle. This is where the floor prime move for porous concrete subfloors becomes your best friend. A well-primed, slightly uneven floor bonds significantly better than a perfectly level floor that is flaking off because you skipped the prep. Before you even think about laying vinyl, you should always perform the straight edge test for vinyl plank subfloors to ensure you aren’t just creating a bridge over a valley.
The Door Jamb Mistake That Haunts Every DIYer
One of the most common traps I see people fall into—and one I definitely fell into during my early days—is getting overzealous with the jamb saw. We all want a clean look, but why your door jamb undercuts are too high is a question that usually arises when you see a massive quarter-inch gap hovering over your new floor. If you cut the jamb based on the thickness of the vinyl alone and forget to account for the underlayment or a slight subfloor dip, you’re left with a gap that no amount of caulk can fix. It ruins a step-by-step flooring installation from planning to perfect finish faster than anything else. Always use a scrap piece of the actual flooring *and* underlayment as a guide for your saw. 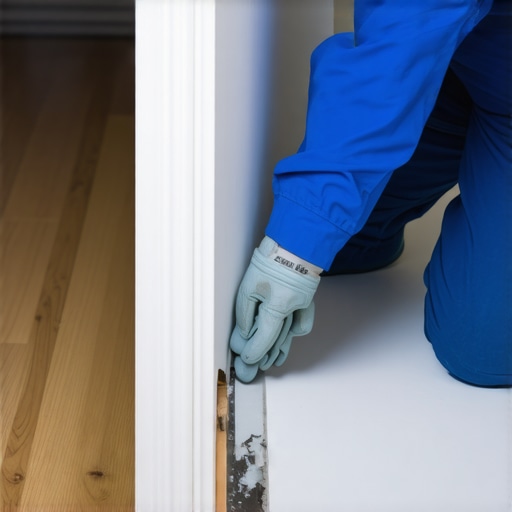
Why does your expensive carpet seam look like a permanent speed bump?
If you’ve moved from vinyl to textiles, you might think the carpet hides everything. It doesn’t. A common nuance people miss is the interaction between the seam tape and the pile. According to the Carpet and Rug Institute (CRI) 104/105 installation standards, failing to properly seal the edges of the carpet with a specialized seam sealer before joining them is the number one cause of premature seam failure and ‘peaking.’ When that seam peaks, it looks like a small ridge running across the room. Often, why your carpet seam looks like a speed bump isn’t because of the glue, but because of poor stretching or improper heat. Using the iron temperature secret for flat carpet seams is essential to avoid melting synthetic fibers while still getting a full bond.
Don’t Ignore the Physics of Your Shower
Finally, let’s talk about the bathroom. People obsess over the tile but ignore the slope. I’ve seen beautiful renovations fail within a year because the installer ignored the slope check tactic for shower floors. If water doesn’t move toward the drain perfectly, it sits in the grout lines and eventually finds a way into the substrate. This is just as critical as the drain flange rule for leak-proof showers. You have to think about the ‘path of least resistance’ for water. Even a tiny deviation in the pitch can lead to mold growth behind the scenes. Have you ever fallen into this trap or found a floor mistake that took you days to fix? Let me know in the comments.
Buy the Right Tools Once and Cry Once
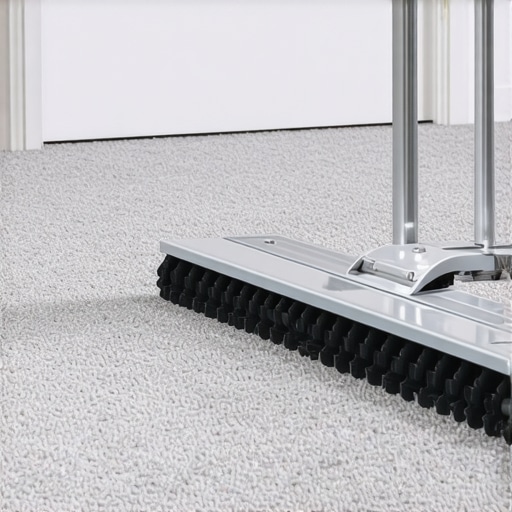
If you want results that don’t fall apart when the seasons change, you have to stop relying on ‘good enough’ tools from the bargain bin. I used to think a knee kicker was all I needed for carpet, but after seeing a hallway ripple six months later, I realized the power stretcher vs knee kicker debate isn’t even a contest. A power stretcher uses leverage to pull the carpet taut across the entire room, ensuring it stays flat for a decade. It’s the same logic for your trim; using the miter clamp secret for professional baseboard corners keeps those joints from opening up when the wood dries out. Most people just nail the corners and hope for the best, but the clamp applies constant pressure while the wood glue sets, creating a bond that is physically stronger than the wood itself. If you’re serious about your work, invest in a high-quality moisture meter. The National Wood Flooring Association (NWFA) technical manual emphasizes that wood flooring should be within a specific moisture range of the subfloor—usually within 4% for solid strip flooring—before you even think about nailing it down. Skipping the moisture meter test for concrete subfloors is just gambling with your bank account.
How do I maintain my flooring over time?
Maintenance isn’t just about vacuuming. It’s about knowing how to clean grout without stripping the sealer and catching small issues before they require shower repairs when to fix vs replace for longevity. For your LVP, keep a repair kit handy; learning how to fix a scuffed vinyl plank with household items can save you from replacing an entire section of the room. For tile, you should be using pH-neutral cleaners specifically formulated for stone or ceramic. Most grocery store cleaners are too acidic and will eat through your sealer in months. I also swear by the hot glue hack for holding baseboard miters while nailing if a piece ever works its way loose. It’s about being proactive so you can transform your home with expert flooring installation tips for 2025 that actually last into 2035.
Smart Subfloors and the Next Decade of Design
Looking ahead, I see the industry moving toward ‘smarter’ installs. We’re already seeing underlayments that can detect moisture leaks and alert your phone before the subfloor rots. It’s an exciting time to be a DIYer because the technology is catching up to our needs. My best advice? Pick one advanced tool—like a power stretcher or a high-end miter clamp—and master it on your next project. You’ll never go back to the basic way again. Master the small details now, and your future self will thank you every time you walk across a floor that doesn’t squeak, gap, or buckle.
The Hard Lessons That Taught Me to Respect the Subfloor
After years of wrestling with materials, I’ve realized that a ‘perfect’ floor is actually won or lost before the first piece of vinyl or carpet even touches the room. One of the biggest myths about flooring is that the material hides the subfloor; in reality, thin vinyl acts like a highlighter for every grain of sand you didn’t sweep up. Always perform the straight edge test for vinyl plank subfloors even if you think the floor looks flat—your eyes lie, but a 6-foot level doesn’t. I also learned that rushing the acclimation phase is a recipe for heartbreak. If you don’t let your material sit, you’ll end up wondering why your vinyl floor is bubbling in one spot six months later. Finally, never underestimate the power of a clean edge. Whether you are choosing baseboard styles that elevate your interior design or trimming a carpet, that final half-inch of detail determines if your home looks like a pro did it or a panicked amateur.
My Go-To Gear for a Flawless Finish
If you’re tired of seeing gaps and ripples, it’s time to stop relying on bargain tools and look at what professionals actually carry. For any carpet project, stop the power stretcher vs knee kicker debate right now—the power stretcher is the only way to ensure your carpet doesn’t look like a series of waves in three years. I also never start a project without a high-quality moisture meter; performing the moisture meter test for concrete subfloors is the only way to know if your adhesive will actually hold over the long haul. For my trim work, I swear by the miter clamp secret for professional baseboard corners to keep those joints tight through every season change. #IMAGE_PLACE_HOLDER_E#
Ready to Transform Your Home One Room at a Time
It’s easy to feel overwhelmed when you’re staring at a bare subfloor and a pile of boxes, but every expert started exactly where you are. Taking the time to master your flooring installation techniques doesn’t just save you money; it gives you a sense of pride every time you walk through your front door. Don’t be afraid to take it slow and double-check your measurements. Whether you’re aiming for a transform your home with expert flooring installation tips for 2025 or a simple weekend refresh, the key is patience and the right preparation. Have you ever had a flooring project go sideways because of a subfloor surprise? Let me know in the comments below!