

I remember standing in my hallway three years ago, staring at a mitered corner that looked more like an open bird’s beak than a finished piece of carpentry. I had spent hours measuring, double-checking my angles, and making precise cuts, yet the moment those boards hit the wall, they fought me. The drywall was wavy, the floor had a slight dip, and the gap in that outside corner was wide enough to swallow a nickel. It was humiliating. Like many DIYers, I thought the trick was in the nailing. I was wrong. The real breakthrough came when I stopped trying to build the corners on the wall and started building them on my workbench. This ‘corner-clamping’ secret for pre-assembled baseboards changed everything, turning a frustrating weekend chore into a professional-grade finish that actually stays tight for years.
Why My Best Miters Still Looked Like Total Garbage
For a long time, I followed the standard advice: cut your 45s, push them together against the wall, and fire away with the nail gun. But here is the reality nobody tells you: your walls are lying to you. Drywall corners are rarely square because of built-up joint compound, which makes your baseboard styles look amateur regardless of how expensive the wood was. My biggest mistake early on was using the ‘nail and pray’ method, where I’d try to force the boards together while the adhesive was wet. It never worked because wood is stubborn. According to the Forest Products Laboratory, wood can expand or contract significantly with changes in humidity, meaning even a ‘tight’ joint held only by nails will eventually pull apart. By pre-assembling your corners with the spring miter secret and specialized clamps, you create a single, rigid unit that floats over wall imperfections. This ensures that your flooring installation looks seamless from edge to edge. Have you ever spent a whole afternoon fighting a single corner only to have it pop open the next morning?
Is Pre-Assembling Corners Actually Worth the Extra Effort?
I know what you are thinking because I thought it too: ‘Isn’t it much slower to glue and clamp everything beforehand?’ It feels like extra work, but it actually saves you hours of caulking and wood-filling later. When you use the back-cut secret on a workbench, you can see exactly how the miter closes without the drywall getting in the way. You aren’t just making a joint; you are creating a chemical bond with wood glue and micro-pins that is stronger than the wood itself. Once that assembly is dry, you can slide it right onto the wall like a glove. If you are dealing with particularly tricky layouts, combining this with the inside corner cope method will give you a level of precision that makes the whole room feel more expensive. We are going to dive into the exact tools you need to make this happen without breaking the bank.
Stop Cutting Simple 45s and Start Back-Beveling
The first thing you need to unlearn is that a perfect 90-degree corner needs two 45-degree cuts. If your saw is off by even half a degree, or if there is a speck of sawdust on the fence, that miter will gape at the front. I always use the back-bevel move for tight baseboard miters, tilting the saw blade just a hair—maybe one or two degrees—so the back of the board is shorter than the front. Think of it like a pair of scissors; you want the blades to meet at the leading edge first. This ensures that the visible part of the joint is crushed together, leaving no room for that annoying black line of shadow which often plagues a durable flooring installation.
Build Your Corners on the Bench Not the Wall
Instead of fighting gravity and a heavy nail gun while kneeling on the floor, I take my pieces to a flat table. I learned this the hard way during a massive renovation where I tried to nail the miters in place, and the force of the 18-gauge brad nailer literally blew the joint apart, sending one piece sliding two inches down the wall. Now, I apply a thin bead of wood glue and a few drops of CA glue for an instant bond. While the CA glue acts as a temporary nail, I apply the spring miter secret, using high-tension steel clamps that bite into the edges and pull the faces together with immense pressure. This creates a single L-shaped unit that is incredibly strong and far more stable than separate pieces.#IMAGE_PLACE_HOLDER_B#
Manage the Drywall Bulge
Once your corner is a solid unit, you will notice it won’t sit flush because of the mud at the corner of the wall. This is where the razor scribe method for baseboards on wavy drywall comes in handy. You may need to carve a little drywall away behind the baseboard or slightly shave the back of the wood. If you are working on a slab, use the wood shim secret for baseboards on uneven slabs to keep the assembly level. By shimming from the bottom, you prevent the miter from twisting and opening up at the top as you nail it into the studs. This is a critical step I wish I had known when I first started exploring different baseboard trends in 2025 for my own living room.
Fasten for Longevity Not Just for Today
When the assembly is finally against the wall, don’t reach for the heavy-duty nails immediately. I prefer the pin nail secret for delicate baseboard moldings. These 23-gauge pins leave holes so small you can barely see them, meaning less wood filler to sand later. I remember a project where we used tall, 7-inch MDF boards; if we had used standard brads, the heads would have puckered the material and ruined the paint prep. After nailing, always follow the caulk and paint sequence to hide the transition between the wood and the wall. This turns the assembly from a piece of trim into a high-end architectural feature.Most DIYers—and honestly, quite a few ‘pros’—rely way too heavily on the knee kicker. It’s the tool everyone associates with carpet, but using it as your primary stretching tool is a massive mistake. In my experience, a knee kicker is for positioning, not for the structural stretch required to keep a room flat for a decade. If you want results that last, you have to use the power stretcher rule for large living room carpets. Without that mechanical leverage, you’re just asking for ripples in three years. Have you ever fallen into this trap? Let me know in the comments, because I’ve seen more ruined luxury rugs from aggressive ‘kicking’ than from actual foot traffic. It’s one of those carpet install secrets achieving flawless results every time: the tool makes the craftsman, but only if you use the right one. Then there is the moisture trap. Everyone talks about acclimating wood, but few people actually measure it. I’ve seen beautiful installs ruined because the installer waited two weeks but didn’t realize the subfloor was still holding 15% moisture. According to the National Wood Flooring Association (NWFA), moisture-related issues account for the vast majority of flooring failures. You cannot eyeball this. This is why the moisture meter requirement for basement flooring jobs is non-negotiable. If your subfloor and your planks aren’t within 2-4% of each other, don’t even think about opening a box of nails. We also never skip the subfloor moisture test on concrete, because hydrostatic pressure can turn your dream floor into a buckling mess overnight.
Why Does My Flooring Still Gap Even With Perfect Acclimation?
It’s the question that keeps perfectionists up at night. You did the acclimation test for avoiding hardwood floor gaps, the humidity was stable, and yet, six months later, you see daylight between the planks. The nuance here is often ‘seasonal swing’ and the lack of a proper vapor seal requirement. If you live in a climate with humid summers and dry winters, your wood is a living, breathing thing. Why your hardwood floors are crowning in the summer is often a direct result of the wood expanding beyond its limit. The ‘pro move’ is to install during the middle of the local humidity range, not the extremes. Finally, don’t overlook the ‘wet zones’ like the shower. Many people think a ‘waterproof’ backer board is enough. It isn’t. I always advocate for the liquid membrane move for fail-proof shower pans to create a seamless bathtub-like environment before a single tile is laid. When considering shower renovation ideas modern designs for a luxury feel, remember that the beauty is only skin deep; the engineering underneath is what keeps your subfloor from rotting. It’s these hidden details that separate a ‘weekend project’ from an ‘investment’ in your home.I used to think a standard bubble level was enough for my projects until I realized my eyes were lying to me over long distances. If you want to stop guessing and start knowing, you need to adopt the laser level move for perfectly horizontal shower tiles. I personally use a self-leveling green beam laser because the visibility is nearly four times better than red beams in brightly lit rooms. When you are setting your first row of tiles or trying to keep your baseboards makeover consistent across a twenty-foot room, that thin green line ensures you aren’t chasing a slope that shouldn’t be there. According to the Schluter-Systems Installation Handbook, achieving 95% thin-set mortar coverage is the absolute minimum requirement for tiles in a wet area to prevent moisture pockets. I achieve this by using the trowel notch secret for better tile adhesion, ensuring every ridge is collapsed into a solid bed. This isn’t just about aesthetics; it is about structural integrity that prevents your grout from cracking three months down the road.
How do I maintain my flooring and showers over the long haul?
Maintenance is where most homeowners drop the ball. You’ve spent thousands on materials, so why risk them with generic cleaners? For your luxury vinyl, why we prefer felt pads over rubber for luxury vinyl comes down to chemical reactions; rubber can actually permanently stain your wear layer through a process called plasticizer migration. To keep your bathroom pristine, always utilize the pre-seal move before you even think about using the shower. It creates an invisible barrier that keeps body oils and soap scum from penetrating the porous grout. If you ever notice a small crack in the corner, don’t ignore it. Consulting shower repairs when to fix vs replace for longevity early can save you from a full-scale gut renovation due to subfloor rot. 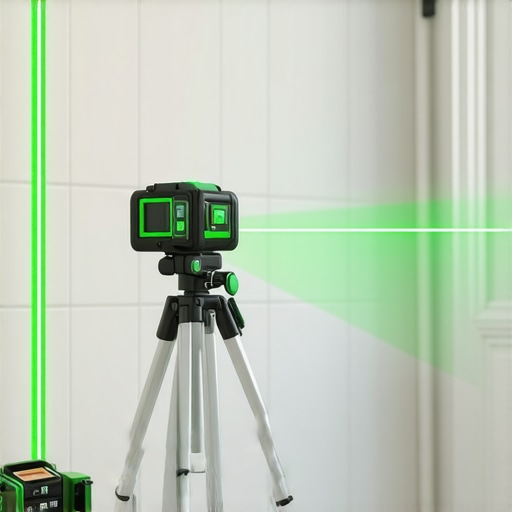
The High-Tech Shift Coming to Our Baseboards
Looking ahead, I expect we will see a massive shift toward moisture-proof composite materials in baseboard trends in 2025. We are moving away from pine and MDF that swells at the first sign of a spill and moving toward high-density polymers that look identical to wood but can literally be submerged in water. For the carpet lovers, the technology in seam tape has improved so much that how to hide a carpet seam in the middle of a room is becoming a lost art because the newer ‘cool-melt’ tapes bond so cleanly. If you really want to level up your next project, I challenge you to try the laser-level layout on your next wall—it will change the way you see your home’s geometry forever.
Hard-Won Wisdom from My Biggest Flooring Face-Plants
Looking back at my early projects, I realize that 90% of my failures came from the ‘I’ll fix it in the next step’ mentality. You simply cannot out-caulk a bad miter or out-stretch a poorly prepped subfloor. One major realization was that speed is the enemy of precision. I used to rush the layout, thinking I’d save time, but I ended up with thin slivers of tile at the door. Now, I spend twice as long on the layout as I do on the install. Another ‘lightbulb moment’ was understanding that wood and tile aren’t static objects; they react to their environment constantly. If you ignore the climate, the house will remind you of it in six months.
- Respect the Subfloor: A 1/8-inch dip today is a squeak that will haunt you for a decade. Taking the time to address flooring installation mistakes to avoid for a seamless look starts with a straightedge and floor patch.
- Glue is Your Best Friend: In baseboards, the nails hold it until the glue dries. The glue is what actually keeps that corner tight for thirty years.
- Laser Eyes: Don’t trust your vision over long distances. Use a laser for everything from shower rows to long runs of baseboard.
The Tools That Turned Me From Amateur to Pro
If you are serious about a professional finish, you need to stop relying on ‘good enough’ gear. My first recommendation is a self-leveling green cross-line laser. It is the single most important tool for ensuring your ultimate shower renovation guide isn’t just a list of steps but a recipe for success. Second, invest in a pin nailer (23-gauge). Unlike standard brad nailers, these leave holes so small they disappear under a single coat of paint, which is crucial for high-end molding work. #IMAGE_PLACEHOLDER_E# Lastly, never start a job without a pinless moisture meter. Knowing the moisture content of your slab or subfloor isn’t an option; it’s a requirement to prevent buckling and rot. These tools aren’t just expenses; they are insurance policies for your hard work.
Your Path to a Professional-Grade Home
The journey from a frustrating DIY project to a professional-grade finish isn’t about natural talent; it’s about discipline and using the right techniques. Whether you are selecting the best carpet types for high traffic areas in 2025 or carefully scribing a baseboard to a wavy wall, the care you put into the hidden details will always show in the final result. Don’t be afraid to take your time and build those corners on the bench. Your home is your biggest investment, and every tight miter and flat tile increases its value and your pride in it. If you ever feel stuck or need specific advice on your layout, feel free to contact us or check out our other guides on expert tips for modern bathroom makeovers. You’ve got this!
Have you ever had a mitered corner that just refused to stay closed no matter how many nails you used? Let me know your biggest struggle in the comments below!