

I’ll never forget the first time I tackled a full house of trim. I’d just finished a beautiful flooring installation and felt like a pro. But as I stood there with my coffee, admiring the clean lines, I saw it. An outside corner miter that looked perfect ten minutes ago was now “yawning.” It was tight at the bottom, but the top was separated by a good eighth of an inch. I thought I was losing my mind. I tried to “persuade” it with a hammer and a few more finish nails, but all I got for my trouble was a split piece of primed MDF and a lot of frustration. [image_placeholder]
The Frustrating Reality of the Yawning Miter
It’s one of those things that once you see it, you can’t unsee it. You spend hours measuring, cutting, and nailing, only to have your corners look like a DIY disaster. The truth is, drywall is rarely square, and the corner beads they use in modern construction are often rounded or slightly proud of the wall. This creates a “pivot point” that pushes the bottom of your baseboard out, which naturally forces the top of the miter to open up. I used to think my miter saw was out of calibration. I spent an entire Saturday afternoon adjusting the fence and the blade, but the gaps kept happening. It wasn’t the saw; it was the physics of the wall itself. According to the Forest Products Laboratory, wood is a hygroscopic material, meaning it constantly expands and contracts with the humidity in your home. When you combine that natural movement with a wall that isn’t a perfect 90 degrees, you’ve got a recipe for gaps. Today, I’m going to show you how to beat the “yawn” once and for all. We’re going to talk about techniques like the back-bevel move for tight baseboard miters and why your standard 45-degree cut is actually your worst enemy.
Is your miter saw actually the problem?
Most folks think they just need a more expensive saw or a laser guide to get those professional results. I certainly did. I wasted a few hundred bucks on a “precision” blade thinking it would solve my problems. But even the best blade in the world won’t fix a corner that isn’t square. The secret isn’t in the tool; it’s in how you manipulate the wood to compensate for the house’s imperfections. Have you ever found yourself staring at a gap wondering if you should just fill the whole thing with caulk and call it a day?
Stop Relying on Caulk to Hide Bad Cuts
Early in my career, I was the “King of Caulk.” If a joint didn’t fit, I’d just pump it full of white goo and hope the paint would hide the crime. While the caulk and paint sequence is an essential part of a finished look, it shouldn’t be your primary structural support. If the gap is too wide at the top, the caulk will eventually shrink and crack, leaving you right back where you started. To get those high-end results, you need to understand the spring miter secret. It’s about creating tension at the tip of the joint so that even as the house breathes, the visible part of the miter stays locked tight. We’ll also dive into why you should be using the inside corner cope instead of mitering your internal joints. Let’s get into the nitty-gritty of why your walls are lying to you and how to fix those stubborn outside corners.
Stop fighting the drywall and start back-beveling
The biggest hurdle to a tight outside miter isn’t your saw; it’s the build-up of joint compound on the corner. That rounded bead acts like a pivot point, kicking the back of your trim out and forcing the front to yawn open. To beat this, you need to master the back-bevel move for tight baseboard miters. By tilting your saw blade about 1 or 2 degrees (beveled away from the face), you ensure that only the very front tips of the miter touch. It’s like creating a sharp leading edge that bites into the joint. I remember doing a project in a house where the walls were so out of whack they looked like a funhouse mirror. I tried standard 45s and every single one failed. Once I started back-beveling, the joints snapped together like magnets. 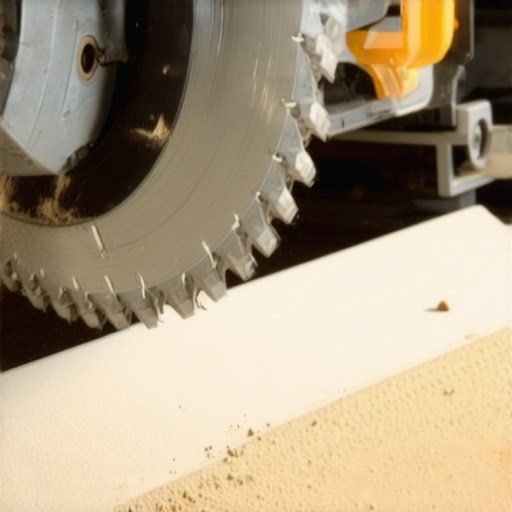
Why your 45-degree setting is probably lying to you
Most DIYers assume every outside corner is a perfect 90 degrees. In reality, they are usually 91 or 92 degrees because of the corner bead. If you cut two 45s, you’re already in the hole by two degrees. Instead of guessing, use two scrap pieces of your chosen baseboard styles to test the fit. Hold them against the corner and see where the gap is. If it’s open at the tip, increase your angle to 45.5 or 46. This tiny adjustment makes a massive difference when you are aiming for a professional flooring installation look.
Use glue and pins to lock the joint forever
Mechanical fasteners alone won’t keep a miter tight as the house shifts. You need a chemical bond. I used to just nail through the face and hope for the best, but I’d always find a gap six months later. Now, I apply a thin layer of wood glue to both faces and use the pin nail secret for delicate baseboard moldings. By shooting a 23-gauge pin through the return side of the miter into the other piece, you effectively ‘stitch’ the wood together. For particularly stubborn corners where the floor is dipping, I’ll even employ the wood shim secret for baseboards on uneven slabs to level the trim before I ever pull the trigger on my nail gun.
The spring miter move for maximum tension
If you really want to level up, try the spring miter secret. This involves cutting your miters slightly ‘long’ so that you have to physically push them into place. This creates a spring-like tension that keeps the tips pressed together. On one job in a high-humidity coastal home, I used this technique along with the corner clamping secret for pre-assembled baseboards. By gluing and clamping the corner on my workbench before taking it to the wall, I ensured the miter was structurally sound before the drywall could even interfere. This ‘pre-assembly’ method is a lifesaver when dealing with the back-cut secret for tight baseboard outside corners, allowing you to focus on the fit rather than fighting the air hose and the wall at the same time.Most people think the gold standard for trim is a perfectly level baseboard. It sounds right, doesn’t it? But here’s the reality: if your floor has a significant dip or crown, a perfectly level baseboard will highlight that gap like a neon sign. I’ve seen pros spend hours shimming to a level, only to realize why your baseboards look crooked on perfectly level floors—it is an optical illusion. Sometimes, you have to ‘cheat’ the trim to follow the floor’s contour so the eye doesn’t catch the discrepancy. This is especially true when dealing with baseboard styles that have flat, modern profiles where every millimeter of gap is visible.
Why a laser level might be sabotaging your trim work
Relying solely on technology often ignores the physical reality of a settling house. If you are aiming for a high-end flooring installation, you need to prioritize the visual transition over a theoretical level. If the floor isn’t flat, your trim shouldn’t be ‘level’ in the traditional sense; it should be ‘relative.’ Use the razor scribe method for baseboards on wavy drywall to ensure the wood marries the wall’s unique curves instead of fighting them.
Is your floating floor actually floating?
The biggest trap in modern flooring is the ‘waterproof’ label on Luxury Vinyl Plank (LVP). Homeowners think they can skip the moisture barrier because the floor won’t rot. However, the National Wood Flooring Association (NWFA) reports that subfloor moisture issues are responsible for over 75% of residential flooring failures. Even if the plank itself is plastic, moisture vapor from a concrete slab can cause organic growth or adhesive failure beneath the surface. That is why we never skip the subfloor moisture test on concrete. Furthermore, many people unknowingly ‘pin’ their floors. If you nail your baseboard too tightly against the floor or install a heavy kitchen island directly on the planks, the floor can no longer expand and contract. This leads to why your vinyl plank floor is clicking when you walk. Always follow the expansion gap rule for heavy kitchen islands on laminate to ensure your floor stays truly floating.
Don’t let your carpet installation fail in three years
In the world of carpet install secrets, the most common mistake is the ‘knee-kicker only’ approach. If a contractor shows up without a power stretcher, they aren’t finishing the job correctly. Without the proper tension, you will inevitably see ripples within a few years because the backing wasn’t stretched to its physical limit. You must follow the directional pull rule for power stretching carpet to lock those fibers into the tack strips for the long haul. Similarly, in showers, the ‘oops’ factor is often the curb. If you don’t understand the curb slope requirement for waterproof shower pans, you are inviting water to sit and rot your framing from the inside out. Have you ever fallen into this trap where a ‘simple’ trim or floor job turned into a squeaky, gapping mess? Let me know in the comments.I’ve wasted thousands of dollars on ‘revolutionary’ gadgets that now just collect dust in my garage. But if you want to pull off a step-by-step flooring installation from planning to perfect finish, you need a few non-negotiables. First is my oscillating multi-tool. It’s the only way to get those clean undercuts on door jambs so your new planks slide right underneath. I also never step onto a job site without a high-quality moisture meter. According to the National Wood Flooring Association (NWFA) technical standards, subfloor moisture is the leading cause of floor failure. That’s why the moisture meter requirement for basement flooring jobs isn’t just a suggestion—it’s a law in my book. Another lifesaver is a dedicated prying tool for those old baseboards. If you’re planning a baseboards makeover elevate your interior with simple updates, don’t just use a claw hammer; you’ll destroy your drywall. Use a wide-blade trim puller to distribute the pressure. For the shower pros, I swear by a 72-inch box level. It sounds like overkill until you’re trying to verify the laser level move for perfectly horizontal shower tiles across a large walk-in. Without it, you might find why your shower glass door hinge is pulling out later because your walls are leaning half an inch.
How do I keep my new floors looking fresh for a decade?
Maintenance is where most homeowners drop the ball. It’s not just about cleaning; it’s about prevention. I always tell my clients to stop hardwood scratches with the felt pad routine. It’s the cheapest insurance policy you can buy. For your carpet install secrets achieving flawless results every time, the secret isn’t just the stretch; it’s the vacuuming frequency. Dirt acts like sandpaper to carpet fibers. In the shower, you have to be proactive about the sealants. If you want to stop shower grout from staining with the pre-seal move, you also need to re-apply that sealer every year or two depending on how much use the bathroom gets. Looking ahead to 2025 and beyond, I see the industry moving toward integrated smart sensors. Imagine a baseboard that alerts your phone if a pipe starts leaking behind the wall or a subfloor that monitors its own humidity levels. We are already seeing prototypes of these ‘active’ building materials in high-end builds. Until then, we rely on good old-fashioned prep and the right tools. If you’re ready to stop the gapping and start winning, I challenge you to try the pre-assembly method on your next outside corner. It’ll change your life. Reach out via contact us if you run into a corner that even these tricks can’t fix.
Hard Truths I Learned the Hard Way
Over the years, I’ve realized that even the most expensive saw in the world won’t fix a lack of patience. Here are a few lightbulb moments that changed my approach to finish carpentry forever:
- The wall is always lying: Never trust a corner to be 90 degrees. Always use scrap pieces to test your angles before committing to your final trim piece. This prevents that frustrating ‘yawn’ at the tip of the joint.
- Moisture is the final boss: Whether you’re dealing with why your hardwood floors are crowning in the summer or a buckle in the carpet, it almost always comes back to humidity and subfloor prep.
- Sightlines over levels: Sometimes a perfectly level baseboard looks crooked because the floor dips. Your eyes should be the final judge, which is why I often ignore the bubble and focus on visual harmony.
- Small gaps are okay if you have a plan: Using the caulk and paint sequence correctly is a skill, not a cheat code, but a structurally tight miter is always the goal.
The Tools I Never Leave in the Truck
I don’t believe in buying every gadget on the shelf, but these items are non-negotiable for anyone serious about their home’s finish:
- A 23-Gauge Pin Nailer: This is how you achieve the pin nail secret for delicate baseboard moldings. The holes are so tiny they practically disappear, allowing you to glue joints without visible marring.
- Reliable Moisture Meter: Especially for basement projects, the moisture meter requirement for basement flooring jobs will save you from a major failure by ensuring the slab is ready for install.
- The Coping Saw: If you want to master the coping saw technique for flawless inside baseboard corners, a simple manual saw with a high-tpi blade is better than any fancy motorized jig.
Take the Leap and Cut that First Board
It’s easy to get paralyzed by the fear of making a bad cut or ruining a piece of expensive oak. But the beauty of trim work and your guide to durable flooring installation for a stylish home is that almost everything can be adjusted, filled, or refined. Every pro you see online has a pile of scrap wood and a history of gapping miters behind them; the difference is they kept cutting. Whether you are looking for shower renovation ideas modern designs for a luxury feel or just refreshing your living room hallway, the skills you build today will last a lifetime. Which corner of your house is giving you the most trouble right now—the wonky drywall or the uneven floor? Let me know in the comments below!