

I was kneeling on a half-finished floor in my guest bedroom, sweat dripping onto a fifty-dollar plank, when I heard that sickening, hollow crunch. I thought I had clicked it home. I had hammered it with a tapping block until my arm was sore, but when I stood up and walked across it, the seam gaped like a hungry mouth. This was not my first rodeo, but it was certainly my most frustrating failure. I had spent hours obsessing over the prep, yet there I was, watching my expensive DIY project fall apart in real-time. It turns out, those heavy-duty, rigid core planks are not just thick; they are incredibly stubborn. They require a finesse that most instruction manuals completely ignore. If you have ever felt the soul-crushing defeat of a seam that just will not stay tight, you are in the right place. Today, I am going to share the specific mechanical secret that ensures your floor stays locked for decades, not just until you put the furniture back.
Your Flooring Should Not Pop Up Like a Toasted Bagel
Look, we all want that high-end stone or hardwood look without the massive price tag. That is why rigid core vinyl is the king of the mountain right now. It is tough, waterproof, and feels solid underfoot. But that weight is a double-edged sword. If your subfloor is not dead flat, or if you miss the locking sweet spot by even a fraction of a millimeter, you are headed for a world of hurt. I learned the hard way that flooring installation mistakes to avoid for a seamless look usually start with overconfidence and a lack of specific technique for these heavy beasts. I used to think I could just muscle the planks into place, but heavy vinyl does not respond to brute force; it responds to geometry. If you have noticed that your rigid core floor sounds hollow when you walk, you have likely missed the crucial locking engagement that I am about to explain.
Does the click-lock system actually live up to the hype?
I get it. You see the glossy marketing videos of people snapping floors together in a single afternoon and think it is as easy as building LEGOs. But heavy vinyl is less forgiving than its thinner ancestors. If you do not perform the straight edge test for vinyl plank subfloors, you are basically building a house on shifting sand. According to the Resilient Floor Covering Institute (RFCI), subfloor flatness is a leading cause of floor failure, often leading to over 70% of homeowner complaints. My big mistake? I thought I could skip the self-leveler because the planks felt heavy enough to ‘bridge’ the gaps. I was wrong. These planks do not bridge; they bounce. I am going to show you how to get it right the first time so you do not end up like I did, staring at a ruined seam at 2:00 AM. Have you ever spent an entire weekend installing a floor only to have it start gapping a month later? Drop a comment or reach out—I would love to hear your horror stories before we dive into the fix. For more tips on a perfect finish, check out this step-by-step flooring installation guide.
Fix the Foundation Before Touching a Single Plank
The biggest lie in DIY is that rigid core vinyl hides subfloor sins. It actually highlights them. Think of your subfloor like a surgical table; it has to be perfectly flat, or the patient—your floor—is going to have issues. I learned this when I tried to install a luxury plank over an old plywood seam that had a 1/8-inch height difference. I thought the heavy stone-polymer composite (SPC) would flatten it out. Instead, every time I stepped on that spot, the floor groaned. If you do not perform the straight edge test for vinyl plank subfloors, you are setting yourself up for failure. You need to identify every high and low spot. If you find a dip, do not just pour leveler blindly; the self-leveler mistake that creates new high spots is a nightmare to sand down later. Instead, use the feather edge tactic for smoothing subfloor seames to create a gradual transition that the rigid planks can actually handle.
The Geometry of a Perfect Lock
Once your floor is flat, you have to master the ‘angle of attack.’ Most people try to push the planks together flat on the floor, but rigid core requires a 20-to-30-degree tilt to fully engage the locking tongue into the groove. You should feel a distinct ‘thud’ rather than a ‘click’ when it seats properly. I remember my first big living room project where I was getting tired and started rushing. I stopped angling the boards and started using a heavy hammer. I ended up mushrooming the edges of three expensive planks because I was forcing the lock instead of letting the geometry do the work. If you find yourself swinging the mallet too hard, stop. You likely have a piece of debris in the groove or your angle is too shallow. Before you lay your first row, make sure you have applied the underlayment tape move for moisture barriers to ensure no moisture wicks up and compromises the core over time.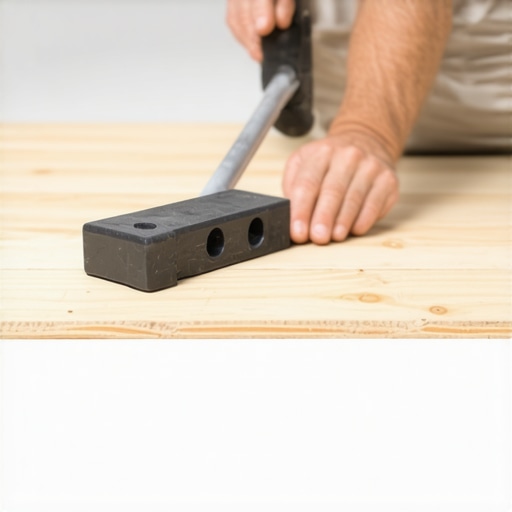
How to Click Your Planks Together Without Breaking the Tongues
The tapping block is your best friend, but only if you use it correctly. You should never tap directly against the tongue of the plank. I once saw a buddy of mine sheer off an entire six-foot section of locking mechanism because he was hitting the plank itself. You want to place the tapping block against the edge and use light, rhythmic taps. It is more like a heartbeat than a drum solo. This ensures the seam closes tight without the material splintering. While you are working, keep an eye on your layout. A common error is failing to plan for doorways; the t-molding-mistake most vinyl installers make is running the floor continuously through a large house without breaks. Rigid core is stable, but it still needs those transition points in large open areas to prevent buckling.
The Expansion Gap is Your Insurance Policy
You might think a 1/4-inch gap at the wall looks ugly, but that gap is what keeps your floor from ‘peaking’ in the summer. I once did a small bathroom where I fit the planks tight against the baseboard. By July, the floor had risen an inch off the subfloor in the middle because it had nowhere to expand. Always use spacers. The expansion gap secret for summer flooring swell is to ensure that even the heavy furniture doesn’t pin the floor down so hard that it can’t move. Once the floor is down, you will hide those gaps with trim. This is where you can get fancy; using the hidden miter secret for baseboard returns gives you that professional finish that makes people think you paid a pro five grand for the job. If you are struggling with tight corners, don’t just caulk the gaps; use the miter clamp secret for professional baseboard corners to keep everything tight while the adhesive sets.Let’s dig deeper into the structural secrets that separate a ‘DIY-looking’ project from a professional-grade renovation. A common belief among homeowners is that the tile and grout serve as the primary waterproof barrier in a bathroom. This is a dangerous misconception. In my experience, relying on grout to keep water out is a recipe for disaster. According to the Tile Council of North America (TCNA) Handbook, grout is naturally porous and is designed for aesthetics and joint stability, not as a moisture seal. If you do not have a robust membrane system underneath, why your shower niche is growing mold behind the tile will eventually become your biggest headache. Many installers stop their waterproofing at the five-foot mark, but why your shower waterproofing needs to go higher is a lesson usually learned after moisture starts rotting the studs above the tile line. Have you ever fallen into this trap? Let me know in the comments.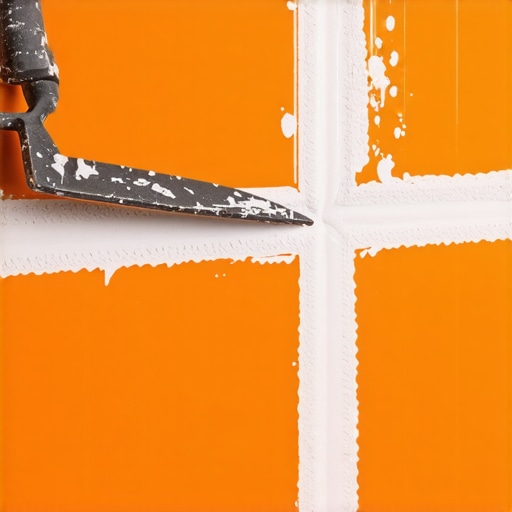
Is your shower pan secretly sinking into the subfloor?
This is one of those ‘hidden’ nuances that only reveals itself after a few months of use. If the mortar bed or dry-pack under your pan is not perfectly compacted, the weight of a person will cause micro-flexing. This is exactly why your shower pan is making a popping sound when you step in. It is not just an annoying noise; that movement will eventually shear your waterproofing or crack your floor tiles. To prevent this, I always emphasize the silicone-only rule for shower corner joints. Standard grout in a corner will crack as the house naturally settles, whereas silicone provides the flexibility needed to maintain a seal.
The Thick Padding Trap That Kills Your Carpet
When it comes to the bedroom, most people assume that the thickest, softest carpet padding is the best choice. However, ‘more’ is not always ‘better.’ A pad that is too thick or low-density allows for too much vertical movement. This excessive ‘give’ puts immense stress on the latex backing of the carpet, which is often why your carpet is coming loose in the hallway or developing ripples. This ‘oops’ factor is a classic trap where comfort actually compromises durability, leading to why your carpet pad is crushing down too fast. For a long-lasting installation, you should prioritize high-density padding rather than sheer loft. Mastering these carpet install secrets will ensure your floor looks brand new for a decade rather than a few years. Finally, pay attention to your trim work. If you notice why your baseboards are pulling away from the wall, it is usually because you are nailing into the drywall instead of finding the studs. In those stubborn gaps, using the flex glue fix for loose baseboard sections can be the invisible hero that keeps your finish work tight and professional.It is one thing to get the floor down, but it is another thing entirely to keep it there. If you want to avoid a mid-project crisis, you need to stop relying on ‘feel’ and start relying on data. I never step onto a job site without my pinless moisture meter. You might think your concrete is dry because it looks gray, but the moisture meter test for concrete subfloors is the only way to prove your adhesive will not fail in six months. I have seen ten-thousand-dollar installs turn into a bubbling mess because the installer thought the slab looked light enough. When you are investing this much time and money, ‘guessing’ is a four-letter word.
The Heavy Artillery You Actually Need
When it comes to carpet, the biggest debate in the industry is the power stretcher vs knee kicker debate. Let me settle it for you: if you are not using a power stretcher, you are not truly installing carpet; you are just laying it down to fail eventually. A knee kicker is excellent for positioning around the perimeter, but the power stretcher is what provides that drum-tight finish that prevents those ugly ripples from forming two years later. While you are at it, do not ignore the iron temperature secret for flat carpet seams. If your iron is too hot, you will melt the secondary backing; too cool, and the seam tape will not bond properly. It is a delicate balance that separates the professional results from the ‘handyman’ specials that look like a speed bump in the middle of the room.
How do I keep my new floors looking fresh for years?
Maintenance is not just about a weekly vacuum or a quick mop. For your bathroom, knowing shower repairs when to fix vs replace for longevity can save you from a full-scale demolition later. If you see a hairline crack in your corner grout, treat it with silicone immediately; do not wait for the mold to start. For carpet, the IICRC S100 standard for professional carpet cleaning specifically notes that dry soil is abrasive. If you do not remove it through deep extraction every 12 to 18 months, those tiny particles act like sandpaper on the synthetic fibers. This is especially true for the best carpet types for high traffic areas in 2025, which are engineered for durability but still require consistent care to maintain their warranty status.
The Next Wave of Flooring Innovation
In the next few years, I predict we will see LIDAR-enabled smartphone apps that can map subfloor variations down to the millimeter before we even buy the material. We are moving away from manual straight-edge guesses and into an era of digital precision where your phone will tell you exactly how much self-leveler you need for a specific dip. Until then, you have to be the computer. My best advice? Stop rushing the ‘invisible’ work like prep and stretching. Before you start your next row of planks, grab a moisture meter and verify your slab; it is the absolute difference between a floor that lasts a lifetime and a floor that fails by next summer. Try using a power stretcher on your next carpet project—your knees and your carpet’s longevity will thank you.
The Hardest Lesson I Learned About Flooring Installation Under Pressure
If there is one thing I have learned after years of kneeling on subfloors, it is that your eyes will lie to you, but a level will not. I used to think I could ‘eyeball’ the straightness of a starter row, only to realize I was off by a quarter-inch by the time I reached the hallway. This mistake forced me to tear up hours of work. Now, I obsess over the first three rows because they are the foundation for everything else. I also realized that rushing the acclimation process is the fastest way to ruin a project; those planks need to live in your home’s humidity before they ever meet a mallet.
- Always double-check your spacers every few rows to ensure the expansion gap hasn’t shifted.
- Keep a vacuum handy to suck out debris from the locking grooves before you click them together.
- If a seam doesn’t feel right, pull it apart immediately—forcing it only breaks the tongue.
#IMAGE_PLACEHOLDER_E#
The Gear I Actually Use to Save My Sanity
You do not need a warehouse full of tools, but you do need the right ones. For anyone tackling stairs, using the stair nose alignment trick for even steps is a total game-changer for both safety and aesthetics. I also never start a project without reviewing carpet install secrets if I am moving from hard surfaces to soft ones, as the tension requirements are completely different. Finally, for that crisp transition between the wall and the floor, consult the painter caulk vs silicone guide for baseboards to ensure your finish work looks seamless for years to come.
Take the First Step Toward a Professional Finish
Flooring is more than just a surface; it is the soul of your home’s design. While the technical details can feel daunting, the satisfaction of walking across a floor you installed yourself is unmatched. By applying these expert flooring installation tips for 2025, you are building a space that is as durable as it is beautiful. Don’t be afraid to take your time and get the prep work perfect. Which part of the flooring process gives you the most anxiety—the subfloor prep or the final trim? Let me know in the comments below!