

I remember creeping down the stairs at 2 AM, trying my best not to wake the baby. Then it happened. My foot hit the edge of the top step, and the hardwood stair nose shifted a full half-inch toward the abyss. My heart did a backflip, and I nearly took a header into the living room. It wasn’t just a cosmetic annoyance anymore; it was a literal trap in my own home. For weeks, I had ignored that slight ‘clack’ sound every time I stepped there, thinking I would eventually get to it. That near-miss was my wake-up call. If you are currently doing the ‘sidestep’ to avoid a wobbly piece of trim, you know exactly the stress I am talking about. Today, I am going to show you how to anchor that piece so securely it will feel like part of the foundation. We are moving past the quick fixes and getting into the real-deal solutions that actually hold up to foot traffic.
That Heart-Stopping Moment Your Stair Tread Slips
A loose stair nose is one of those nagging repairs we tend to ignore until someone nearly takes a tumble. It is incredibly common, especially if the original installer relied too heavily on wood glue and tiny finish nails that eventually shear off under the weight of a human body. When I first started messing around with flooring, I made the classic rookie mistake of just firing more nails into the top of the wood. I thought more metal meant more strength. I was wrong. Those nails eventually wiggled loose, leaving me with a wobbly board and a bunch of ugly holes to fill. You have to understand that the stair nose takes the brunt of your weight every time you descend. If you have been struggling with a similar issue, have you ever felt that terrifying shift under your heel and wondered if the whole staircase was failing? You are not alone, and it is usually a much simpler fix than a full replacement.
Can you really fix this without ripping everything apart?
The short answer is yes, but you have to be smarter than the gravity working against you. Most people fear that a loose nose means they need to call in a professional or tear out the entire tread, but often the issue is just a failed bond between the subfloor and the nosing. By using the stair nose alignment trick for even steps and the right adhesives, you can restore the structural integrity of your stairs in a single afternoon. According to the National Safety Council, falls are a leading cause of home injuries, and unsecured flooring is a major contributor to those statistics. It is about more than just aesthetics; it is about making sure your home is safe for your family and guests.
Why Your First Attempt Probably Failed
Years ago, I thought a bit of yellow wood glue and a prayer would hold a transition in place. It lasted about three days before my 70-pound dog sent it flying. The reality is that standard wood glue is great for porous wood-to-wood contact, but it often fails on the smooth underside of finished nosing or when it’s sitting on a dusty subfloor. If you didn’t prep the surface or used the wrong fasteners, that board was destined to move. This is why I now swear by the urethane glue secret for hardwood, which provides a flexible yet incredibly strong bond that handles the natural expansion and contraction of your home. Combining this with a solid mechanical fastening strategy, like we see when learning how to fix a loose stair tread without tearing it off, is the only way to ensure that ‘clack’ never returns. In the next section, we are going to dive into the tools you need to stop the wiggle for good.
Strip Away the Failed Fixes of the Past
The biggest mistake people make when a stair nose starts to wobble is simply adding more ‘stuff’ on top of the problem. They squirt more glue into the gap or hammer in more nails, but they never address the debris underneath. If your stair nose is moving, it means the previous bond has shattered into a million tiny pieces of dried glue and wood fibers. Trying to bond new adhesive to that mess is like trying to tape a brick to a pile of sand. I once spent three hours trying to scrape dried construction adhesive off a subfloor with a dull putty knife. It was miserable, and I ended up gouging the wood. That was before I learned the heat gun trick for removing old floor adhesive. Softening the gunk makes it peel off like old chewing gum, saving your sanity and your subfloor. You have to get back to a clean, flat surface before you even think about the permanent fix. Use a shop vac to pull every last grain of dust out of the crevices. If the subfloor is particularly porous or dusty concrete, applying the floor prime move for porous concrete subfloors will ensure your adhesive actually bites into the material rather than just sitting on a layer of dust.#IMAGE_PLACE_HOLDER_B#
The Glue Choice That Actually Stops the Creaking
Once the surfaces are prepped, you need an adhesive that can handle the vibration of a walking human. Most pros rely on the urethane glue secret for hardwood on concrete, even if they are working on a wooden subfloor. Why? Because urethane stays slightly flexible as it cures. It’s like a high-strength rubber gasket that bonds the wood to the floor. Standard wood glue is too brittle; when the house shifts or the wood expands in the humidity, that brittle bond snaps. Think of the adhesive like a handshake; if there is a layer of old debris in the way, you aren’t really making contact. Apply the urethane in a thick, serpentine bead along the structural stringer and the subfloor edge. This ensures that even if there are slight irregularities in the wood, the glue will expand to fill the void and eliminate that hollow ‘clack’ sound every time you step down.
Go Beyond Nails with the Hidden Screw Technique
If you want this repair to outlast your time in the house, you have to stop relying on finish nails. They are essentially smooth needles that the wood eventually spits out through friction. I moved to using trim screws years ago, and I haven’t had a callback since. However, you must follow the pre-drill rule for wide baseboard installations. If you drive a screw straight into the edge of a hardwood stair nose, it will split like a piece of firewood. Use a bit that is slightly smaller than the screw shank to create a pilot hole, then use a countersink bit so the head sits 1/8th of an inch below the wood surface. After the screw is driven home, use the painters point hack for baseboard nail holes to fill the void. When the putty dries and you dab it with a bit of matching stain, the repair becomes invisible to anyone who isn’t looking for it on their hands and knees.
Ensure a Flush Finish with Proper Alignment
The final critical step is making sure your nosing doesn’t become a trip hazard. Use the stair nose alignment trick for even steps by using a scrap piece of your flooring as a bridge. Lay the scrap across the joint where the nose meets the tread. If the scrap rocks back and forth, your nose is too high; if there’s a gap under the scrap, it’s too low. This is why using the right adhesive is so important—it gives you a few minutes of ‘open time’ to wiggle the piece into the perfect position before it sets. If you have been wondering how to fix a loose stair tread without tearing it off, this method provides the maximum amount of structural reinforcement with the minimum amount of destruction to your existing staircase. Put some heavy weight on the nose—a few boxes of tile or a couple of heavy dumbbells—and let it cure for at least 24 hours before you let the kids or the dog run up and down.People often assume that to get a high-end look, every piece of wood needs to be jammed together as tightly as humanly possible. I used to think a zero-tolerance fit was the mark of a master. But here is the contrarian truth: if you do not leave room for the house to breathe, the house will eventually scream. This usually manifests as a loud ‘crack’ in the middle of the night or, worse, a stair nose that pops off because the flooring behind it expanded and pushed it right off the edge. This is where the penny gap rule for hardwood expansion space becomes your best friend. Without that breathing room, you are essentially building a ticking time bomb of tension that will eventually compromise your structural adhesive.
Does your subfloor meet the 4% moisture rule?
One of the most sophisticated mistakes I see—even from seasoned pros—is ignoring the moisture differential between the subfloor and the finish material. The National Wood Flooring Association (NWFA) states that for solid wood flooring up to 3 inches wide, the moisture content between the flooring and the subfloor should be within 4 percent. If you ignore this, you might end up wondering why your hardwood floor sounds like a drum. The wood will cup or crown as it tries to reach equilibrium, and no amount of glue or screws will stop it. I have seen beautiful installs ruined because the contractor did not realize why your concrete subfloor needs a calcium chloride test before laying down expensive planks. If you are working on a staircase that borders a basement or crawlspace, this moisture check is even more critical as it is the primary reason adhesives fail prematurely.
The Leveling Trap Most DIYers Fall Into
The ‘Oops’ factor often comes down to the subfloor prep. Most beginners think ‘flat’ is the same as ‘level,’ but they are completely different animals. You can have a level floor that is full of waves, which will cause your click-lock joints to fail within months. Using the self-leveler mistake that creates new high spots is a trap many fall into when they try to fix a dip. If you do not feather out the edges, you are just creating a new pivot point for your flooring. This is especially critical in bathrooms where why your shower base is sinking into the floor is often a result of poor structural support rather than just a bad install. 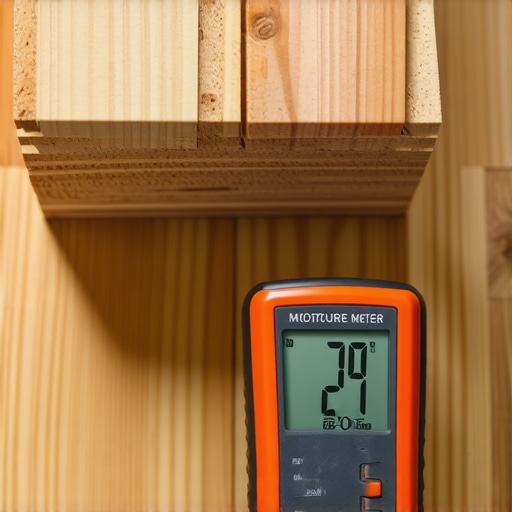
Stop Treating Your Wood Like Plastic
Let’s dig deeper into the trim. When you are wrapping up a project, do not just slap the boards on. Use the back-cutting secret for baseboard miters to ensure tight corners even if your walls aren’t a perfect 90 degrees. Another nuance people miss is the transition between rooms; the t-molding mistake most vinyl installers make involves pinning the molding to the floor, which prevents the floor from floating. This results in buckling that looks like a miniature mountain range in your hallway. Have you ever fallen into the trap of thinking a project was ‘good enough’ only to have a joint open up a month later? Let me know in the comments, I would love to hear your horror stories and how you fixed them. Real expertise isn’t about never making mistakes; it is about knowing exactly how to prevent them before they happen and following flooring installation mistakes to avoid for a seamless look from the very first cut.
The Gear That Makes Every Cut Count
If you are serious about moving from ‘weekend warrior’ to someone who actually builds things that last, you have to stop guessing. My most-used tool isn’t a fancy saw; it’s my pinless moisture meter. I personally use a Lignomat because it doesn’t leave holes in my expensive planks, and it tells me exactly when the wood is ready to be laid. You can follow all the expert flooring installation tips for 2025, but if you do not know the moisture content of your subfloor, you are just gambling with your budget. Another non-negotiable for me is a high-quality green beam laser. I’ve found that red lasers wash out in bright rooms, but a green one stays sharp across an entire floor. Using the laser level hack for straight tile rows is the only way I can sleep at night knowing my layout isn’t drifting an eighth of an inch over a twenty-foot run. These tools aren’t just luxury items; they are your insurance policy against the house’s natural tendency to settle and shift.
How do I keep my floors and showers from aging prematurely?
The secret to longevity isn’t in the deep cleans; it is in the daily prevention. For hardwood, I tell everyone to throw away their steam mops immediately. Steam is the absolute enemy of wood finish. Instead, I stick to the microfiber mist rule for cleaning matte floors. It uses the absolute minimum amount of moisture to get the job done without swelling the grain. In the bathroom, longevity is all about the maintenance of your movement joints. According to the TCNA (Tile Council of North America) Handbook for Ceramic, Glass, and Stone Tile Installation, any change in plane must be filled with a flexible sealant, not grout. If you see cracks in your shower corners, you need to check out shower repairs: when to fix vs replace for longevity to stop water from rotting your studs. Even small environmental awareness, like understanding why your white oak floor is turning yellow due to UV exposure, can help you decide where to place rugs or window films to protect your investment for the next decade. #IMAGE_PLACE_HOLDER_D#
Why sensors and sustainability are the next big leap
Looking toward 2026 and beyond, I see a massive shift toward ‘smart’ subfloors and bio-based adhesives. We are already seeing underlayments hit the market with built-in leak detection sensors that can ping your phone before a shower leak becomes a structural catastrophe. Sustainability isn’t just a buzzword anymore; it’s about the air quality in your bedroom. The next generation of flooring will rely on plant-based glues that emit zero VOCs while providing the same grip as the old-school chemicals. If you are planning a big bathroom project, I strongly suggest you look into the solid-shoulder rule for heavy shower doors to ensure your future-proof bathroom can handle the weight of modern, thick glass enclosures. My advice? Don’t just build for today. Go out and buy a decent moisture meter right now—it’s the one tool that will save you thousands of dollars in ruined materials over your lifetime.
The Hardest Lesson I Learned About Wobbly Stairs
One of the most profound lightbulb moments in my career was realizing that silence is the ultimate indicator of structural health in any staircase. In flooring installation, if you can hear a ‘click’ or a ‘thud,’ something is moving that shouldn’t be. I used to think I could just add more weight to the top, but movement creates friction, and friction eventually destroys even the strongest adhesives. Another hard lesson: never skip the vacuum. Even a microscopic layer of drywall dust acts like a release agent for glue, making your repair destined to fail within months. Finally, I learned that wood is alive; it breathes and moves with the seasons. If you do not use flexible urethane and proper expansion gaps, the house will eventually win the tug-of-war and pop your trim right off the edge.
The Pro Kit That Makes This Repair Permanent
To get professional results, you have to stop using homeowner-grade ‘all-purpose’ glues and start using specialized gear. I trust Lignomat moisture meters because they allow me to verify the subfloor is dry enough to bond, preventing the hollow ‘drum’ sound described in my guide on why your hardwood floor sounds like a drum. For the bond itself, I only use high-tack urethane adhesive, which provides the necessary ‘give’ for high-traffic areas. A green beam laser level is my second set of eyes, ensuring that every tread is perfectly planar before the glue sets. For the finishing touch, GRK trim screws are my go-to because their small heads disappear once you apply the painters point hack for baseboard nail holes.
#IMAGE_PLACE_HOLDER_E#
The Peace of Mind That Comes from a Rock-Solid Staircase
There is a unique sense of pride that comes from walking down your stairs at night and feeling absolutely zero movement under your feet. It turns a potential hazard into a testament of your craftsmanship. Whether you are tackling a full step-by-step flooring installation from planning to perfect finish or just securing a single wobbly board, the principles of prep and proper adhesion remain the same. By avoiding common flooring installation mistakes and following expert flooring installation tips for 2025, you ensure your home remains safe and beautiful for the long haul. Take that first step today—your family and your own peace of mind will thank you.
Have you ever felt that terrifying shift under your feet on a staircase? Let me know in the comments below—I would love to help you troubleshoot your specific situation.