

I will never forget the sound of my mother-in-law’s wine glass hitting the hardwood. It wasn’t a clumsy moment on her part—it was entirely my fault. I had just finished a weekend carpet install in the hallway and left a transition that was basically a booby trap. That metal strip sat a good half-inch higher than the floor. I watched her toe catch the edge, the stumble, and the slow-motion splash of Pinot Noir across my brand-new rug. It was mortifying. That was the day I realized that floors aren’t just for looking at; they are for walking on without needing a helmet. Today, I am going to show you exactly how to avoid my early mistakes so your home stays safe, stylish, and stumble-free. [image_placeholder]
Stop Building Speed Bumps in Your Doorways
Transitions are the unsung heroes of any successful flooring installation. When you are switching from plush carpet to a hard surface, you are dealing with height differences that can easily trip up a toddler or an elderly guest. I used to think I could just slap a generic T-molding down and call it a day. I was wrong. If you do not account for the thickness of the pad or the height of the subfloor, you end up with a carpet seam that looks like a speed bump and acts like a hurdle. My biggest blunder early on was using the wrong hardware. I once used a transition strip where the screws were exposed and slightly raised, which snagged every pair of socks in the house. Now, I swear by the hidden screw method for a clean look. According to the National Safety Council, falls are the leading cause of non-fatal injuries in U.S. homes, and uneven flooring is a frequent culprit. We are going to fix that today.
Is a Professional Transition Really Worth the Extra Effort?
You might be wondering if it is worth the extra hour of measuring and trimming to get that transition perfectly flush. The short answer is yes. Beyond the safety aspect, a sloppy transition makes the most expensive carpet look cheap. If your carpet pad is too thick for the tack strip, the transition will always feel spongy and unstable. Getting the height right means your vacuum won’t get stuck and your guests won’t have to look down every time they walk into a new room. Have you ever had a guest nearly do a face-plant because of a transition you thought looked okay? It is a common headache, but one we can solve with a few simple tools and a bit of neighborly advice. Let’s dive into the practical steps to get those floors level and safe.
Flatten the Ground Before You Stretch the Rug
Think of your subfloor like the foundation of a house; if it is slanted, everything else will eventually lean. During my second carpet install, I thought the pad would hide a small dip in the plywood. I was wrong. Within six months, you could feel the hollow spot every time you stepped on it. To avoid this, you need to master the feather-edge tactic for smoothing subfloor seams. This involves using a floor patch to create a gentle ramp rather than a sharp drop-off. Be careful with liquid levelers, though. I once made the self-leveler mistake that creates new high spots by pouring it too thick and not spreading it fast enough. It hardened into a mountain that I had to sand down for three hours while wearing a respirator. If your floor isn’t flat, your carpet pad is too thick for the tack strip to grip properly, leading to those annoying ripples that look like waves in the ocean. 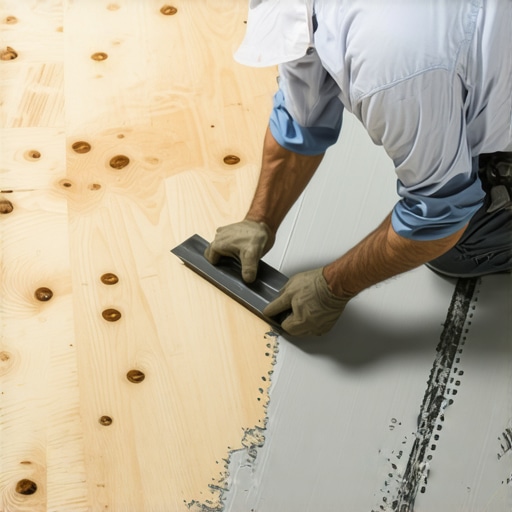
Hide the Hardware for a Sleek Threshold
The transition between materials is where most DIY projects lose their ‘pro’ status. If you are going from a hard floor to a soft one, do not just hammer down a silver bar and call it a day. I remember installing a doorway transition for a neighbor where I didn’t measure the clearance. The door dragged across the metal every time it closed, sounding like a fingernail on a chalkboard. Now, I always use the hidden screw method for metal transition strips. This involves a track that you screw into the subfloor first, then you snap the decorative cap over it. It is like a Lego set for your floor—no visible screws to catch on your mop or your toes. When screws are exposed, they eventually back out from the vibration of footsteps. I have seen kids cut their feet on screw heads that popped up just an eighth of an inch. By using the track-and-cap system, you ensure the transition remains flush for years. If you are working with vinyl, avoid the t-molding mistake most vinyl installers make by leaving enough expansion room. If the molding is too tight, the floor will buckle the first time the humidity drops.
Don’t Let Your Baseboards Leave a Gap
Once the floor is down, the baseboards act as the frame for your masterpiece. This isn’t just about nailing wood to a wall; it is about hiding the expansion gaps required for a successful flooring installation. I once tried to install 5-inch tall MDF boards in an old Victorian house with wavy plaster walls. I tried to force the board flush and ended up cracking the wood right down the middle. That is when I learned the pre-drill rule for wide baseboard installations. By drilling a small pilot hole first, you prevent the wood from splitting and ensure the nail seats perfectly. If you see daylight between your floor and the board, do not just glob on the caulk. You will end up wondering why your caulked baseboards are cracking within weeks. The secret is to use a high-quality flexible sealant that moves with the house. Think of it like a rubber band; it needs to stretch as the wood breathes and the seasons change.Most homeowners assume that a thicker carpet pad is a shortcut to a luxury feel. I used to think the same until I saw a high-end frieze carpet look like a lumpy mess after just a year. The truth is, if your carpet pad is too thick for the tack strip, you are actually shortening the life of your floor. The excess ‘give’ puts too much stress on the carpet backing, leading to delamination and those permanent ripples nobody wants. In professional circles, we call this ‘cushion collapse.’ According to the Tile Council of North America (TCNA), moisture management is the most overlooked phase of any wet-area install. This leads me to the biggest trap in bathroom remodeling: thinking the tile is the waterproof layer. It isn’t. Your tile and grout are purely aesthetic; the real work happens behind the scenes. If you skip the double-membrane tactic for curb-less showers, you are basically inviting a slow-motion flood into your joists. I once had to gut a three-year-old master bath because the owner didn’t understand the soft-joint rule for shower wall corners. They used hard grout in the corners instead of 100% silicone, and when the house shifted—as every house does—the grout cracked, water seeped in, and mold had a field day. 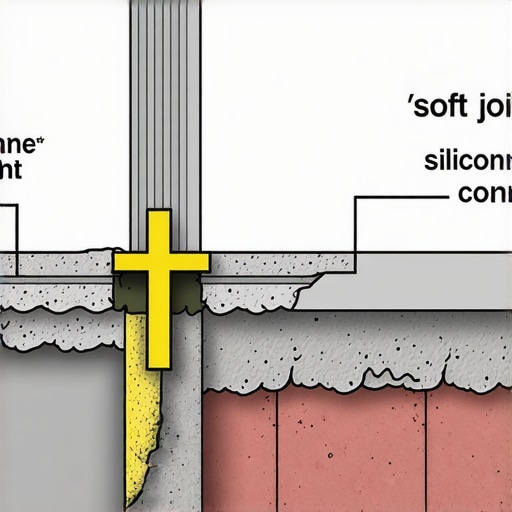
The Thick Padding Myth That Destroys Carpets
While a 1/2-inch thick pad feels like walking on clouds, it often prevents the carpet from staying properly tensioned. I’ve seen countless DIY jobs where the carpet pulls off the pins because the pad was simply too tall. For a truly professional carpet install, you need a pad that is dense, not just thick. A 6-to-8 pound density is usually the sweet spot for durability.
Is Your Shower Niche Actually a Hidden Bathtub for Mold?
This is a question I get from clients who notice a musty smell even after a deep clean. If you didn’t slope the bottom of that niche slightly toward the shower floor, water is sitting there, soaking through the grout lines. When planning shower renovation ideas, people focus on the tile pattern but forget the pitch. Always perform the dry-fit test for shower drain alignment and niche placement before a single drop of mortar touches the wall.
Finish Your Trim Without the Knee Pain
When it comes to the finishing touches, most DIYers wait until the wood is on the wall to pull out the paintbrush. Big mistake. You should always paint your baseboards before installing. It saves your back, prevents paint from bleeding onto your new flooring, and ensures the edges are sealed against moisture. Have you ever fallen into the trap of thinking a thicker pad would make your cheap carpet feel expensive? Let me know in the comments.
I’ve spent too many hours on my knees to ignore the importance of the right gear. For a professional-grade carpet install, my absolute non-negotiable is a power stretcher. Most DIYers rent a knee kicker and think they’re set, but if you want to avoid carpet coming loose in the hallway, you need the leverage only a power stretcher provides. I remember trying to stretch a living room with just a kicker once; by Sunday night, my right knee was twice the size of my left, and the carpet still had a ripple by Monday afternoon. The Carpet and Rug Institute (CRI) 104 standard actually mandates power stretching to ensure the carpet stays under proper tension for its lifespan. If you ignore this, you’re just waiting for the day your floor starts to look like a wrinkled shirt.
Keep Your Tools Sharp and Your Knees Intact
When it comes to the wet work in showers, I always keep a high-quality diamond-grit blade on hand for my wet saw. It makes the difference between a jagged edge and a professional finish when you need to hide the cut edge on a niche perimeter. For baseboards, I’ve stopped using a standard miter saw for everything. I’ve moved to the inside cope method for corners, which requires a simple coping saw. It handles the natural expansion and contraction of your home far better than a standard 45-degree cut ever will. If you have long walls, remember to use the scarf joint rule for long baseboard runs to make the seams disappear into the wood grain. 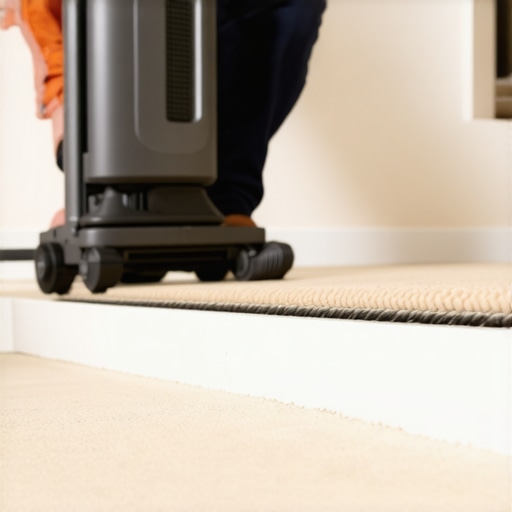
How Can I Keep These Floors Looking New for a Decade?
Maintenance is where most people drop the ball after the hard work of a flooring installation. For those sleek matte tiles or hardwoods, I swear by the microfiber mist rule for cleaning matte floors. Drowning your floor in water is the fastest way to ruin the subfloor or cause buckling. Instead, use a barely-damp mop to lift the dust without soaking the seams. If you do get a minor ding in your kitchen or bathroom, knowing how to fix a chip in a ceramic tile backsplash or floor can save you from an expensive shower repair later on. Longevity isn’t just about the install; it is about the care you provide in the years that follow.
The Future of Home Reno Is Getting Smarter
I predict that within the next few years, we are going to see a massive shift toward modular, click-lock baseboard systems that hide integrated LED lighting. It’s the logical next step for the smart home era, allowing for easier wire management and ambient lighting without tearing into drywall. For now, though, the best way to scale your results is to master the advanced techniques today. I challenge you to try the double-cut method for invisible carpet seams on your next project; it is the single best way to graduate from amateur to pro status in your own home.
Lessons I Only Learned After Making a Mess
- The subfloor is everything. If you ignore a squeak or a dip now, it will haunt you for a decade. I learned early on to never trust a foam pad to hide a structural mistake. If the base isn’t flat, your flooring installation will eventually fail.
- Silicone is your best friend in the shower. Forget hard grout in the corners; if you want to avoid shower repairs, use flexible joints that can move with your house.
- Transitions define the room. A bad metal strip turns a beautiful carpet install into a hazard, so spend the extra hour on the hidden screw method for a pro look.
[image_placeholder]
What’s Inside My Toolbox for a Flawless Finish
I don’t leave my results to chance anymore. For every carpet project, I ensure I have a high-density 8-pound pad and a rented power stretcher. These aren’t luxuries; they are requirements for a floor that doesn’t ripple. When it comes to baseboard styles, I always keep a sharp coping saw and a tube of high-flex caulk to ensure those corners never open up during the winter. For those looking to dive deeper into the technical side, I highly recommend checking out the Carpet and Rug Institute (CRI) guidelines for stretching and the Tile Council of North America (TCNA) handbook for waterproofing standards.
Building a Home That Actually Lasts
Flooring is more than just a surface; it is the stage where your life happens. By taking these extra steps—pre-drilling your wide baseboards, waterproofing your shower niches, and choosing the right pad—you are investing in long-term peace of mind. Your successful flooring installation starts with the decision to do it right the first time rather than doing it twice. You’ve got the knowledge and the mentor-approved tactics; now go grab the tools and make it happen.
Have you ever had a transition strip that turned into a tripping hazard in your home? Let me know your biggest flooring headache in the comments below!