

I still remember the first time I felt like a real ‘pro.’ I had just finished laying down some beautiful wide-plank flooring in my guest bedroom. I was proud. But then came the finishing touch: the quarter-round. I slapped those curved strips against the baseboards to hide the gaps I had left during the flooring installation. When I stepped back, my heart sank. Instead of a sleek, modern finish, the room looked bulky, dated, and—if I am being honest—a little bit amateur. It is a classic flooring installation mistake that most of us make because we are told it is the standard way to finish a room.
Why Your Trim Looks Bulky Instead of High-End
The problem isn’t the quarter-round itself; it is using it as a crutch. We use it to mask a messy cut or a gap that is just a hair too wide. I used to think it was a mandatory part of the process, but in reality, it often ruins the clean vertical lines of your baseboard styles. When you stack that extra piece of wood on top, you are losing the shadow line that makes professional trim work pop. It is a lesson I learned the hard way after realizing my ‘finished’ rooms felt smaller and more cluttered than the ones in the design magazines. We need to focus on precision rather than just covering up our tracks.
Is quarter-round actually worth the hype?
You might be wondering if anyone actually notices these tiny details. The truth is, while a casual guest might not point it out, the visual weight of heavy, unnecessary trim can make a space feel cramped. According to a study by the National Association of Home Builders, interior finishes that emphasize clean lines and craftsmanship significantly improve the perceived value of a home. We are going to solve that today by looking at how to get those tight, professional lines without the extra bulk. Have you ever finished a project only to feel like the trim just did not ‘fit’ the room’s vibe? You are not alone.
Early in my journey, I made the mistake of thinking more wood meant more ‘custom.’ I would even stack baseboards to try and get a luxury look, but I ended up with a dust-collecting ledge that made the room feel dated. If you want to keep things fresh, you need to understand baseboard trends in 2025, which lean heavily toward simplicity and architectural precision. We are going to dive into the better alternatives, like using a proper inside cope method for corners, or opting for thin shoe molding instead of that chunky quarter-round that eats up your floor space.
Ditch the Quarter Round for a Pro Finish
The secret to a high-end look isn’t more wood; it’s better planning. You need to start with the penny gap rule for hardwood expansion space. This simple trick keeps your floor from buckling while ensuring the baseboard actually covers the edge. I once ignored this in a laundry room and ended up with a gap so big I could have hidden a television remote in it. To fix it, I learned that you don’t always need expensive power tools. You can actually learn how to cut baseboards without a miter saw using a simple coping saw for a much tighter fit. Precision here acts like a well-tailored suit; it just looks expensive because it fits perfectly.
Master the Inside Cope for Flawless Corners
Miters are like a bad relationship; they look good at first but eventually pull apart as the house settles. Instead of cutting two 45-degree angles that will inevitably gap, you should ‘cope’ one side. This involves the back-cutting secret for baseboard miters where you remove the ‘meat’ of the wood from behind the profile. The first time I tried this, I ended up with a pile of sawdust and a ruined board because I didn’t angle my saw enough. But once I got it, the joint clicked into place like a puzzle piece. It handles the natural movement of a house way better than a standard miter ever could. For those looking for the ultimate beginner’s guide, mastering the inside cope method for beginners is the single biggest upgrade you can make to your toolkit.
Make Your Nails Disappear and Your Joints Stay Tight
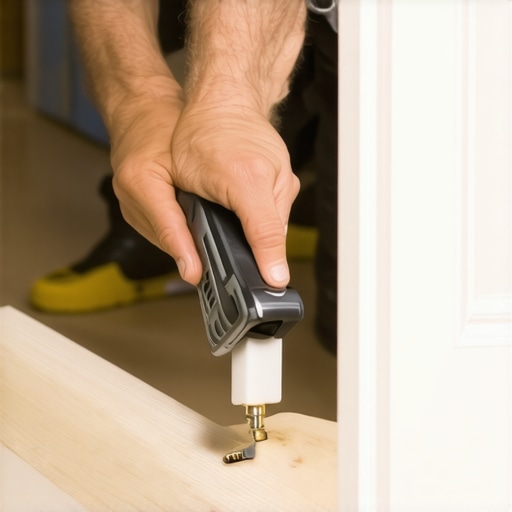
Even the best trim looks like Swiss cheese if you don’t handle the hardware right. Use the painters point hack for baseboard nail holes to ensure your filler stays put and disappears under a coat of paint. If you find yourself struggling with pieces that won’t stay still while you reach for the nailer, I highly recommend the hot glue hack for holding baseboard miters while nailing. It acts like a third hand, keeping the joint tight while you fire the gun. For longer walls, don’t just butt the boards together. You must follow the scarf joint rule for long baseboard runs to make the seam invisible. Finally, choose your sealer wisely by checking the painter caulk vs. silicone guide for baseboards. Using silicone here is a nightmare because paint will bead right off it, leaving you with a mess that is nearly impossible to clean up.
How to Handle Tricky Bullnose Corners
Standard corners are easy, but rounded walls can break your spirit. If you have bullnose corners, you can’t just slap a 90-degree joint on them. You need to learn how to cut baseboards around a bullnose corner without gaps, which usually involves a small ‘transition’ piece that bridges the curve. When I first encountered these in a modern condo remodel, I tried to bend the wood until it snapped. The real trick is using two smaller 22.5-degree cuts to navigate the bend smoothly. It takes a few extra minutes, but it completely eliminates the need for that clunky quarter-round we’re trying to avoid.
Let’s get real for a second: most homeowners spend 90% of their budget on the material and only 10% on the prep work. That is exactly backwards. I used to think that a few extra bags of compound would solve any wavy subfloor, but I quickly learned about the self-leveler mistake that creates new high spots. If you do not map out the high points first and treat the floor like a topographical map, you are just moving the problem around. Precision in a high-end home starts under the floor, not on top of it.
Is your subfloor’s moisture content actually lying to you?
Many people believe that if a concrete slab looks dry and feels dry to the touch, it is ready for luxury vinyl or hardwood. This is a dangerous myth that costs thousands of dollars in repairs. According to the National Wood Flooring Association (NWFA), over 75% of flooring failures are directly caused by moisture-related issues. You absolutely must perform why your concrete subfloor needs a calcium chloride test before even opening your boxes of wood or laminate. This technical step is the difference between a floor that lasts decades and one that buckles in six months. Without it, you are just guessing with your investment.

Another common oops factor happens during carpet installation when people focus on comfort over mechanics. Everyone thinks a thicker pad is better, but there is a strict technical limit. I have seen countless homeowners struggle with why your carpet pad is too thick for the tack strip. If the padding is too tall, the carpet cannot properly hook onto the pins, leading to ripples and stretching within weeks. It is always better to choose a high-density, lower-profile pad that supports the carpet’s structure rather than just adding bulk underfoot.
Fix the Foundation Before You Apply the Finish
In bathrooms, the mistakes are even more costly because of the water involved. People often obsess over the tile pattern but ignore the structural integrity of the floor itself. You need to understand why your floor joists need blocking before tile installation. Tile is rigid, and any slight bounce in your floor will eventually crack your grout lines. Similarly, do not trust a pre-sloped shower pan blindly; I always recommend the dry pack method for a level shower base to ensure perfect drainage toward the drain. Finally, watch out for your door frames. The door jamb saw mistake that leaves huge gaps happens when you do not account for the slight compression of your underlayment. Have you ever fallen into this trap? Let me know in the comments.
Stop Relying on Your Tape Measure for Layouts
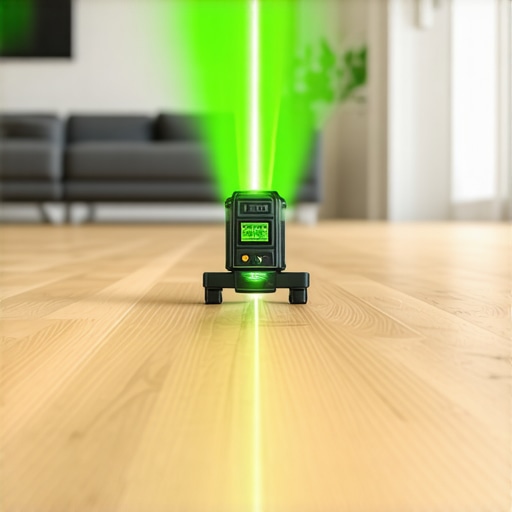
If you are still pulling a tape measure for every single board, you are working too hard and likely introducing compounding errors. I personally never start a flooring installation without my 360-degree green beam laser level. Why green? It is significantly more visible in daylight than red beams, allowing me to strike a perfectly level line across an entire open-concept floor. This is vital when you are trying to avoid the t-molding mistake that ruins open-concept floors. I use the laser to identify the highest point of the subfloor immediately. If I find a dip, I know exactly where to apply the feather edge tactic for smoothing subfloor-seams before the first plank even touches the ground. It is about working backward from a perfect finish rather than hoping the material covers your mistakes.
How do I keep my new floors looking fresh for years?
Maintenance is where most people fail because they treat every surface the same. If you have opted for a modern low-sheen finish, you must follow the microfiber mist rule for cleaning matte floors. Over-wetting these surfaces can lead to ghosting or streaks that are permanent. For those with hardwood, longevity often comes down to the texture you chose during the step-by-step flooring installation. I always tell my clients that why wire brushed finishes hide scratches better is not just marketing—the physical texture masks the inevitable wear and tear from pets and kids. If you do happen to have an accident during a touch-up, knowing how to remove paint over spray from hardwood floors without melting the finish is a skill that will save your investment from a costly professional sand-and-refinish job.
Carpet Longevity Depends on More Than Just Vacuuming
We often think of carpet as a ‘set it and forget it’ choice, but the mechanical wear starts the day you move in. The Carpet and Rug Institute (CRI) technical guidelines state that high-traffic areas should be vacuumed daily to prevent soil particles from acting like sandpaper on the fibers. This is especially true if you followed carpet install secrets achieving flawless results every time, as even a perfect seam can be ruined by abrasive dirt. If you start seeing fuzzing in your home office, you might need the level loop fix for frayed office carpets to stop the damage before it spreads. When selecting new materials, prioritize the best carpet types for high traffic areas in 2025, focusing on solution-dyed fibers that resist fading and deep staining.
The Future of High-Performance Residential Trim
I predict that by 2026, we will see a massive shift away from traditional MDF and wood baseboards toward high-density polymer composites that are 100% waterproof. These materials allow for much tighter tolerances and eliminate the expansion issues that cause why your caulked baseboards are cracking within weeks. As homes become more ‘smart’ and modular, we are also seeing more people use the pre-drill rule for wide baseboard installations to allow for hidden wiring channels. I highly encourage you to try the ‘back-cutting’ method on your next project; it is the single most effective way to turn a ‘decent’ DIY job into a professional-grade masterpiece that stands the test of time.
Hard Truths Learned Through Miles of Sawdust
After years on job sites, I have realized the most expensive tool is actually patience. One lightbulb moment was accepting that every house is crooked; once you stop fighting the walls, you start working with them. I also learned that you should always paint your baseboards before installing them to avoid brush marks on your new floor. Another big realization? The ‘dry fit’ is not optional. Laying out planks without glue first reveals patterns that look natural versus ones that look like a mistake.
#IMAGE_PLACEHOLDER_E#
The Gear That Separates Pros from Amateurs
To get that high-end look, you need more than just a hammer. I swear by my 360-degree laser level for mapping out high spots before any flooring installation. For those tricky corners, a high-quality coping saw is non-negotiable if you want to master the techniques in my baseboards makeover guide. Finally, keep a set of wood shims and a heavy-duty pull bar handy; they are the unsung heroes of tight tongue-and-groove joints.
Take the Leap and Transform Your Space
Renovating your home can feel like a mountain of stress, but the satisfaction of sliding that last piece of trim into place is worth every drop of sweat. Whether you are following expert flooring installation tips for 2025 or simply freshening up a guest room, remember that your home reflects your care. Don’t be afraid of the learning curve; even the pros started with a crooked cut and a dream. Your next flooring installation project is the perfect chance to build something beautiful. Have you ever tried the coping method on a corner, or do you prefer the standard miter cut? Let me know in the comments below!